| 1. | From the Menu Bar, select Mesh Editing > Rigid Body > Create. |
| 2. | Enter a name in the Rigid body creation field and validate with Ok. |
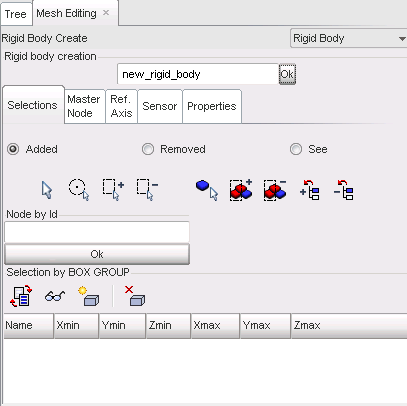
| Note: | The nodes already selected in other kinematic conditions cannot be reselected. |
| 4. | Click SAVE to create a new rigid body from the selected nodes. |
Rigid body main node
The secondary nodes are displayed in red and the main node in green. By default, the main node is set at the secondary node center of gravity.
To impose a different main node location:
| 1. | Select the Master Node tab. |
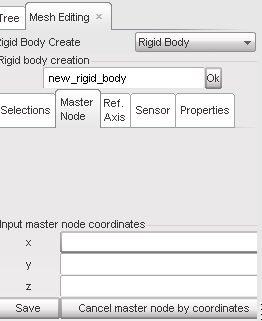
| 2. | Set the x, y, and z main node coordinates in the fields. |
| 3. | Click Save to impose this location for the main node; or |
Click Cancel main node by coordinates to keep the default main node location.
| 4. | Click the Ref. Axis tab. |
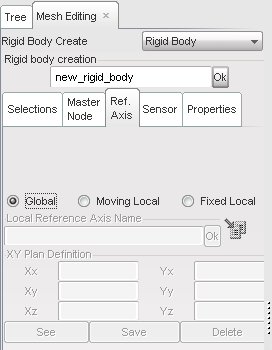
| 5. | Define the reference axis using the different tools in the Reference Axis frame. |
| 8. | Select the Properties tab. |
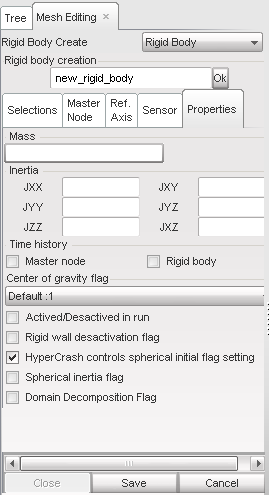
| 9. | Set a mass in the field below Mass. |
| 10. | Set the inertia in the Inertia fields. |
| 11. | Click the Main node toggle to activate it and save the main node as a time history node. |
Click the Rigid body toggle to activate it and save the rigid body for time history.
| 12. | Click Save to save the created rigid body; or |
Click Cancel to cancel the rigid body creation.
| 13. | Click Close to close the menu. |


