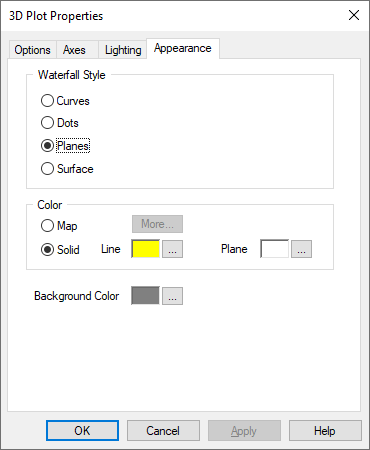
If you select a waterfall plot, you use the Appearance property sheet to control the waterfall style and color.

Background Color: Specifies the background color of the plotting window. To choose a new color, click … and make the appropriate selections in the Color dialog box. Click OK when you are satisfied with your selection. The color you chose is previewed next to Background Color.
Map: Applies a spectrum of color. To choose the saturation and lamination of the colors, click More and make the appropriate selections in the Mapping Color Setup dialog box. Click OK when you are satisfied with your selection.
Solid: Applies a solid color. To choose a new color, click … and make the appropriate selections in the Color dialog box. Click OK when you are satisfied with your selection. The color you chose appears in the box to the left of the … button.
The following are examples of different surfaces depending on the Enable Diffuse Light and Surface Color settings:

Enable Diffuse Light is activated. Surface Color is set to magenta.

Enable Diffuse Light is de-activated. Surface Color is set to magenta.

Enable Diffuse Light is activated. Surface Color is set to Map.

Enable Diffuse Light is de-activated. Surface Color is set to Map.
Curves: Specifies that each segment of a waterfall surface be represented as a continuous line.

Dots: Specifies that the waterfall surface be represented as individual data points:

Planes: Specifies that each segment of a waterfall surface be represented as a 2D plane.

Surface: Specifies that the waterfall surface be represented as a solid surface.
