The procedure to translate an MDL file format to Embed file format is automated.
1. Choose Tools > Import; then click Simulink Diagram.
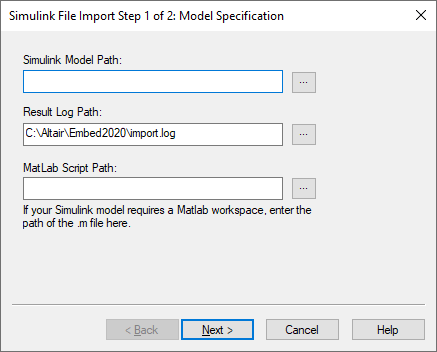
The Simulink File Import Step 1 of 2 dialog box appears.
2. Do the following:
•In the Simulink Model Path box, enter the name of the MDL file to be translated, or click … to locate the file.
•In the Result Log Path box, enter the name of the LOG file that will store all error, warning, and confirmation messages issued during the translation. Click … to set the name and path information for the LOG file.
•In the MatLab Script Path box, enter the full path for the M file, if necessary, or click … to locate the file.
•Click Next to initiate the translation.
The Simulink File Import Step 2 of 2 dialog box appears. This dialog box provides the results of the translation. The components are described below.
•Simulink Version: Indicates the version of Simulink under which the MDL file was created.
•Partially Converted Blocks: Indicates the number of blocks that may require additional manual set-up.
•Embed Blocks Created: Indicates the number of blocks that were completely created.
•Unsupported Blocks: Indicates the number of Simulink blocks that must be translated or implemented manually.
•View Log File: By clicking on this command button, you can directly browse the LOG file to see the details of the translation process.
3. Click Finish to place the translated model into your Embed work area.