HS-4600: Motor Design Optimization for Ripple Torque Reduction
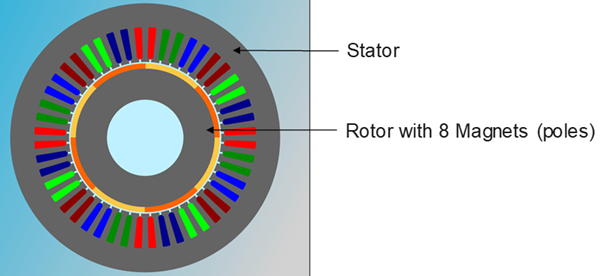
This tutorial is centered around a synchronous permanent magnet motor designed with Altair FluxMotor tool. The goal of this tutorial is to achieve an optimal magnet shape to minimize the ripple torque at a specific working point while maintaining the torque reached at this working point and without increasing the magnet mass.
Before you begin, copy the model files used in
this tutorial from <hst.zip>/HS-4600/ to your working
directory.
Perform the Study Setup
-
Start a new study in the following ways:
- From the menu bar, click .
- On the ribbon, click
 .
.
-
Specify the path for the FluxMotor solver
script.
- From the Define Models step, click the Solver Execution Script cell and select Register new Solver from the drop-down menu.
-
In the Register Solver Script dialog, click
 in the Path cell.
- Specify the path for the FluxMotor solver script as ..\AltairFluxMotor2020.1\Scripts\win\FluxMotors.exe.
- Click OK.
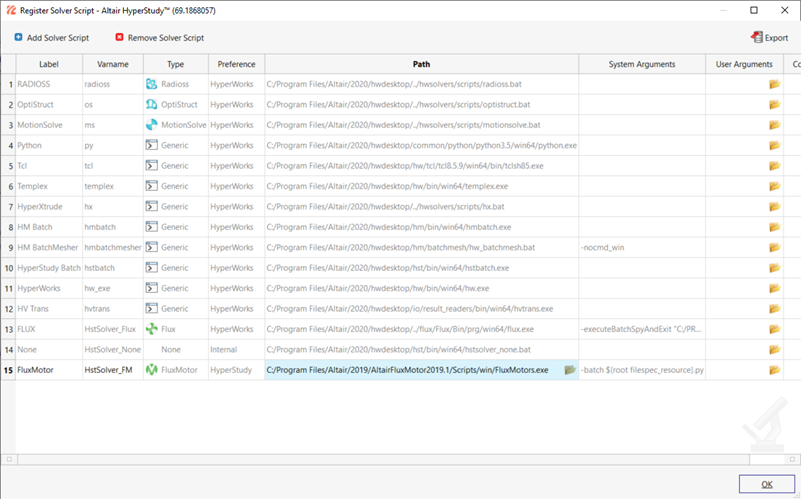
Figure 2. -
Establish resource file.
-
In the Resource column, click .
- In the HyperStudy - Load model resource dialog, select HstConnector.fm2hst and click OK.
-
In the Resource column, click
-
Go to the Define Input Variables step.
-
In the Bounds tab, edit the Lower Bound and Upper Bound as shown
below.
Label Lower Bound Upper Bound Magnet::TM (mm) 2 10 Magnet::CM (deg) 161.91 179.9 Magnet::R (mm) 70 89.2 
Figure 3.
-
In the Bounds tab, edit the Lower Bound and Upper Bound as shown
below.
-
Go to the Objectives/Constraints - Goals tab and define
the following goals:
Apply On Type Column 1 Column 2 Ripple torque::Ripple mech. torque, pk-pk (N.m) (r_3) Minimize N/A N/A Masses::Rotor::Magnets (kg) (r_1) Constraint <= 2.5 Working point::Mechanical torque (N.m) (r_2) Constraint >= 174 
Figure 4.
Perform Optimization
- Optional:
Open the Iteration History tab and observe the optimum
solution.
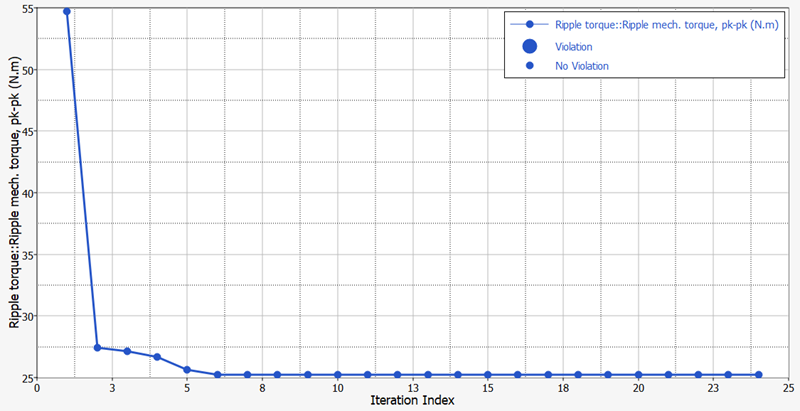
Figure 5.