


|
Amazon Kinesis – Data Streams
The Amazon Kinesis – Data Streams connector reads records from the given data stream and Shard ID.
Steps:
1. Select Amazon Kinesis – Data Streams from the Data Sources pane. The Amazon Kinesis – Data Streams pane and the retrieved Amazon Kinesis – Data Streams source are displayed.

2. Enter the Name of the Amazon
Kinesis – Data Streams data source, then click  .
.
3. You can either:
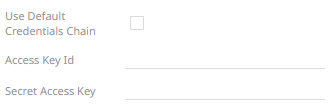
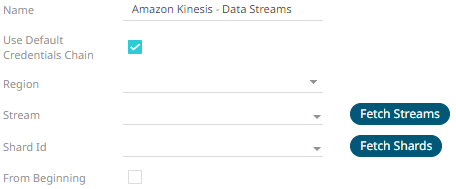
· check the Use Default Credentials Chain box to use the default Access Key ID and Secret Key Access, or
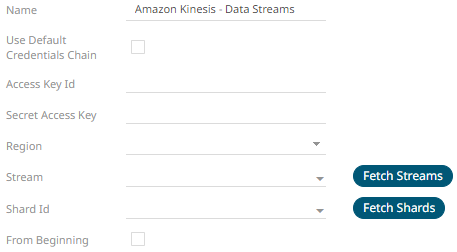
· uncheck the Use Default Credentials Chain box and enter the Access Key ID and Secret Key Access.
|
NOTE |
The Access Key ID and Secret Key Access from the AWS account can be configured in three places: · Two properties at the Panopticon.properties file which is available in the AppData folder of Panopticon Real Time o connector.kinesis.datastreams.accesskeyid o connector.kinesis.datastreams.secretaccesskey If this configuration is used, the Use Default Credentials Chain box is not displayed in the connector UI.
This is the recommended way to provide the credentials.
· AWS credentials provider chain o Environment Variables - AWS_ACCESS_KEY_ID and AWS_SECRET_ACCESS_KEY o Credential profiles file at the default location - ~/.aws/credentials on Linux, macOS, or Unix, and C:\Users\USERNAME\.aws\credentials on Windows.
· Dedicated fields in the connector Not the recommended configuration.
|
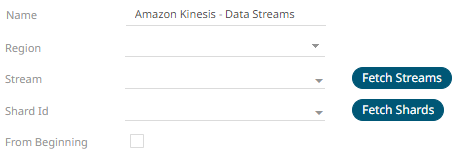
4. Select or define the following properties:
|
Property |
Description |
|
Region |
Physical location of the data center. The list is picked up from the Amazon Kinesis Data Streams Endpoints and Quotas page. |
|
Stream |
Name of the stream from where you want to
pull the data. Click Fetch Streams |
|
Shard Id |
Each connector instance or data source is
connected to only one shard. Click Fetch Shards
|
|
From Beginning |
The starting position in the data stream from which to start streaming. Default value is unchecked, which means LATEST. When checked, the starting position is set to TRIM_HORIZON. |
 to
load all of the available streams from the AWS account.
to
load all of the available streams from the AWS account.
|
NOTE |
All of the connection settings can be parameterized.
|
5. Select the Message Type.
6. Click  to the fetch the schema based
on the connection details. Consequently, the list of columns with
the data type found from inspecting the first ‘n’ rows of the input
data source is populated and the Save button is enabled.
to the fetch the schema based
on the connection details. Consequently, the list of columns with
the data type found from inspecting the first ‘n’ rows of the input
data source is populated and the Save button is enabled.
This also populates the Id Column with the set of columns, of arbitrary type, that can be concatenated to form a unique row identifier.
7. You can also opt to load or save a copy of the column definition.
8. Click to add columns to the Amazon Kinesis – Data Streams connection that represent sections of the message. Then enter or select:
|
Property |
Description |
|
Name |
The column name of the source schema. |
|
Fix Tag/JsonPath/Text Column Index/XPath |
The Fix Tag/JsonPath/Text Column Index/XPath of the source schema. |
|
Type |
The data type of the column. Can be a Text, Numeric, or Time |
|
Date Format |
The format when the data type is Time. |
|
Enabled |
Determines whether the message field should be processed. |
|
Filter |
Defined parameters that can be used as filter. Only available for JSON, Text, and XML message types. |
|
NOTE |
To parse and format times with higher than millisecond precision, the format string needs to end with a period followed by sequence of upper case S. There can be no additional characters following them. For example: yyyy-MM-dd HH:mm:ss.SSSSSS
|
To
delete a column, check its  or all the column entries, check
the topmost ,
then click
or all the column entries, check
the topmost ,
then click  .
.
9. Date/Time values of output data and Date/Time inputs, where supported, is by default unchanged.
You can opt to define the Show in Timezone and Source Timezone settings.
10. For this section:
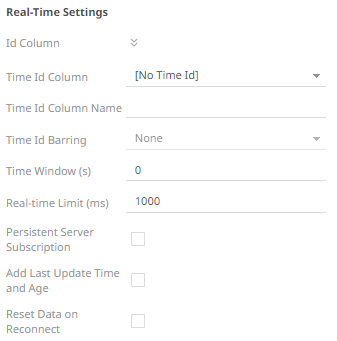
Refer to Define Real-Time Settings for more information.
11. Set the row limit of the data set.
12. Tap the Preview Selected Data Source slider to turn it on.
13. Click  to display the data preview.