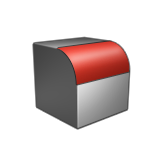
Round
Round one or more edges by creating a constant or variable radius fillet. This tool can handle challenging geometry such as overlapping rounds.
Create a Round
Round one or more edges by creating a constant or variable radius fillet.
- On the ribbon, click the Modify tab.
-
Click the Round icon.

-
Select an edge set:
- Click one or more edges. Tip: Click a face to select all of the associated edges.
- Right-click to confirm.
The radius of the rounded edge set is indicated by a blue triangle. - Click one or more edges.
- Optional:
Select another edge set:
- In the guide bar, click Add Edge Set.
- Click one or more edges. Tip: Click a face to select all of the associated edges.
- Right-click to confirm.
The radius of the rounded edge set is indicated by a blue triangle. - See Step 2 of Edit a Round.
- Right-click and mouse through the check mark to exit, or double-right-click.
Edit a Round
Edit the radius, round type, edge sets, or setback corners.
- Double-click the round to enter edit mode.
-
Edit the round:
To Do this Note Reselect the edges - In the guide bar, select Edges.
- Click the edges you want to add or remove.
- Right-click to confirm.
Change the selection method In the guide bar, select one of the following options: - Tangent Selection
- Single Selection
Add an edge set - In the guide bar, click Add Edge Set.
- Click one or more edges. Tip: Click a face to select all of the associated edges.
- Right-click to confirm.
Remove an edge set - Click the edge set.
- In the Control Panel, click Remove Edge Set.
Merge edge sets - Click the first edge set.
- In the Control Panel, click Merge Edge Sets.
- Click the second edge set.
Resize the radius - Hover over the radius, and then drag an arrow.
- Click the radius, and then enter a Radius.
- In the Control Panel, enter a Radius.
Change the round type In the Control Panel, select one of the following options: - Constant: Create a round with a constant radius.
- Variable: Create a round with a variable radius.
- Chamfer: Create a fillet cross-section with a straight line rather than a circular arc.
You can apply a variable radius to only one edge set at a time. Force curvature continuity along the edge In the Control Panel, select Curvature Continuous. This option is only available when the Constant and Variable round types are selected. Modify a round with variable radii - To add radii, hold down Alt while clicking.
- To resize a radius, click the radius, and then enter a Radius.
- To reposition a radius:
- Drag the radius.
- Click the radius, click the chevron, and then enter a Position [%] or a Distance.
- To create a smooth transition between the variable radii, select Smooth Transition.
- To change the shape of the round, click a radius,
click the chevron, and then select one of the
following options:
- Circular: Create a circular round.
- Parabolic: Create a parabolic round. To change the deviation, enter a Deviation [%].
Modify a chamfered round In the Control Panel, do the following: - To define the chamfer distance, enter a First Distance, and then a Second Distance.
- To modify the chamfer angle, enter an Angle.
- To maintain a 1:1 ratio between the first distance and the second distance, select Keep Angle.
Modify setback corners To show the setback corners, in the Control Panel, select Show Setbacks, and then do the following: - To enable blending at a setback corner, click a
setback corner, click Enable,
and then define the distance:
- Drag an arrow.
- Click an arrow, and then enter a
Distance.Note: If one distance is modified, all other distances are modified as well. To disable this, click an arrow, and then click Change All.
- Blend surfaces are automatically added to a setback corner. To disable this, click a setback corner, and then click Collar.
When blending rounds converge at a corner, setback corners are created. - Right-click and mouse through the check mark to exit, or double-right-click.