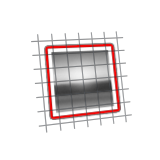
Image Plane
Create an image plane that you can use as a background reference image, so you can trace lines and curves to start your design.
Create an Image Plane
Create a plane, select front and back images, and adjust the images.
The image will not be included in a final rendering.
- On the ribbon, click the Sketching tab.
-
Click the Image Plane icon.

- Drag to draw the plane.
- Choose an image file, which is used for the Front Texture.
- Optional: Click the preview next to Back Texture, and then select an image.
- Optional:
Adjust the transparency of the image:
- Drag the numerical slider.
- Type a Transparency, and then press
Enter.Note: 1.0 corresponds to completely transparent, whereas 0.0 corresponds to completely opaque.
- Optional:
Select from the following Options:
- Keep Aspect: Maintain the ratio of the width to the height of the image.
- Mirror Horizontal: Mirror the image horizontally.
- Mirror Vertical: Mirror the image
vertically.Note: When you select both mirror options, the image is mirrored in sequence.
- Right-click and mouse through the check mark to exit, or double-right-click.
Edit an Image Plane
Reposition, resize, change, or adjust the image.
- Double-click the image plane to enter edit mode.
-
Edit the image plane.
To Do this Resize the plane - Drag an arrow.
- Type a length or width.
Reposition the plane Press W to open the Move tool. Lock or unlock an edge Hover over an edge of the plane, and then click the red push pin icon. Change an image Click the preview next to Front Texture or Back Texture, and then select an image. Adjust an image Hover over the preview next to Front Texture or Back Texture, and then click the black and white circle icon. You can invert the image and define the gamma, saturation, brightness, contrast, and minimum or maximum clamp values.
Remove an image Hover over the preview next to Front Texture or Back Texture, and then click the trash can icon. - Right-click and mouse through the check mark to exit, or double-right-click.