: Click to display the design project
information. Figure 1.
: Select the sorting criteria.
Sort by reference: Sort the BOM list by the reference
designator. Figure 2.
Sort by part number: Sort the BOM list by the part number. Figure 3.
: Category for priority sorting to see
errors.
Changed part (before application): Give priority to the changed
part.
Lock part Library: Give priority to the locked part.
CPN not found: Give priority to the part which doesn’t have a
CPN.
Different part information compared to UPMS: Give priority to the
part which has different properties to the part in UPMS.
The part included verification fail: Give priority to the part that
failed verification.
Click Sorting to sort with the selected condition.
: Edit
In this menu, you can add, change and delete parts and can add and
edit parts which are not included in the design.
Figure 4.
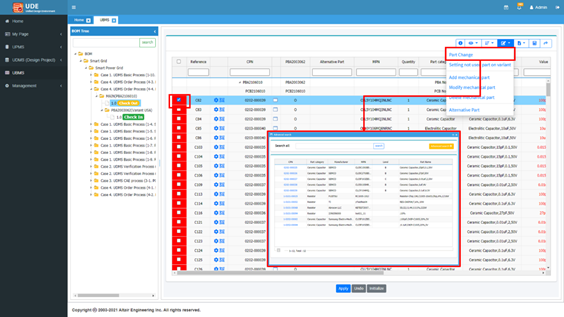
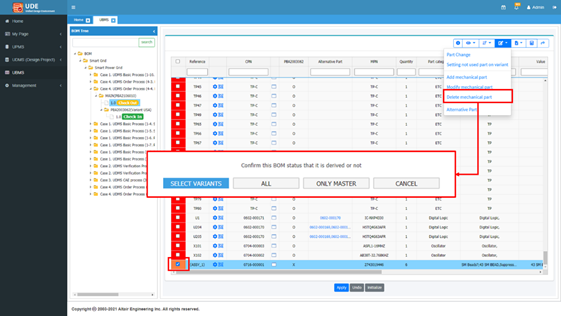
Part Change
When changing a part, only part with the same footprint is listed in the list.
Part can be changed when the footprint of a new part is the same with the existing
part. If the footprint is different, a serious defect occurs when the changed part
is placed on the PCB. Figure 5.
If there are variants, then you can select the variants to reflect.
Select variants: Apply to the selected variants.
ALL: Apply to all including the master.
ONLY MASTER: Apply to the master only.
CANCEL: Cancel to change.
Setting Not Used Part on Variant
In this menu, you can set the not used part in the variant BOM. Figure 6.
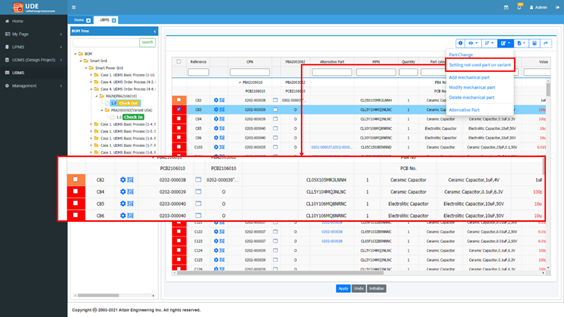
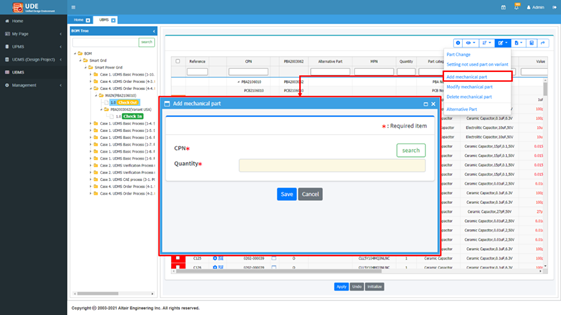
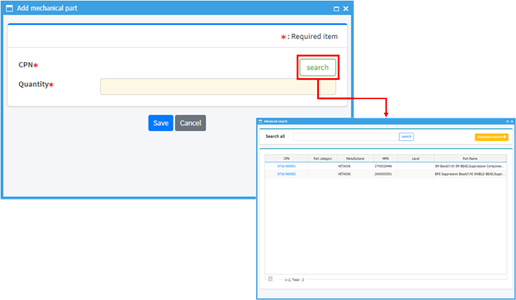
Add Mechanical Part
To add a mechanical part to BOM, the part should be registered in the UDE system
before adding. Figure 7.
Click Search to select parts from the parts list to add
them. Figure 8.
When saving, if there is a variant, you need to select which one to reflect. Figure 9.
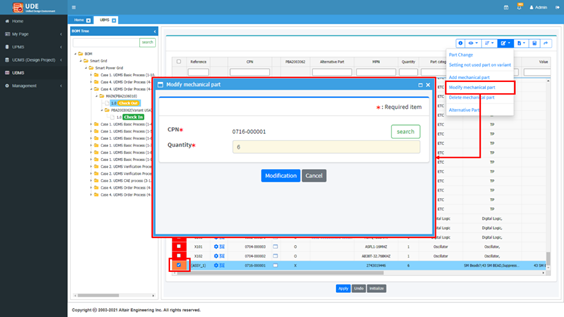
Modify Mechanical Part
Modify the mechanical part information. The mechanical part can be modified with its
part number and quantity information. The modification function is the same as add
mechanical part. Figure 10.
Delete Mechanical Part
When deleting, select the application type and proceed the same as the part
change.
Figure 11.
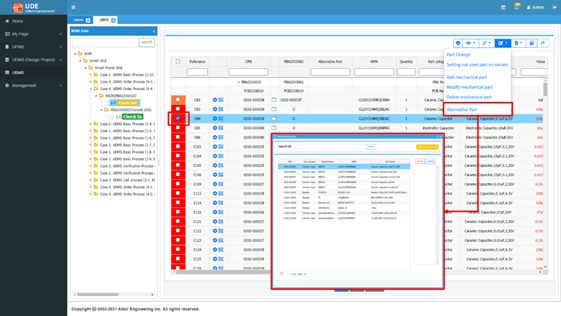
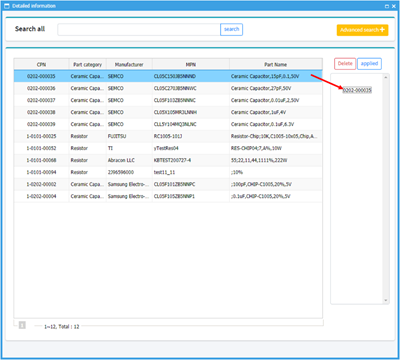
Alternative Part
Define the alternative parts to a part. Figure 12.
To add an alternative part, select a part and drag to the right area for adding. Figure 13.
To delete an alternative part, select a part to be deleted and click
Delete. Figure 14.
Click Applied to apply and finish.
: Export to Excel
All: Export all list to an excel file.
Compare (Derivation):Export the different items only.
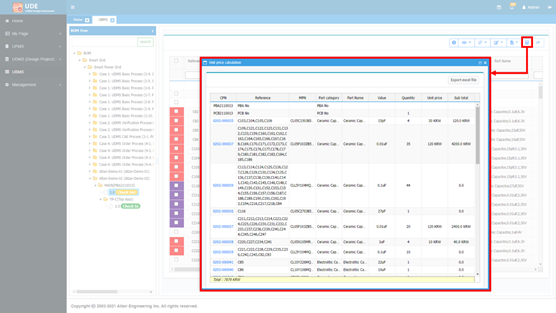
: Unit price calculation. By using the unit price
calculation menu, you can estimate the total cost. Figure 15.
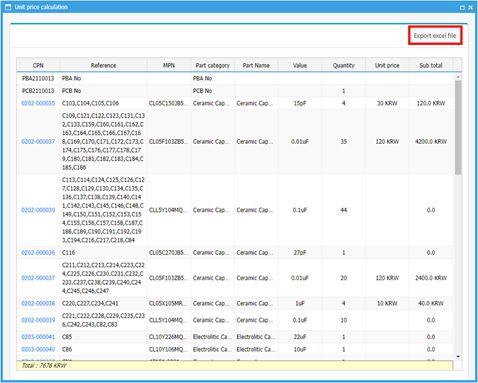
You can export the price list to an excel. Figure 16.
 : Click to display the design project
information.
: Click to display the design project
information.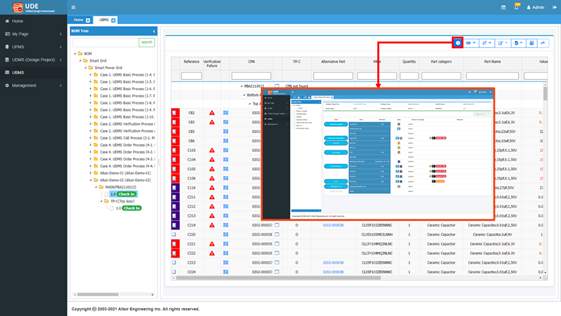
 : Select the sorting criteria.
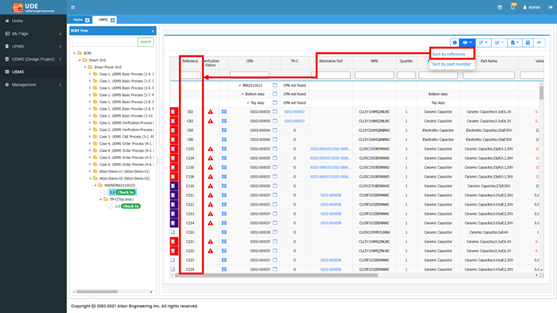

 : Category for priority sorting to see
errors.
: Category for priority sorting to see
errors. : Edit
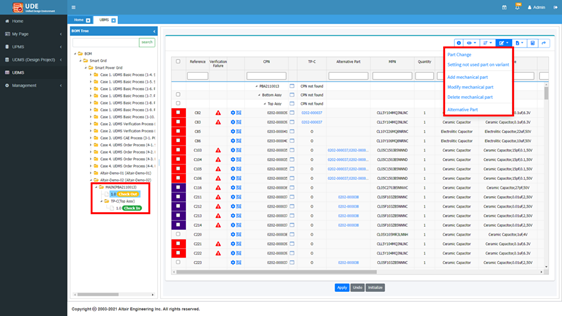


 : Export to Excel
 : Unit price calculation. By using the unit price
calculation menu, you can estimate the total cost.
: Unit price calculation. By using the unit price
calculation menu, you can estimate the total cost.