The ribbon allows you to quickly access tools and standard functions, and is located along the top of HyperStudy. Click on an icon to open the related tool. Hovering over a group of icons may reveal additional tools.
How you use HyperStudy depends on your model type, your simulation software and your design objectives among other factors. You can use
HyperStudy as a standalone software or you can start it from another HyperWorks product.
Once you have finished setting up your study, you will need to select one or more study approaches to find the answers
to your study questions. The best combination of approaches and the best method to use for each approach depends on
your application and objectives.
The Directory displays all of the files in the current study
folder, that is the study in use in the Explorer.
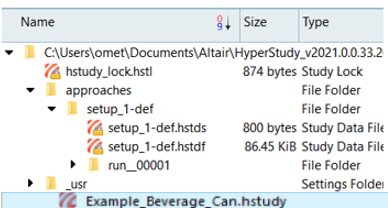
The study folder contains all of the files in the current study.
The study file (.xml) at the root level.
An /approaches folder with one sub-folder per approach
(as added in the study Explorer).
A report folder (/rpt) where all images and
.html files created during the execution of the
study are placed.
Note: Additional options are included in the Directorycontext menu, such as options used to open a specific
file in the study folder, load output files, and compare to files that can be of
different outputs. The Go To option can be used to browse study files or open
the study Explorer view.