Overlay Settings
TableView supports overlaying reports for summary tables.
- Appending rows or columns places the data sources next to each other. Appending also always create new pages.
- Inserting rows or columns (interlacing/alternating rows or columns) displays interlaced columns, and expanded headers.
Overlay Mode
- Append as Rows
- Appends as Columns
- Insert as Rows
- Insert as Columns
When you select an area from the table to interlace columns, all cells above and below the selected area will be merged cells. In other words, they will be expanded horizontally to accommodate the new columns beneath/above them.

Figure 1. Generic example of initial session data in TableView and the appended columns after overlaying reports:

Figure 2. Summary Table for a twice-overlaid report using Append as Columns:

Figure 3. A generic example of your initial session data in TableView and the Interlaced columns after overlaying reports:

Figure 4. A Summary Table example for a twice-overlaid report using Insert as Columns (Interlaced columns) using real data:
Define the Overlay Area and Save as a Report Template
After defining the overlay area, save it as a report template.
-
Create or load a session file that contains your data.
For example, the following session displays the internal and kinetic energy data in TableView (right side of image) for the curves shown on the left:
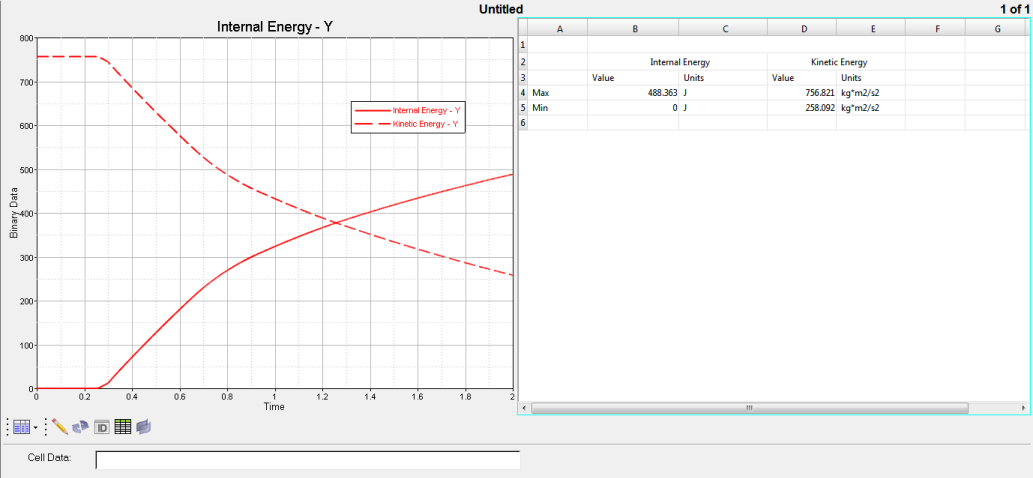
Figure 5. -
From the TableView toolbar,
select the Overlay Settings icon,
 .
.
-
Click the selector icon, and with the left mouse button, drag and select the
cells in TableView that contain the previously loaded
data.

Figure 6.
Figure 7. The cells you marked are displayed in the panel below:
Overlay a Report Template
-
From the Reports toolbar, click the Open Reports Panel
icon,
 .
.
-
Click Apply.
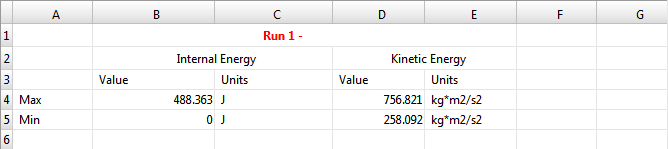
Figure 8. -
Click Apply.
Run 2 data is appended next to the Run 1 data.
Figure 9.
Interlacing Columns
If you choose to interlace data, or Insert as Columns instead of Append as Columns, the procedure varies slightly.
-
For example, start with the same session data as when appending data.
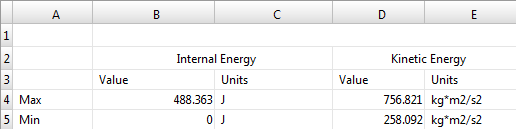
Figure 10. -
However, when you select Insert as Columns for the Overlay Mode, you will have
two overlay areas defined, as shown below:

Figure 11. -
Click Apply.
The image below shows the data for Run 1 and Run 2 side-by-side under each heading.

Figure 12.Note: Existing cells (in the original table) will not be modified/affected when the overlay is performed.When more than one area in the table is selected for an overlay, the selected areas must align horizontally when overlaying by column and vertically when overlaying by row. In both cases, the selected areas must not overlap. When more than one area in the table is selected, if the second area overlaps or does not align properly with the first, a message similar to the one below is displayed as soon as the second area is selected and you will not be allowed to select that area:
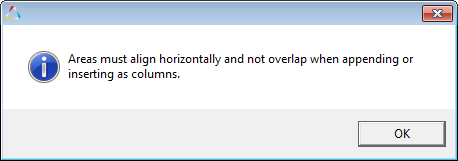
Figure 13.
Define the Rows or Columns for an Overlay
-
From the Overlay Settings panel, , click Add Overlay Area
to add a new overlay to the table.
-
Define which rows or columns should be used for the overlay.
-
Click in the empty cell under the Cells column and click the selector
button,
 .
.
- Select an area in TableView by holding down the left-mouse button (LMB) and dragging in the table area.
- Release the LMB to select the area and record it in the panel's Overlay Area table.
-
Click in the empty cell under the Cells column and click the selector
button,
- To delete an overlay area, select it from the panel and click Delete Overlay Area.