|
Specifying Export Settings for a Project File
Using Automator Export Wizard, you can configure project exports to export table or summary data to a file or database. When the project's associated process is run, the export(s) will be performed. When you specify export settings for a project, you specify an export (or exports) of files as well as any distribution actions you want to apply to it.
Note: You can also specify default export file types at this time.
To specify export settings for a project
-
On the Navigation Tree, click Automator > Standard Processes and select Project Editor.
-
On the Exports tab click the Add icon
 to display the Export Wizard.
 -
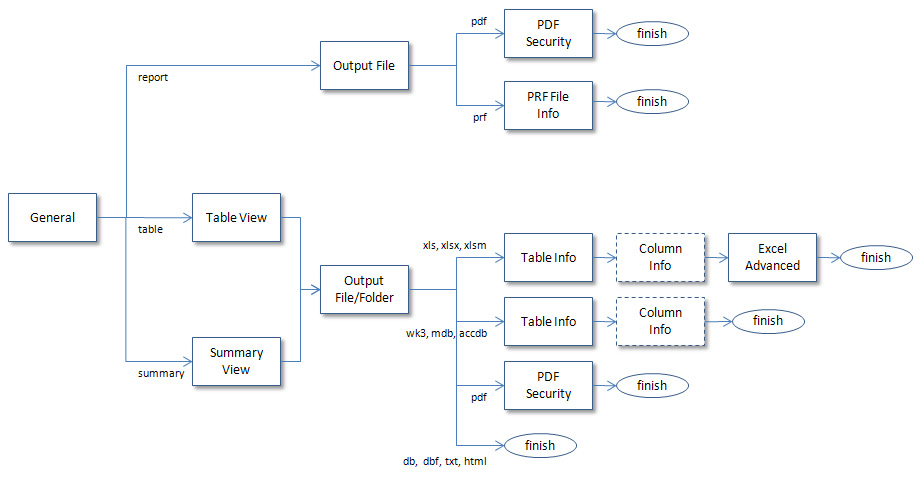
Step through the screens of the Export Wizard, specifying the desired settings as you go. The Export Wizard is comprised of the following screens:
Note: A set of screens you will traverse depends on your settings. Refer to the export wizard workflow below.
-
On the final screen of the wizard, click the Finish button to save the export settings and close the wizard.
-
To specify the default version for each supported export file type when exporting table or summary data for the current project, click the Types... button.
-
To save or download created project, click the corresponding button or continue specifying other project settings if necessary.
Note: When saving a project file provide a comment in the displayed window and click Commit. The Server Library Project page is displayed, where you can edit project file name, revision and access rights if necessary.
You may now perform the next step in configuring a project file, specifying export settings.
|
|