


|
Adding an Action Dropdown
The Action Dropdown allows the selection of the parameter value that will be used by the action.
Steps:
1. After double-clicking or drawing a rectangle
on the dashboard canvas, click  on the Select Part pane
then click the Action Dropdown
on the Select Part pane
then click the Action Dropdown  icon.
icon.
The Action Dropdown pane is displayed, and the Action Dropdown part is added on the dashboard canvas.
For this example, the following parameters are defined:
|
Parameter Name |
Type |
Default Value |
|
Ticker |
Text |
COST |
|
Slider Value |
Text |
0 |
These parameters are used on the Title of the Line graph (e.g., Price History for {Ticker} with Slider Value = {Slider Value:0.00%}).
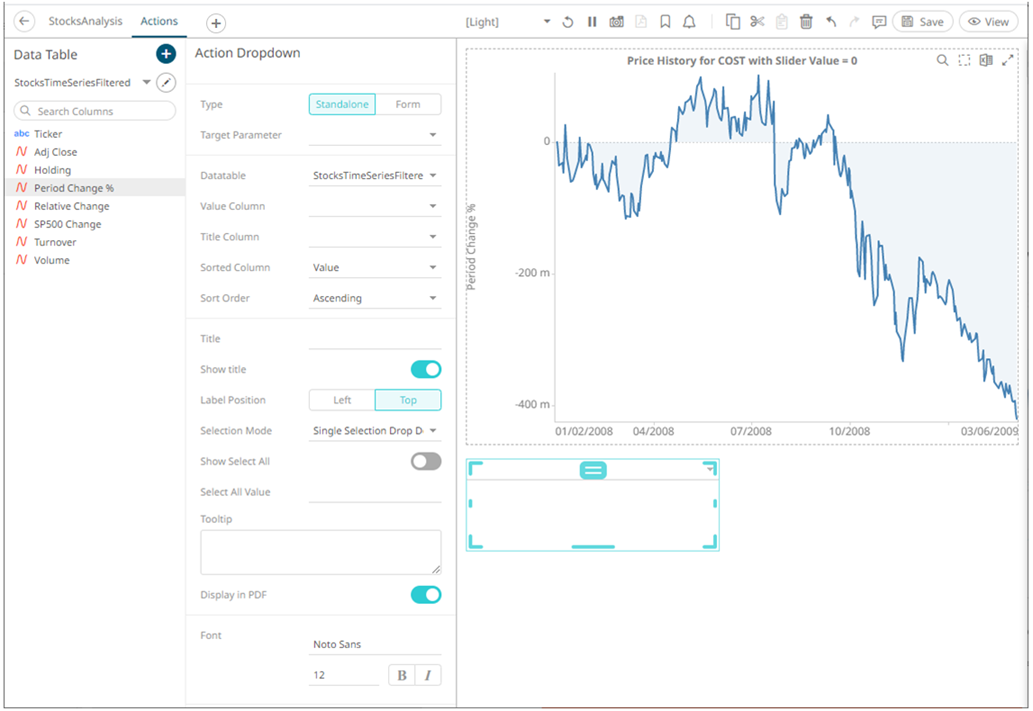
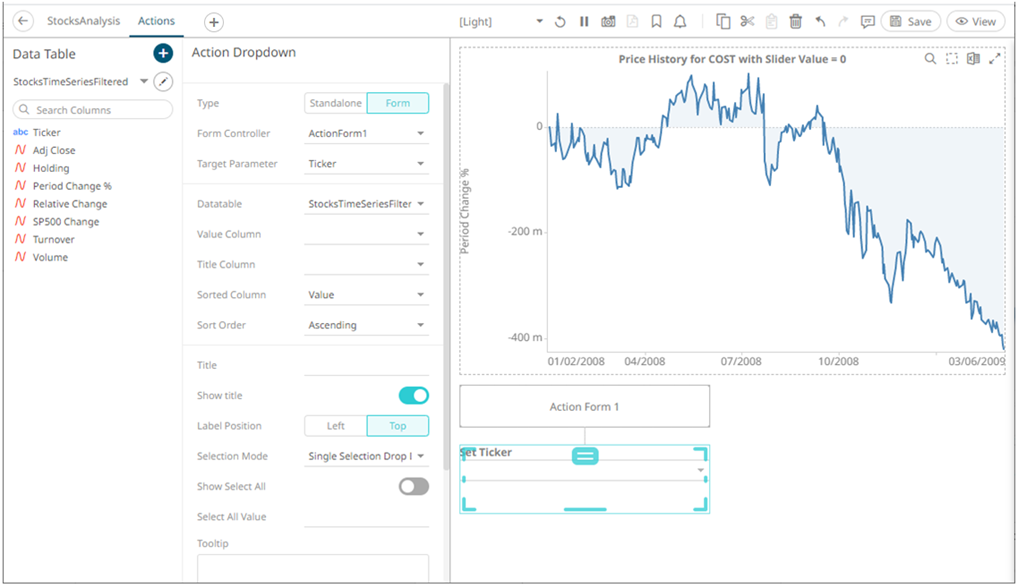
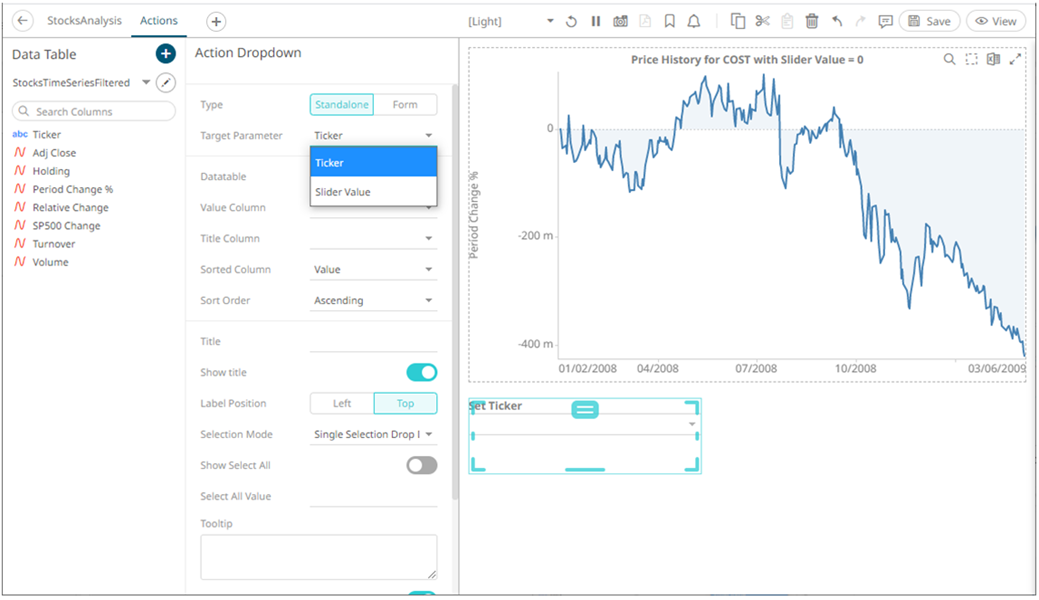
2. The action dropdown can be configured to either be a Standalone or a Form component.
When set to Form, the action dropdown can be connected to any form controller on the same dashboard. The parameters that the action part can set depends on how the form is configured.
|
NOTE |
An action form part must be defined first to associate the action dropdown as a component. Refer to Adding an Action Form more information.
|
A line connects the component to the associated form.
If the action dropdown should not be connected to a form, it can be set to Standalone instead. Select the Target Parameter that will be updated by this action part.
3. Select the Data Table that will be the source of the Value Column and Title Column.
4. Select a Value Column.
5. Select a Title Column.
6. For the Sorted Column, select either Value or Title. If you did not select a Title Column, the Sorting drop-down is disabled and the Value Column is automatically used for sorting.
7. Optionally, specify a sorting mode for the values: Ascending, Descending, or None.
|
NOTE |
The Sort order setting is based on “Sorting” + Value/Title drop-down and “Order” + Ascending/Descending.
|
8. Enter the drop-down Title.
9. Tap the Show Title slider to display the Title in the drop-down.
10. Select the Label Position: Top or Left.
11. Select the Selection Mode.
12. Tap the Show Select All slider to allow selection of all items. Consequently, this causes an array of parameter values to be passed to the action or auto parameterization.
13. Enter the Select All Value.
14. Enter a description or useful information about the action drop down into the Tooltip box.
15. Tap the Display in PDF slider to turn it on and include the action button in the output PDF.
16. Set the Font type, size, style (Bold and/or Italic).
17. Click the Save  icon on the toolbar to save the
changes.
icon on the toolbar to save the
changes.
When
saved, the  notification
is displayed.
notification
is displayed.