


|
Adding an Action Form
The Action Form enables binding multiple action controls to a single action. In cases where multiple parameters that affect data loading are used, this allows for setting of all the parameters at once instead of once per action control.
The form part can be configured to use five different action modes. However, unlike the Action Button, the parts tied to the action form are the ones that dictate the set of parameters for the mode. These components can be any of the existing action parts, except the action button.
|
NOTE |
The parameter that the action part controls is used in the action the form executes. This means that the action part parameter will no longer affect the dashboard parameter. Parameter changes and data updates will still happen, but only within the context of the form. Furthermore, action parts as form components are only allowed to configure their target parameters based on the mode of the form part. For Navigate and Set Parameter modes, the action parts can target the dashboard parameters. For the other modes, the set of targetable parameters is not known, so they can set a parameter of any name.
|
This section discusses the steps and guidelines to add an action form using the following dashboard parameters and data tables.
Sample Data Table 1: Result
|
Text |
Num |
From |
To |
|
{p_text} |
{p_numeric} |
{p_timefrom} |
{p_timeto} |
Sample Data Table 2: TextOptions
|
Option |
Type |
Qty |
|
Apple |
Fruit |
5 |
|
Banana |
Fruit |
11 |
|
Pear |
Fruit |
3 |
|
Orange |
Fruit |
6 |
|
Lemon |
Fruit |
5 |
|
Grape |
Fruit |
12 |
|
Kiwi |
Fruit |
5 |
|
Red |
Color |
3 |
|
Blue |
Color |
7 |
|
Green |
Color |
10 |
|
Yellow |
Color |
3 |
Sample Data Table 3: TextType
|
Type |
|
Color |
|
Fruit |
Sample Parameters
|
Parameter Name |
Type |
Default Value |
|
p_text |
Text |
Default |
|
p_numeric |
Numeric |
0 |
|
p_timefrom |
Time |
2021-01-01T00:00:00.000 |
|
p_timeto |
Time |
2021-02-01T00:00:00.000 |
|
Type |
Text |
Fruit |
Steps:
1. After double-clicking or drawing a rectangle
on the dashboard canvas, click  on the Select Part pane
then click the Numeric Action Slider
on the Select Part pane
then click the Numeric Action Slider  icon.
icon.
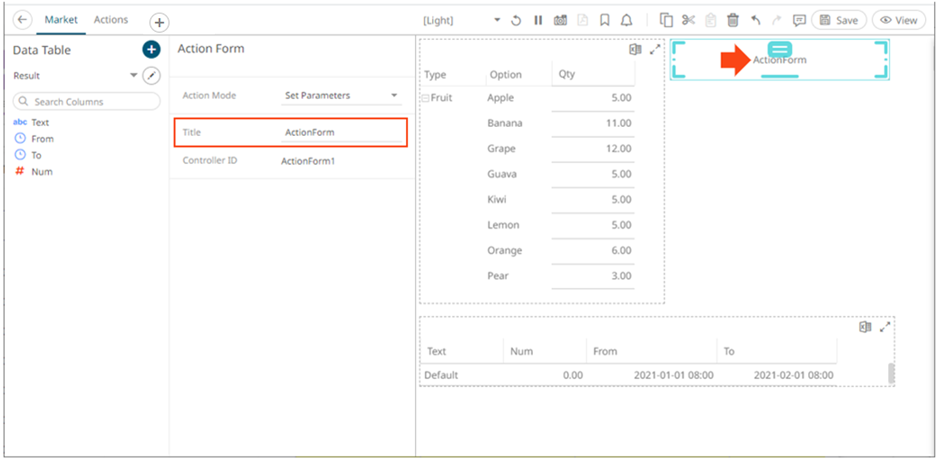
The Action Form pane is displayed, and the Action Form part is added on the dashboard canvas. The Controller ID is automatically generated (e.g., ActionForm1) which is used when associating the form to other action parts.

2. Optionally enter the action form Title. The title of the form on the dashboard is updated.
3. Select any of the Action Modes:
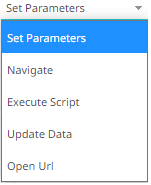
· Set Parameters
Updates parameters on the current dashboard. The connected action parts can select any parameter on the current dashboard to set.
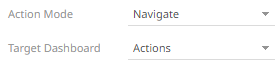
· Navigate
Updates the parameters on the target dashboard. The connected action parts can select any parameter on the target dashboard.
· Execute Script
Allows the execution of a script.
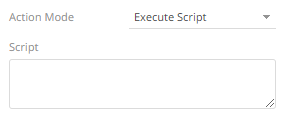
Enter the parameterized Script.
The parameters are written within curly brackets, {ParameterName}.
The connected action parts define which parameters will be available in the script. If a connected action defines a parameter by name “ParameterName”, this value ca be used in the script in the form.
For script actions allowing multiple value input, you can optionally specify a value separator within the curly brackets where you put the parameter name. The syntax is as follows:
{ParameterName:Separator}
For example: {Company:|}
Default separator is comma. At execution, the parameter will be replaced with real field values associated with the selected visualization node.
· Update Data
Allows data update (typically in a database) by passing parameters into a data query.
The connected action parts will be able to select any parameter of the configured target datatable.
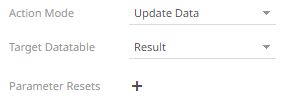
You can opt to specify one or several existing parameters that will get a new value when the Update Data action is executed. You can do so by clicking on the Parameter Resets section.
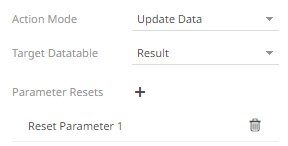
Click on the parameter instance to expand and define its properties.
· Open URL
Allows access to a web page or file or even point to other resources on the web such as database queries and command output.
¨ Enter the parameterized URL.
The parameters are written within curly brackets, {ParameterName}.
Similar to the script mode, the required parameters need to be defined by the connected action parts.
For actions allowing multiple value input, you can optionally specify a value separator within the curly brackets where you put the parameter name. The syntax is as follows:
{ParameterName:Separator}
For example: {Company:+}
Default separator is semicolon. Specifying for example a plus sign allows you to do multi search term searches on Google, for example.
At execution, the parameter will be replaced with real field values associated with the selected visualization node.
The easiest way to create parameterized URLs is to open an example web page and copy the URL. As an example, Yahoo Finance Key Statistics for Microsoft has the following web address:
http://finance.yahoo.com/q/ks?s=MSFT
If a parameter called Ticker has been set up in the data table, you can generate the URL by removing MSFT and replacing it with {Ticker}:
http://finance.yahoo.com/q/ks?s={Ticker}
¨ Select the Target area of the page where the output URL will be displayed.
4. Click the Save icon on the toolbar to save the changes.
When saved, the notification is displayed.
The Action Form can now be used as the form controller of the following action parts:
Sample 1: Using the Set Parameter mode and adding Action Text Box and Action Dropdown components to ActionForm1 with the following target parameters.
|
Action Part |
Target Parameter |
Default Value |
|
Action Text Box |
p_text |
Default |
|
Action Dropdown |
Type |
Fruit |
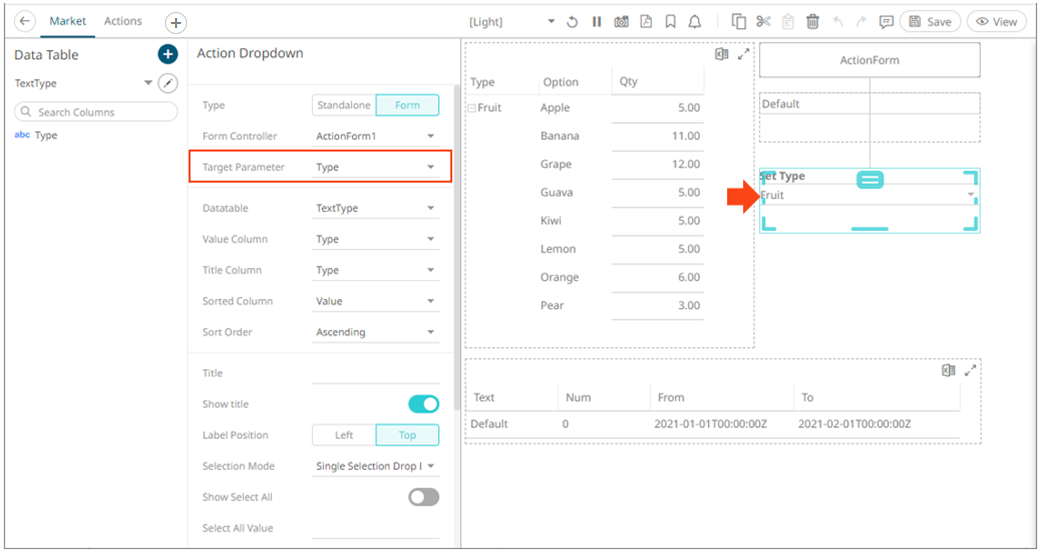
The action parts can be configured to either be a Standalone or a Form component.
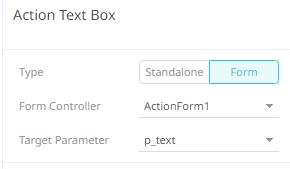
When an action part is set to Form, it can be connected to any form controller on the same dashboard. The parameters that the action part can set depends on how the form is configured.
If a part should not be connected to a form, it can be set to Standalone instead.
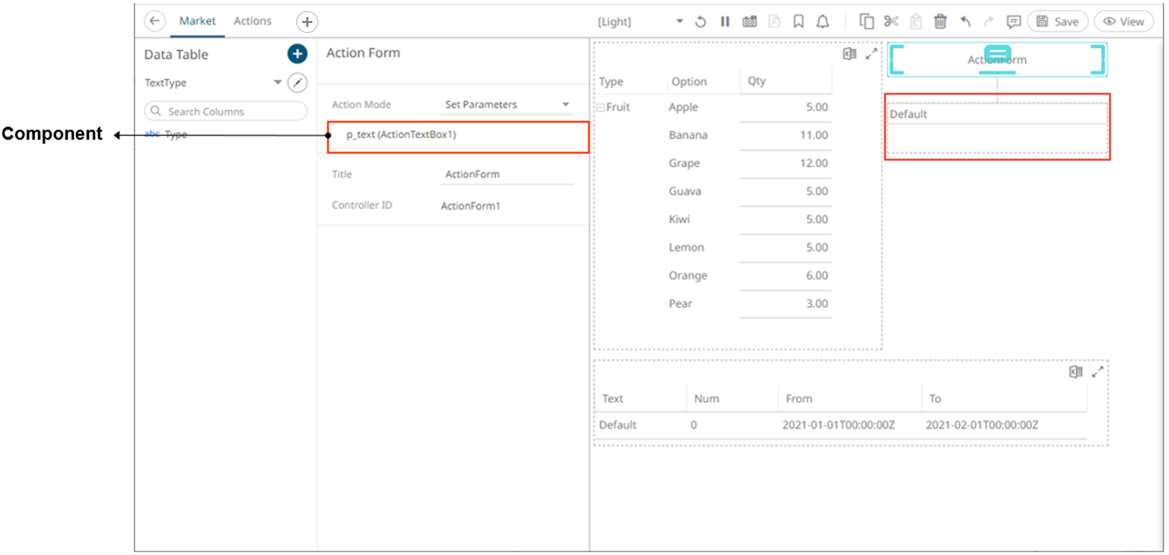
A line connects the component to the associated action form.
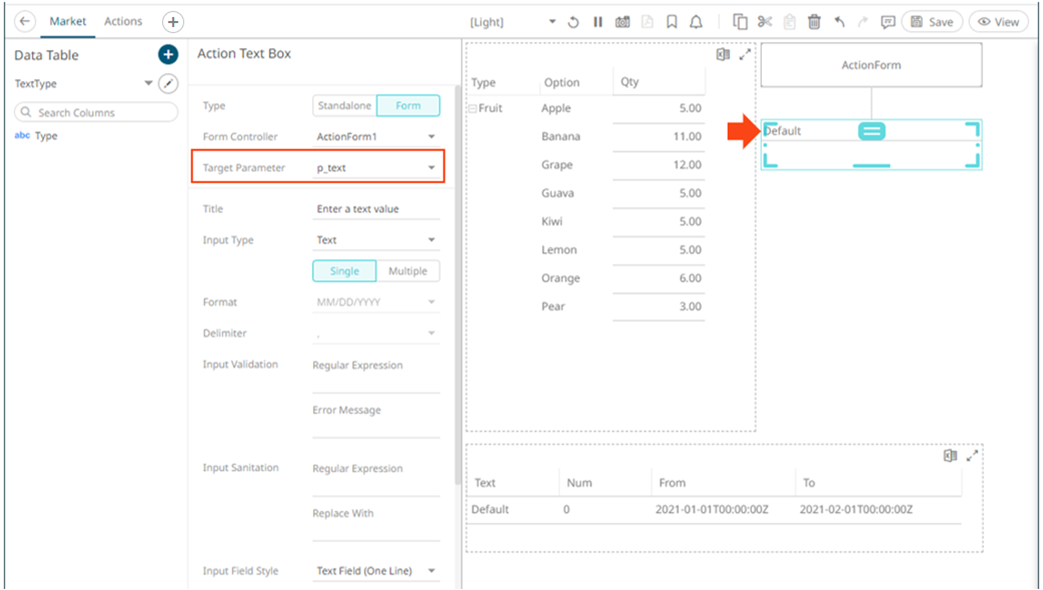
Upon selection of the action form, it lists p_text(ActionTextBox1). This means that the parameter p_text is being set by the connected action part ActionTextBox1.
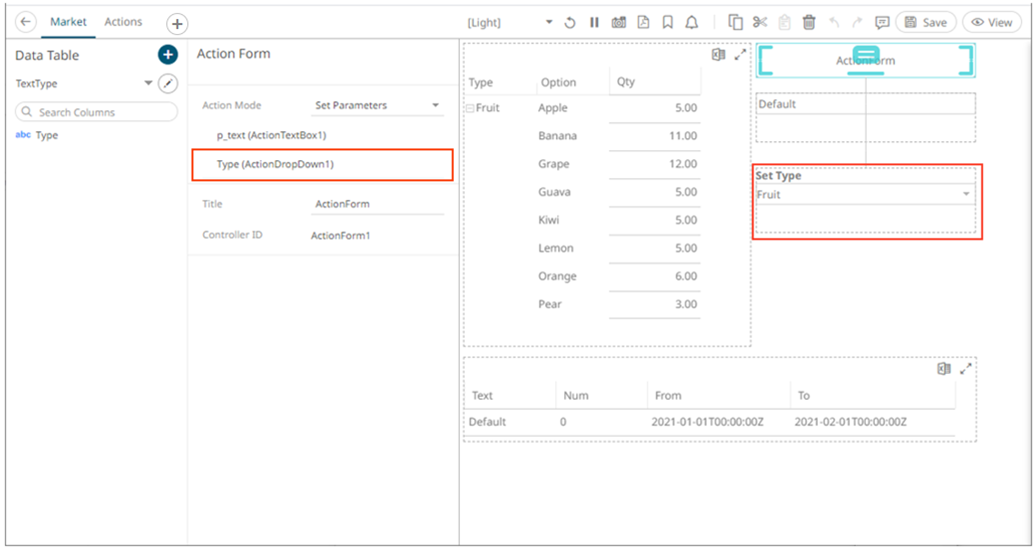
For the second component, again a line connects it to ActionForm1.
Upon selection of the action form, it additionally lists that the Type parameter is being set by the newly connected ActionDropDown1 part.
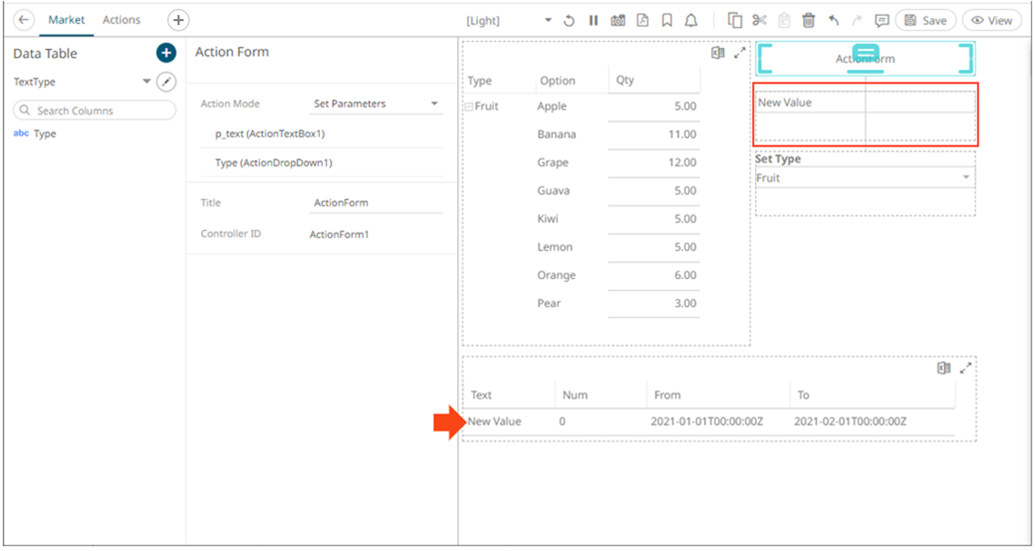
Changing the value in the action text box from Default to New Value and clicking the form button will trigger the Set Parameter action and set the value of p_text on the dashboard.
Sample 2. Using the Set Parameter mode and adding a new Action Form (ActionForm2) with an Action Drop Down component:
|
Action Part |
Value Column |
Target Parameter |
Default Value |
|
Action Dropdown |
Option |
p_text |
Default |
The Controller ID is automatically generated (e.g., ActionForm2) for the new action form.
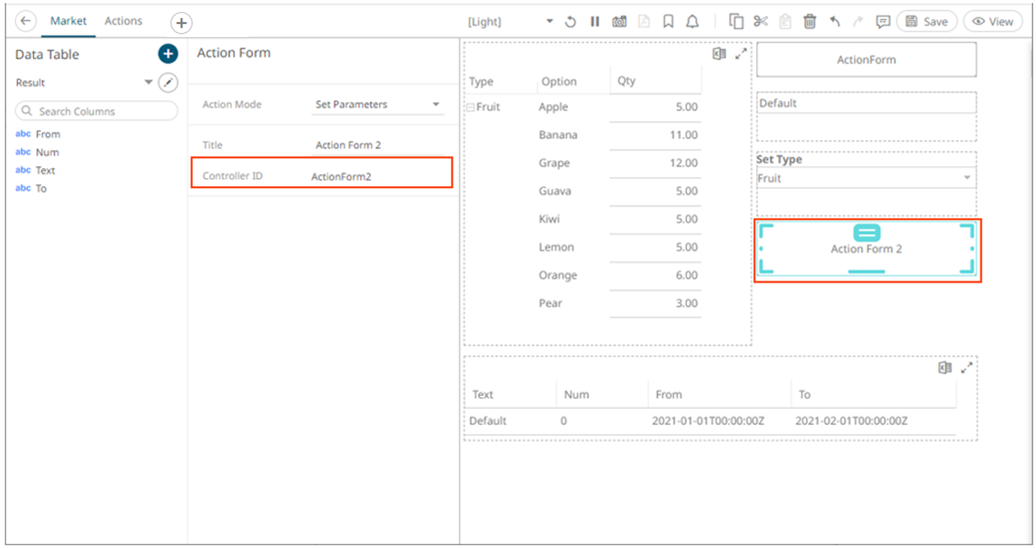
For the action dropdown component, the target parameter is p_text and the value column is Option.
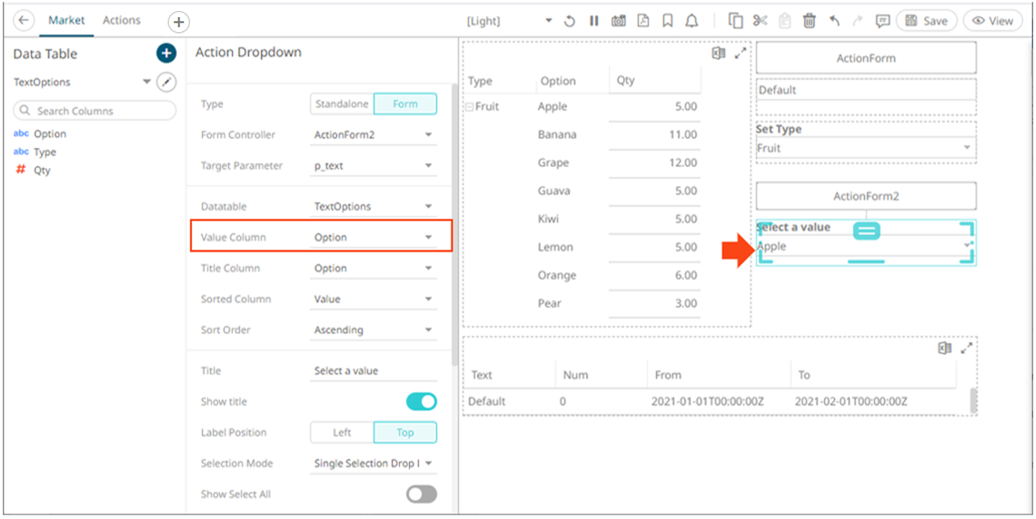
This means that the value selected in the dropdown list will update the p_text parameter on the dashboard after clicking ActionForm2.
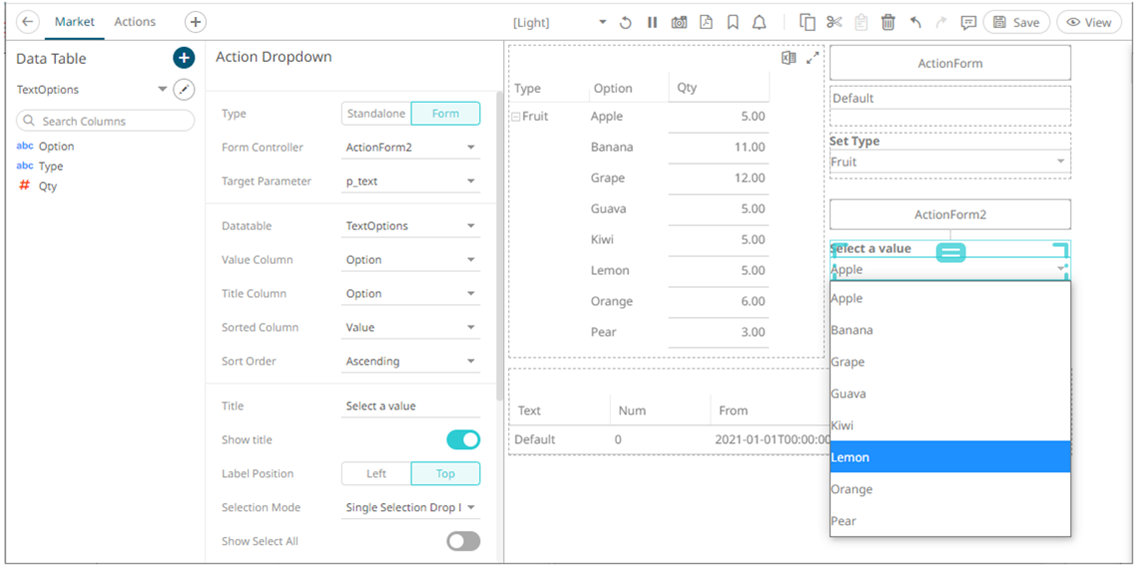
For example, when selecting Lemon in the dropdown, it sets the p_text parameter for all action parts connected to the form without updating the parameter on the dashboard. The parameter will only be set on the dashboard after clicking the form button.
