


|
Elasticsearch 7.x
The Elasticsearch 7.x connector allows you to connect and access data from an Elasticsearch cluster using Java High Level REST Client.
|
NOTE |
· To enable the Elasticsearch 7.x connector on the Edit Data Table, refer to Elasticsearch Connectors Dependency Installation for more information on how to copy the provided dependency files to the Lib folder. · The Elasticsearch 7.x connector supports Elasticsearch 7.x versions. · Elasticsearch 6.x and Elasticsearch 7.x connectors will not work in a single Panopticon Real Time instance due to conflicting Elasticsearch API dependencies.
|
Steps:
1. Select Elasticsearch 7.x from the Data Sources pane. The Elasticsearch 7.x Settings pane and the retrieved Elasticsearch 7.x source are displayed.
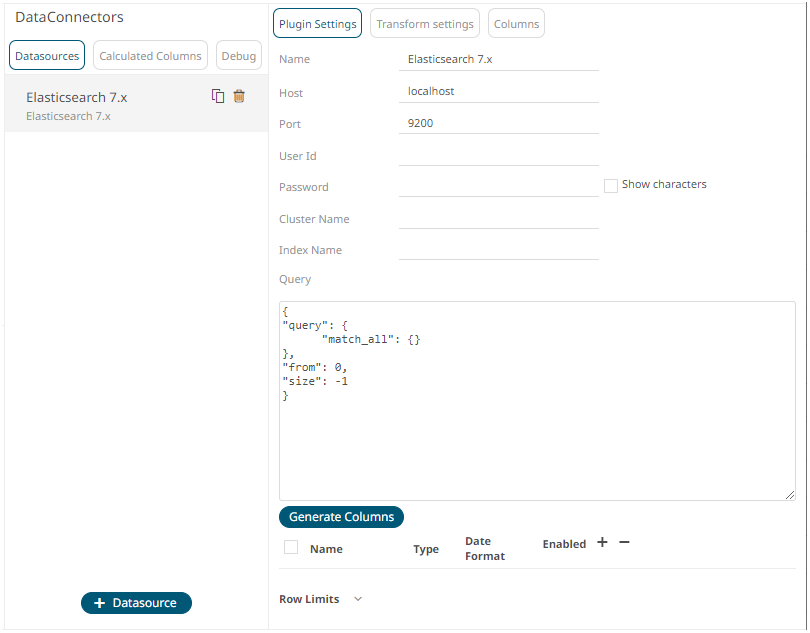
2. Enter the Name of the Elasticsearch
7.x data source, then click  .
.
3. Enter the following information:
|
Property |
Description |
|
Host |
The hostname of any node in your Elasticsearch cluster, or localhost for a node on your local machine. |
|
Port |
The port running the Elasticsearch HTTP service (default is 9300). If the port you wish to use is different from the default port, change the value to the correct one. |
|
User Id |
The username used to connect to the Elasticsearch 7.x service. |
|
Password |
The password used to connect to the Elasticsearch 7.x service. Check the Show Characters box to display the entered password characters. |
|
Cluster Name |
The cluster name that can be used to discover and auto-join nodes. |
|
Index Name |
The Index name in Elasticsearch. This is some type of data organization mechanism that allows partition of data in a certain way. |
4. Enter an optional JSON-encoded request body in the Query box.
5. Click  . The
columns populate the Output Column section.
. The
columns populate the Output Column section.
6. Click  to add columns and specify their properties:
|
Property |
Description |
|
Name |
The column name of the source schema. |
|
Type |
The data type of the column. Can be a Text, Numeric, or Time |
|
Date Format |
The format when the data type is Time. |
|
Enabled |
Determines whether the message field should be processed. |
To
delete a column, check its  or all the column entries, check
the topmost ,
then click
or all the column entries, check
the topmost ,
then click  .
.
7. Set the row limit of the data set.
8. Tap the Preview Selected Data Source slider to turn it on.
9. Click  to display the data preview.