


|
Adding a REST Transform Operator
Takes an input data frame, executes a REST call, and interprets the result which gets passed upstream.
Steps:
1. In the Application page, click and select Rest_Transform ![]() in the Add Operator
pane.
in the Add Operator
pane.
The REST Transform
node ![]() icon displays in the Graph panel,
as well as the properties to be defined in the Operator Settings
panel, and the preview of the data in the Schema panel.
icon displays in the Graph panel,
as well as the properties to be defined in the Operator Settings
panel, and the preview of the data in the Schema panel.
![]()
The right (outbound) edge allows you to connect to the other operators.
2. In the Operator Settings panel, define or select the following required properties:
|
Property |
Description |
|
Node ID |
The ID of the REST Transform operator. |
|
Inputs |
The stream of records or input you will be subscribed to. |
|
Interval |
The interval of which the data should be published to the output stream (in milliseconds). |
|
Keep Records |
Check to retain or not remove flushed elements. This means the entire set of records will be flushed at each interval. |
|
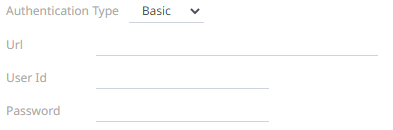
Authentication Type |
· Basic
Enter the URL of the REST API. Then enter the User Id and the Password that will be used to the connect to the REST API.
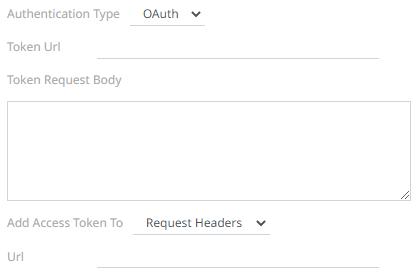
· OAuth
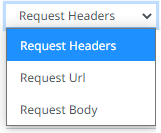
Then enter the following settings: o Token URL – The URL to retrieve the access token from. o Token Request Body – The request body used for access token requests. o Add Access Token To - The Access token retrieved from the Token URL can be added to headers, URL or request body, depending on how the REST endpoint needs the token.
§ Request Header - A header is automatically added to the REST API request. § Request URL - The URL needs to be manually parameterised with a {access_token} parameter, before calling the REST API, the parameter is replaced with the actual token. § Request Body - The Request Body needs to be manually parameterised with a {access_token} parameter, before calling the REST API, the parameter is replaced with the actual token.
o URL – The URL of the REST API.
|
|
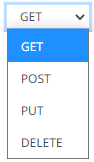
HTTP Method |
Select the appropriate HTTP method for the request from the following options:
· GET – retrieve data · POST – add new data · PUT – replace existing data · DELETE – remove existing data |
|
Timeout |
The length of time to wait for the server response (10 to 300). Default is 10. |
|
Content Type |
The required Content Type. Default is application/json. |
|
Request Body |
The Request Body for HTTP POST. You can also click
|
3. Check the Multiple Records box to send unnamed array.
4. In the Response Settings section, click Generate
Output Schema  to fetch the schema of the output topic. This populates
the list of columns, with the data type found from inspecting the
first ‘n’ rows of the file.
to fetch the schema of the output topic. This populates
the list of columns, with the data type found from inspecting the
first ‘n’ rows of the file.
5. Select the Response Type:
· XML
· JSON
If JSON is selected, enter the Record Path which allows the identification of multiple records within the JSON document.

· Text
If Text is selected, confirm the Column Delimiter, Text Qualifier, and if the first row of the message includes column headings.
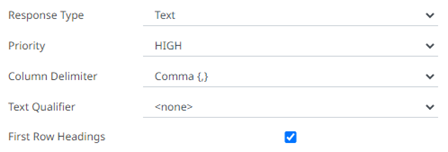
6. Select the Priority of the node’s startup:
|
Priority |
Description |
|
APPLICATION |
Running and successful completion of the node is critical in the application startup. |
|
HIGHEST |
Highest priority but not critical. |
|
HIGH (Default) |
High priority but not critical. |
|
STANDARD |
Standard priority. |
|
LOW |
Low priority. |
7. Enter or select the following properties:
|
Property |
Description |
|
Source |
The column name of the source schema. |
|
Target |
The column name of the target schema. |
|
XPath/Json Path/Index |
The column name of the target schema. |
|
Type |
The data type of the column. Can be: BOOLEAN, DATE, DATETIME, DOUBLE, FLOAT, INT, LONG, STRING, TIME. |
|
Date Format |
Date/Time format when the data type is DATE, DATETIME, or TIME. |
8. You can also click the following icons:
|
Button |
Description |
|
Add a new field entry. |
|
|
|
Check
a box of a field entry and click |
9. Save the changes.