Learn about modifying parameters and properties, positioning and searching for
blocks.
Modify Parameters in the Block Dialog
Every block includes a set of parameters that controls the block’s behavior and
options. You can modify these parameters in the block dialog as required for your
model.
Locate a block in a diagram that you want to modify and double-click the
block.
A block dialog appears containing the parameters for the
model.
Enter the parameter values as required for your model.
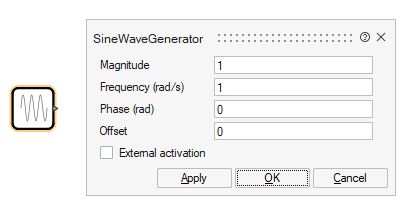
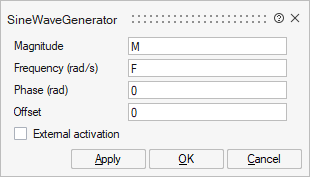
The following dialog shows you the parameters you can set for a SineWaveGenerator
block. For example, you can set an exact numerical value for the amplitude:
You can further parameterize the block
by setting the Magnitude to M and the Frequency to F, where both M and F are model
parameters that can be defined in the model context.
Tip: To get information on all the parameters for a
block, select the block and press F1 to see the block's help
page.
Modify Properties in the Property Editor
Use the Property Editor to modify the name and other display properties of a
block.
From the ribbon, select View > Property Editor.
Select a block in a model that you want to modify.
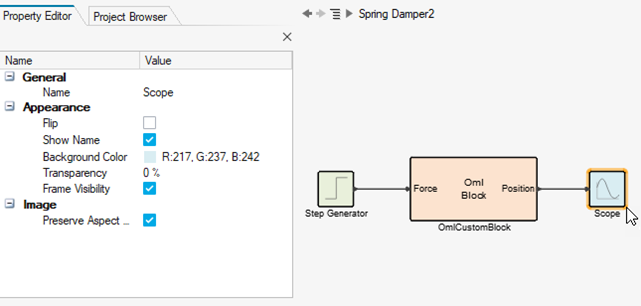
The Property Editor displays the properties available for the selected
block.
In the Property Editor, define the properties that are
applicable for your block.
General Property
Description
Name
Enter a block name. The name is displayed below the block.
Name Font
Enter a font family and size for the block name.
Text
Enter a description, which is displayed inside the block.
Text Font
Enter a font family and size for the block description.
Port Label Font
Enter a font size for the port lable. Note that the port name is
defined in the block dialog that you access by double-clicking on the
block.
Appearance Property
Description
Flip
Flip the block and its associated links 180 degrees.
Show Name
Display the block name in the model.
Background Color
Set the color of the block image.
Transparency
Set the color transparency of the block image.
Frame Visiblity
Toggle the block frame on or off.
Image Property
Description
Preserve Aspect
Maintain the length-width aspect ratio when modifying the block
size.
Tip: You can also modify a number of properties through the block
dialog and context menu. To access a block dialog, double-click a block. To
access a context menu, right-click on a block.
Enable External Activation
Enable a block to receive an activation signal through an external activation
port.
Double-click a block that you would like to connect to an Activation
block.
On the dialog that appears, select the External
Activation box.
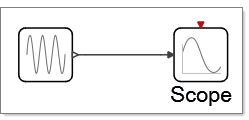
Turning on External Activation exposes a red input port that can accept
a link from an Activation block. The Scope block in the following diagram shows
this port:
Position Blocks
Switch, rotate, flip, align and center a block in a diagram.
Rotating and Flipping Blocks
You can change the orientation of blocks and links inside of a diagram through the
Orient tool group or the context menu.
Select a block that you want to reposition.
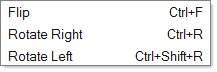
On the ribbon, from the Orient tool group select to flip a block to the left
or right , or rotate a block to the left or right . Alternatively, right-click and select from the
options on the context menu:
The links between the selected blocks automatically flip or rotate as
specified.
Aligning Blocks
Adjust link segments or points on link segments to align blocks in a
diagram.
To align blocks manually, on a link segment or a point on a link segment,
left-click, and then position the link with the mouse.
To align blocks automatically, cross-select the blocks you want to align. Then
on the ribbon from the Alignment tool group: select
the tool to align to the left , right
, top
or bottom .
Alternatively, right-click and select from the align options on the context
menu:
The link segments between the selected blocks automatically move to
align the blocks as specified.
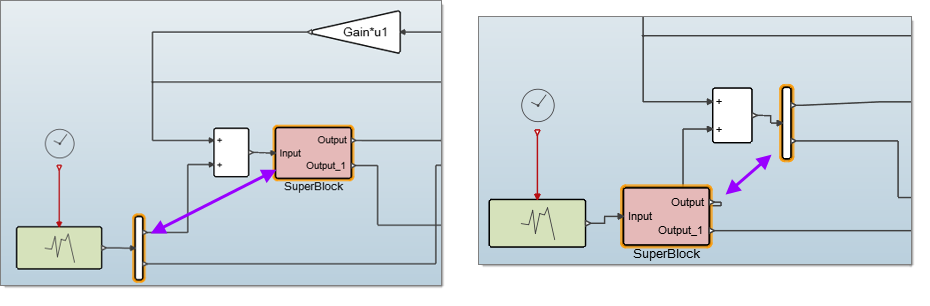
Centering Blocks in a Diagram
Move link segments or link points to center blocks in a diagram.
To center blocks manually, on a link segment or a point on a link segment,
left-click, and position the link with the mouse.
To center blocks automatically, cross-select the blocks you want to work with
on your diagram. Then on the ribbon from the Center tool
group, select the tool to center vertically or horizontally . Alternatively, right-click and select from the
options on the context menu.
The link segments between the selected blocks automatically move to
center the blocks as specified.
Switching Two Blocks
Switch the placement of two blocks in a diagram.
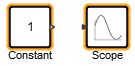
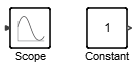
Select two blocks that you want to reposition in a diagram:
Press Ctrl+T, or right-click, and from the
context menu, select Switch.
The blocks swap places in the diagram:
The following figure shows the switching of two blocks in a model. The software
automatically reconnects the blocks in the diagram within the limits of compatibility of
the ports on the blocks. Once the blocks are switched, you can adjust the links as
needed.
Search for Blocks
Locate a block in a particular palette, or search for a block or palette throughout a
library.
In the Palette Browser, enter a
term in the search field for one of the following options:
Search option
Search result
All blocks are displayed in the palettes with the found blocks
highlighted. Navigate through the blocks with the up and down arrows
next to the search field.

 or right
  , or rotate a block to the left
  or right
  . Alternatively, right-click and select from the
options on the context menu:
. Alternatively, right-click and select from the
options on the context menu:

 , right
 , top
, top
 or bottom
  .
Alternatively, right-click and select from the align options on the context
menu:
.
Alternatively, right-click and select from the align options on the context
menu: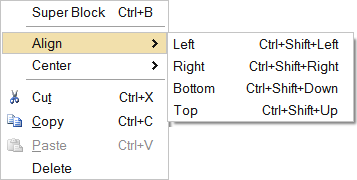

 or horizontally
  . Alternatively, right-click and select from the
options on the context menu.
The link segments between the selected blocks automatically move to center the blocks as specified.
. Alternatively, right-click and select from the
options on the context menu.
The link segments between the selected blocks automatically move to center the blocks as specified.