MPDB Tool

The MPDB tool offers a complete automated post processing solution of the MPDB Frontal Compatibility Assessment load case, for Radioss and LS-DYNA output files.
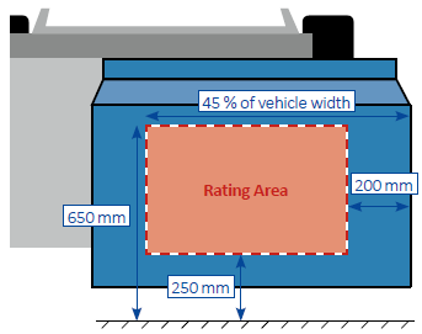


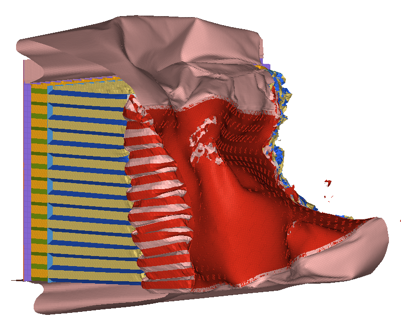
Figure 1. Figure from Carhs Safety Companion 2019
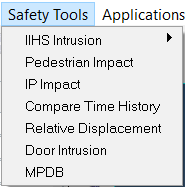
Upon loading the Vehicle Safety Tools preference file, the Safety Tools menu bar option is displayed, and the MPDB Tool is listed in the pull-down menu:


Figure 2.


Figure 3.
The automated tasks covered by the MPDB tool, are:
  • The definition of the rating area of the PDB front face
  • The calculation of the standard deviation of the post-test barrier deformation
  • The calculation of the Occupant Load Criterion (OLC)
  • The calculation of the Compatibility Modifier
  • Results report generation

Calculate the Standard Deviation

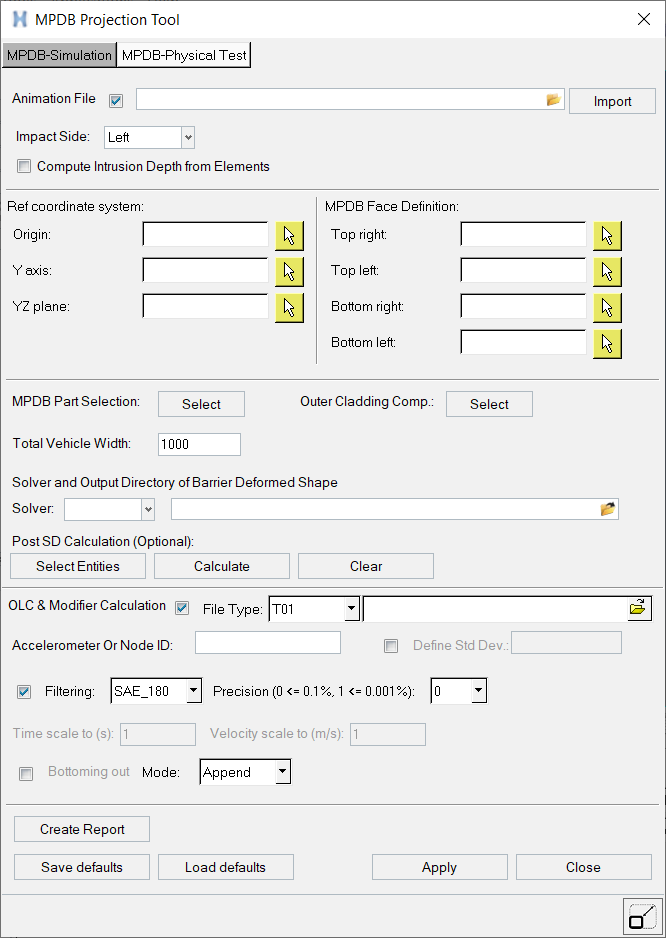
  1. From the MPDB Projection Tool dialog, verify that the Animation File option is checked and use the file browser to select the desired solver animation file to import.
    Tip: The Animation File option is activated by default, however you can uncheck the option to deactivate the standard deviation calculation process.
  2. Click the Import button to import the selected file.
  3. Optional: Activate the Compute Intrusion Depth from Elements option to convert nodal based projection distance results into element based results using an average.
    Note: By default, the projection distance results are available only as nodal based, therefore the option is unchecked.
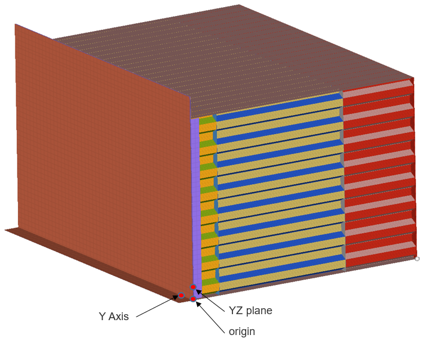
  4. Use the Origin, Y-Axis, and YZ plane node selectors to define the system at the back of the barrier frontal block, which will be the reference system for the projection calculation.


    Figure 4.
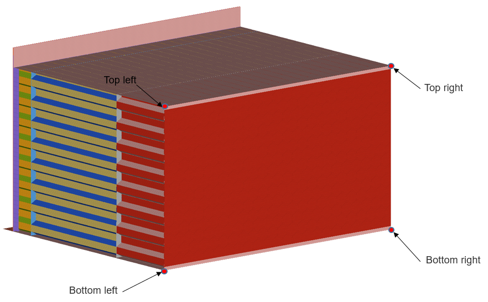
  5. Use the Top right, Top left, Bottom right, and Bottom left node selectors to select the four corners of the front face of the barrier.


    Figure 5.
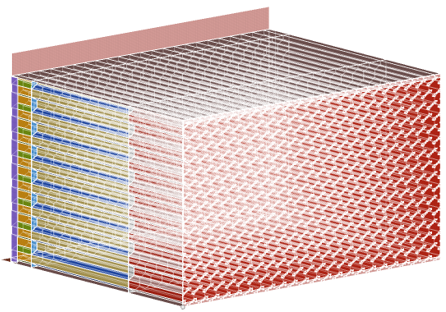
  6. Select the whole components defining the full barrier block.


    Figure 6.
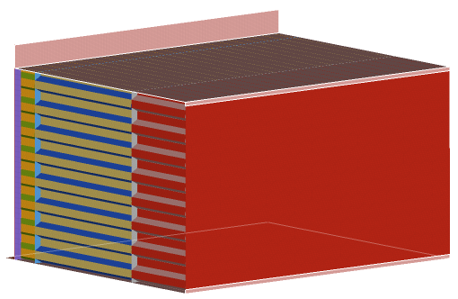
  7. Select the outer cladding components of the barrier block.


    Figure 7.
  8. Define the total vehicle width requested to calculate the rating area on the barrier.
  9. Select the solver used and the directory for the tool outputs.
    • LSDyna
    • Radioss
    Default: Animation directory/Output
  10. Optional: Use the Calculate Standard Deviation options to select a new entities and calculate the standard deviation for the selected area.
    Attention: These options are meant to be used when the first evaluation of the Standard Deviation and Intrusion projections have been calculated and are available in the modeling window (after clicking the Apply button at the bottom of the tool).
    Select Entities
    Select a new calculation area.
    Calculate
    Calculate the standard deviation for the newly selected area.
    Clear
    Clear the results.

Calculate the OLC and Modifier

  1. From the MPDB Projection Tool dialog, verify that the OLC & Modifier Calculation option is checked.
    Note: This option is activated by default.
  2. Select a file type from the drop-down menu.
    • T01 (Radioss file)
    • binout/nodout (LS-Dyna)
  3. Use the file browser to select the requested output file.
  4. Enter the requested input to extract the barrier acceleration value requested for the OLC and Modifier calculation.
  5. Activate the Filtering check box and choose the filter options to apply on the time history outputs.

Generate Results and Reports

When all of the requested data has been defined for the Standard Deviation and/or OLC and Modifier calculation, the tool is ready to start the automatic post-processing of the MPBD barrier.
Before starting the automated post-processing procedure, ensure that the crash animation is set-up to the desired post-processing time step:


Figure 8.
  1. From the MPDB Projection Tool dialog, click Apply to start the entire post-processing procedure for the selected outputs.
  2. Click Save defaults to save all of the data specified in the dialog in an external file.
    Tip: The Load defaults option provides you with an efficient way to quickly retrieve the save default values to be reapplied on a new solver output set of data.
  3. Click Create Report to generate a PowerPoint containing all of the generated MPDB post-processing results generated by the tool.

MPDB Tool Results

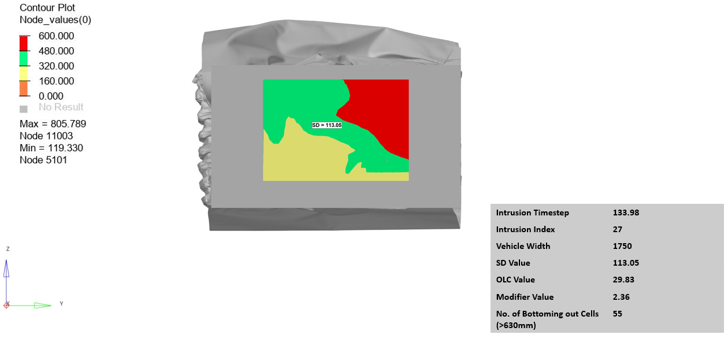
The MPDB Tool automatically processes the Standard Deviation on the barrier, based on the intrusion calculations:


Figure 9.
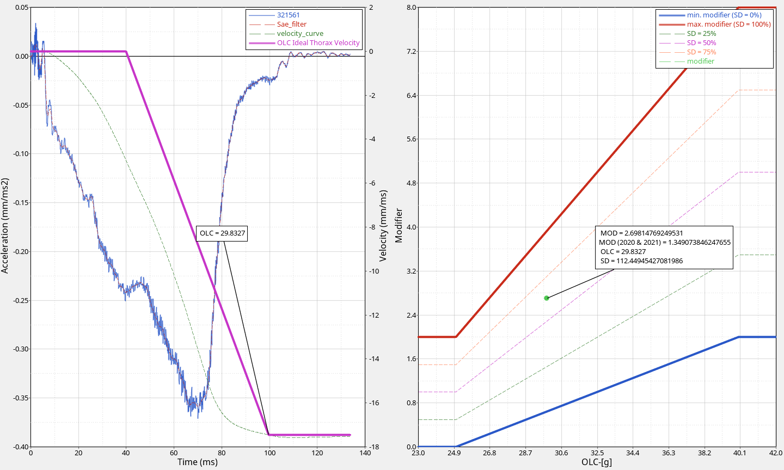
As well as the OLC and Euro-NCAP Modifier:


Figure 10.
Furthermore, in the “Output Directory” specified in the dialog, the following files are exported automatically by the tool:
Output.key or output_0000.rad
Solver input file containing the deformed shape of the barrier at the selected time step.
outputreference_plate.key or outputreference_0000.rad
Solver input file containing the reference plate defining the Grid for the projection calculation.
export_barrier_reference.key or export_barrier_reference_0000.rad
Solver input file containing the deformed shape of the barrier at the selected time step and the GRID used for the projection calculation.
outputprojection.csv
File containing the projection nodal or elemental projection values.
MPDB_session_file.mvw
Session file with results.

MPDB Physical Test (scanned data)

The automated tasks covered by the MPDB tool (for physical test data), are:
  • The definition of the rating area of the MPDB front face.
  • The calculation of the standard deviation of the post-test barrier deformation.
  • The calculation of the bottoming out scenario.

Calculate the Standard Deviation

  1. From the MPDB Projection Tool dialog, use the file browser to select the desired physical test data (STL format).
  2. Select the output directory. This is the location where the output files from MPDB tool such as results file, projection distance .csv file, PPT file, and so on will be saved.
  3. Enter the XYZ coordinates for the four corner nodes that represent the four corners of the front face of the barrier (Top right, Top left, Bottom right, and Bottom left) face of the barrier.
    Note: It is assumed that the barrier is positioned along longitudinal direction with the front face of the barrier facing the vehicle as per the EURONCAP MPDB regulation. If not, you should position the scanned data first before proceeding further.
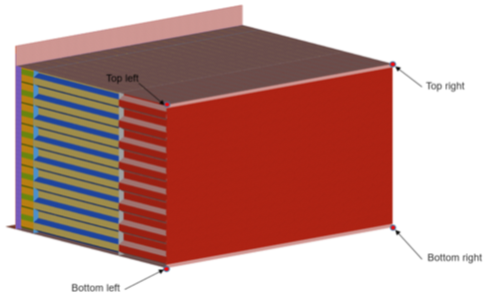
    Figure 11.
  4. Enter the total vehicle width.
  5. Enter the OLC value.
  6. The above two inputs along with the SD value are needed to calculate the modifier value.
  7. In the end, the Standard Deviation contour plot and the modifier plot will be created and embedded into a PPT.