Flux - HyperStudy co-simulation
Introduction
HyperStudy is a multi-disciplinary design exploration, study, and optimization software for engineers and designers.
It is interesting to couple it with Flux to leverage the HyperStudy approaches (DOE, Fit, Optimization and Stochastic) for Flux models design exploration and optimization.
The HyperStudy to Flux connection allows exploring efficiently the design space of any electromagnetic devices modelled in Flux (motor, actuator, transformer…)
Workflow
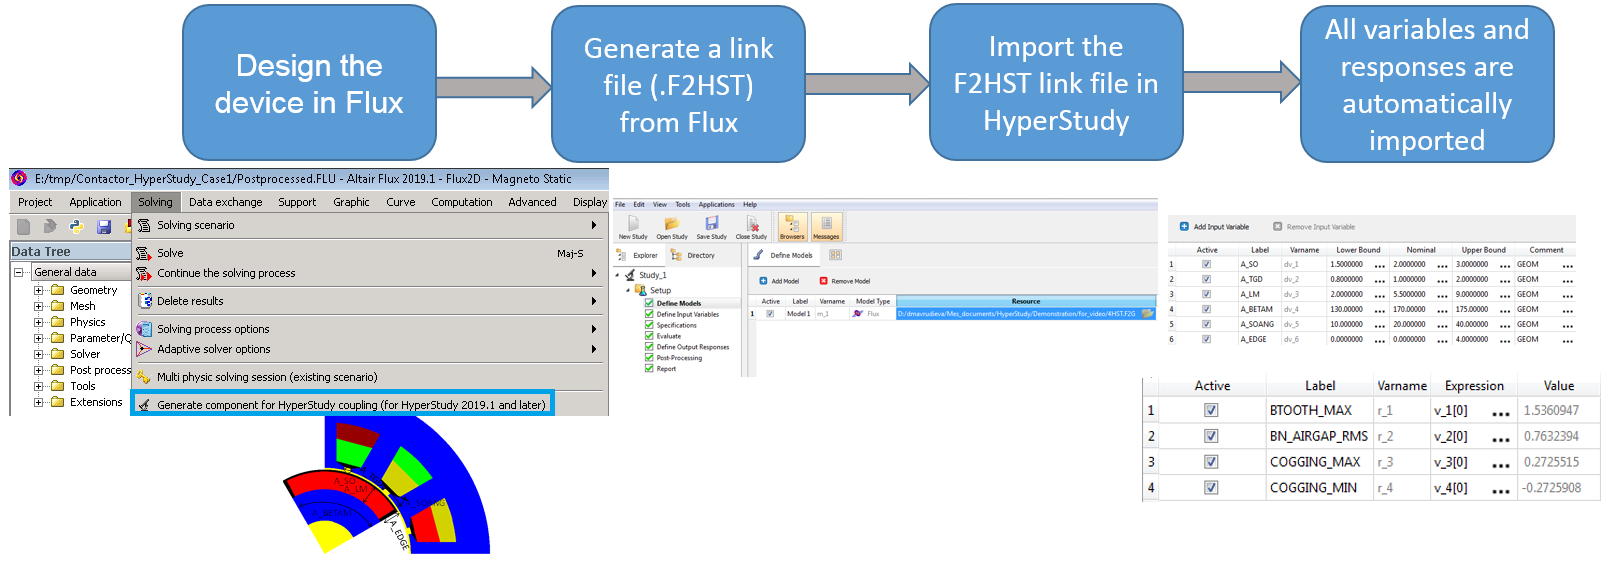
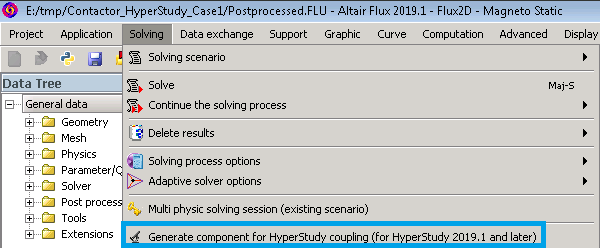
In Flux
From Flux 2019.1, generate the component for HyperStudy coupling:
- This command Generate component for HyperStudy coupling is compatible with Flux and HyperStudy 2019.1 and later versions.
- This command Generate component for HyperStudy coupling replaces the previous command Generate component for GOT-It coupling.
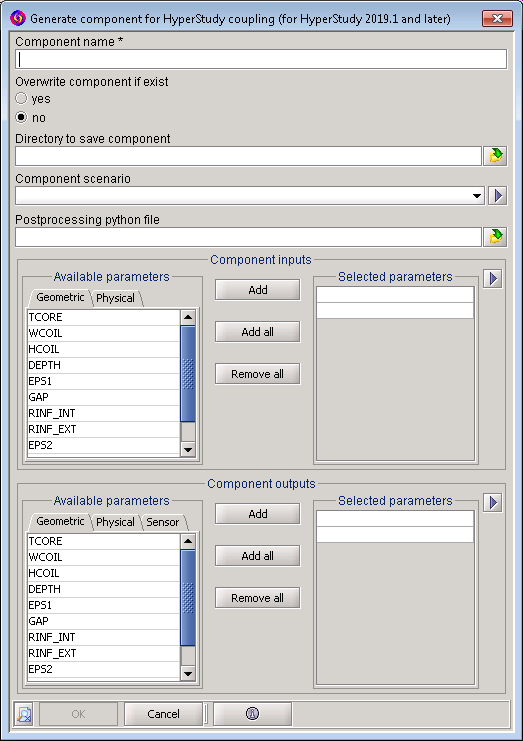
- Define the name of the component
For example: 4HST
- Choose to overwrite the component or not, if already existing
- Optionally, choose the directory to save the component
If nothing is selected, this directory will be the current working directory
- Optionally, select a scenarioNote: In transient applications, selecting a scenario is mandatory.
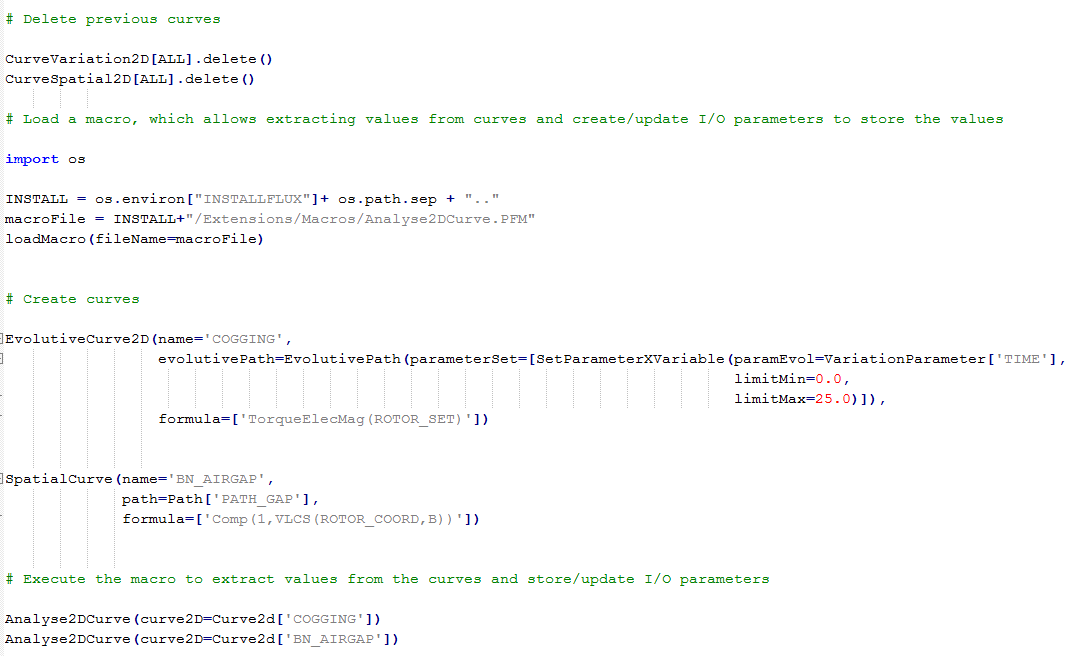
- Optionally, select a postprocessing python file in order to automatically
postprocess resultsNote: In transient applications, it is generally used to manage curves (extract values).Here is an example of a postprocessing python file:
- Optionally, select a preprocessing python file which contains some commands which
can be run before launching the optimizationWarning: The possibility to run pre-processing commands before optimization is reserved for advanced users. The user must be vigilant in the construction of this python file. This option is to be used with caution.
- Select the input parameters:
- Geometric parameters (defined with a numerical value, not a formula)
- Physical parameters: I/O parameters (controlled by a scenario, not a formula)
Note: Only the parameters available for selection are displayed.HyperStudy will change the values of the selected input parameters (ranges are specified in HyperStudy) in order to explore the design (for instance, find the optimal values with respect to specific goals and constraints).
- Select the output parameters:
- Geometric parameters
- Physical parameters: I/O parameters
- Sensors
Note: Only the parameters available for selection are displayed.HyperStudy will recover automatically the results of the selected output parameters.
- Click on the OK button
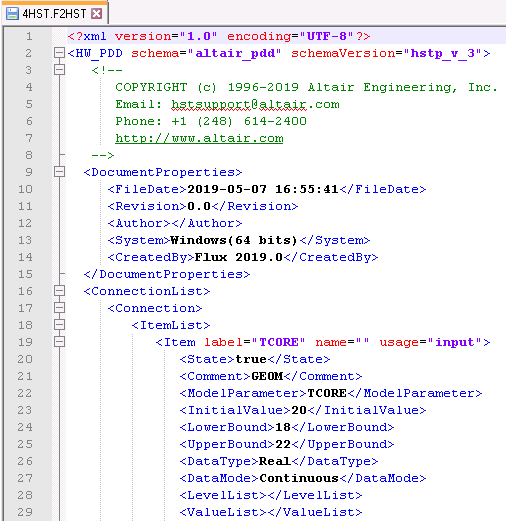
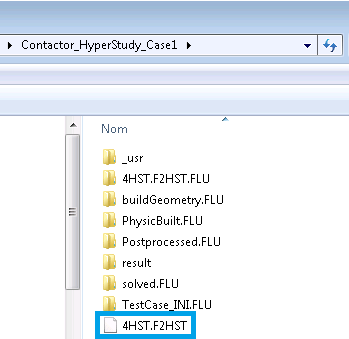
- the Flux project (which has been duplicated): *.F2HST.FLU
- the link file (which has been created): *.F2HST
- 4HST.F2HST.FLU: duplicated Flux project
- 4HST.F2HST: link file
The memory values specified manually or by default in the Flux Supervisor options are written in the F2HST file when generating the component for HyperStudy from Flux. By default, HyperStudy will launch Flux with these values. In the dynamic memory mode, the memories are put to the value "0" in the file and HyperStudy will launch Flux in dynamic memory.
Note that if you change the memory values in the Flux Supervisor options, after generating the component, the new values will not be communicated to HyperStudy.
In HyperStudy
i.e. on Windows: <Flux installation directory>\flux\Flux\Bin\prg\win64\Flux.exe
(by default <Flux installation directory>=C:\Program Files\Altair\2019 if Flux 2019.1 was installed on Windows with an administrator account),
 |
 |
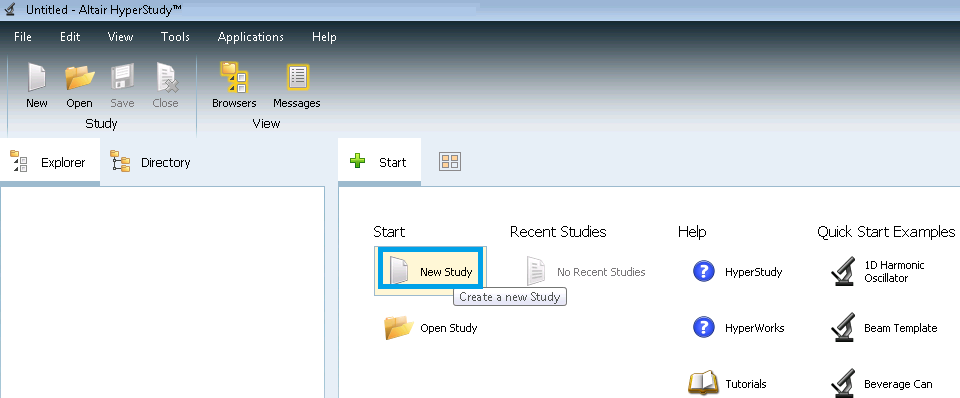
In HyperStudy, start a new study and create a connection with Flux model:
-
- To start a new study:
Click on
- In the Location field, select the directory in which the Flux project *.F2HST.FLU and the link file *.F2HST are located
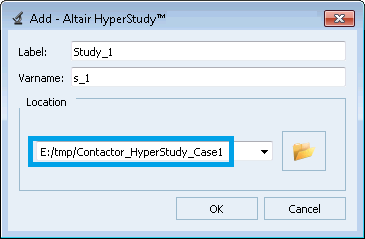
The new study is created:
- To start a new study:
- To create a connection with Flux model, there are two possibilities:
- A possibility is:
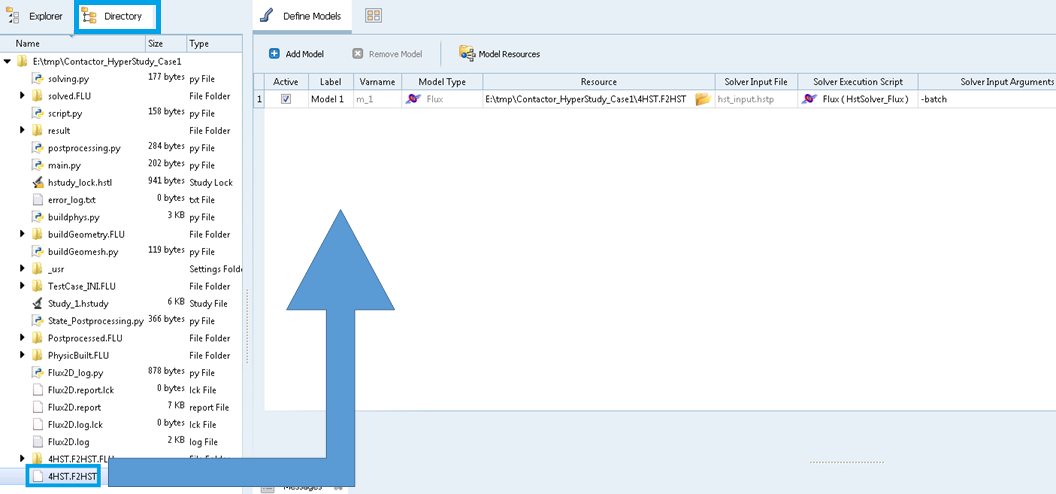
Click on Directory, and Drag & Drop the F2HST file into the graphical interface.
It creates automatically a Flux model and populates the fields.
- Another possibility is:
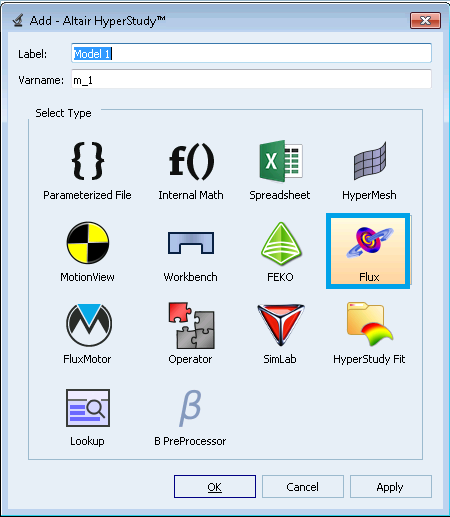
- Click on
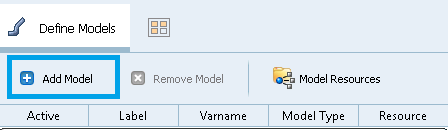
-
- Select Flux
- Click on the OK button
-
- In the Resource field:
Click on


- Browse the directory and select the F2HST
file
- In the Resource field:
- Click on
- A possibility is:
- Whatever the creation option used, once the Flux model has been added:
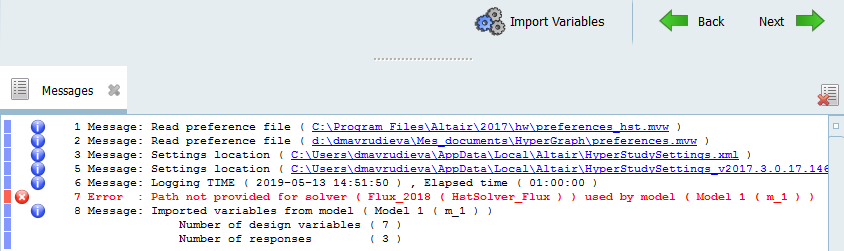
Click on the Import Variables button (at the bottom right)
Your screen should look like this: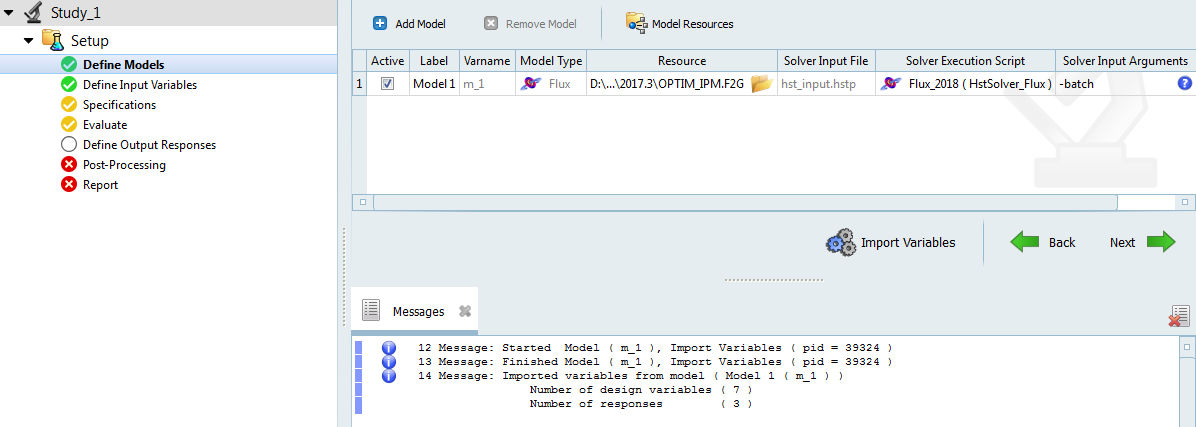
In this case, please refer to the Attention at the beginning of this section In HyperStudy.
For more details regarding HyperStudy use, please refer to HyperStudy user guide.