Blank Fit Analysis
Calculate the best-fit and standard blank shape around the perimeter of the initial blank shape.
-
On the Feasibility tab, Fit icon, click Run Blank
Fit.

The flattened blank from the last run executed is loaded into the session. If desired, you can measure the flattened blank with the Measure tool
 and provide input into the Blank Fit
dialog as required.
and provide input into the Blank Fit
dialog as required. -
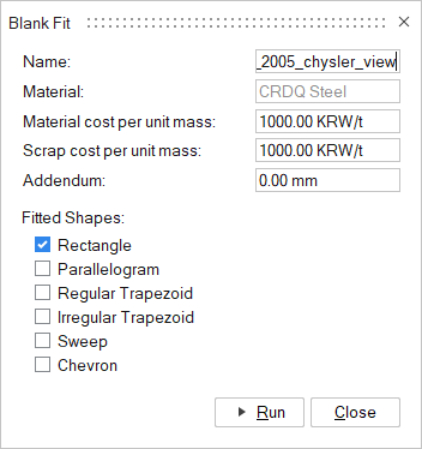
In the Blank Fit dialog, define blank fit settings and
click Run.
- Enter a run name.
- Enter a material and scrap cost per unit mass.
- Enter an addendum (extra material on the periphery of the blank shape for holding the blank in place during the stamping process).
- Select fitted shapes to use when fitting the blank.
After the run has successfully completed, view the results of the blank fit.
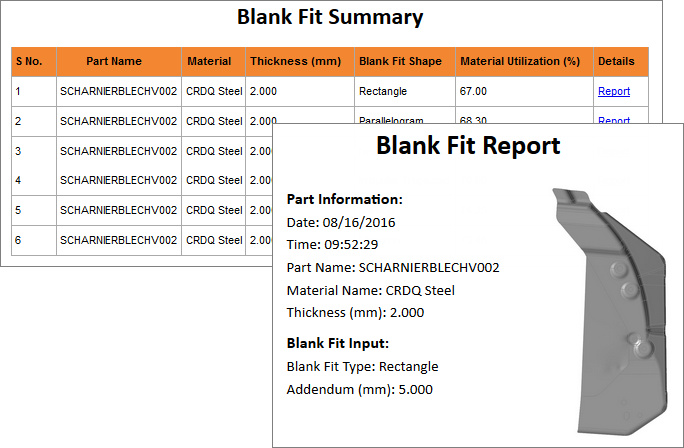
View Blank Fit Summary
View a summary of a blank fit.
-
From the Feasibility ribbon, Blanks tools, Fit tool group, click the Show Blank Fit tool.

A summary of the blank fit opens in your browser.By default, the most recent blank fit opens. View the results of a different blank fit by selecting a run in the Blank Fit Status or Blank Fit History dialogs.
-
In the Blank Fit Summary table, click Report to view a detailed blank report for each blank
shape.
Blank Fit Status
View the status of the current run, as well runs for the current model that have not yet been viewed. To see all past runs, you need to view the run history.
-
Hover over the Fit icon, then click Blank
Fit Status.

The run status is displayed.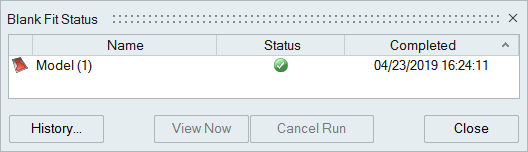
-
When the run is complete, review its status.
Status Description Note 
The run completed successfully. This is also indicated by a green flag above the Fit icon. You can click the green flag to display the results.

The run was incomplete. Some but not all of the result types may be available. You should run a new analysis to generate complete results.

The run failed and no meaningful results are available. This is also indicated by a red flag above the Fit icon.
Blank Fit History
View, sort, open, and delete past runs for the current and previous models.
-
On the Fit icon, click Run
History.

The run history is displayed.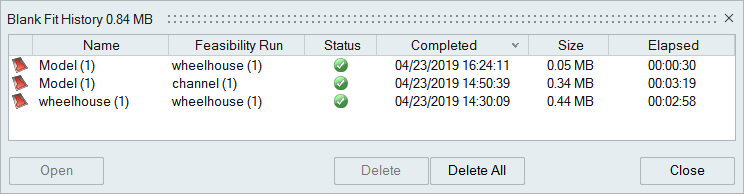
-
Review the status of the run.
Status Description Note The run completed successfully. The run was incomplete. Some but not all of the result types may be available. You should run a new analysis to generate complete results.
The run failed and no meaningful results are available.
- The default directory where the run history is stored can be changed in the Preferences under Run Options.
- By default, you will receive a notification when the run history exceeds a certain size. You can change the size limit or turn off the notification in the Preferences under Run Options.