Altair Units
Altair provides a cloud-based license server solution known as Altair Units. This allows customers to use either/or a traditional on-premise license server or an Altair server managed via Altair One. Altair One is Altair’s global customer portal.
Altair Units is a cloud-based licensing system. As long as you have internet access, the units can be used to run all applications. There is no VPN necessary.
A client computer and/or individual user is authorized to use an accounts license. Typically, an individual user will authorize their own machine and user/login account. A single machine that is shared by multiple users may either have multiple authorizations for each user or if done by an admin, a single machine can have ALL users authorized.
The primary differences between these two authorization schemes are for accounting and management purposes. If an individual authorizes a machine, that machine may be de-authorized just for that individual, leaving other users authorized. When the machine uses a ‘system wide’ authorization, the entire machine may be de-authorized by simply de-authorizing the system wide authorization.
The primary use case for a system wide authorization is for compute clusters. It is not known at authorization time what machines in the cluster a particular user may end up on at run-time, and so on. So, the admin authorizes the entire machine for all users. The usage .log files will still record the username, but the authorization will be for all users.
Set up the Altair Units System
Once you have a valid Altair One account, you should be able to see the Altair Units from the dashboard available from the Manage License menu in Altair One. There are both administrative functions (if you are one of your company's designated admins) and user functions. This section describes the typical user functions. The two main functions are authorizing a machine to use Altair Units and checking on current usage.
In order to utilize your purchased units, each machine you wish to use your units from must be authorized prior to running any client applications. This can be done in two different ways. The default method to access an Altair license is directly from the application License Setup dialog available in HyperWorks, the Inspire Suite, SimLab, and SimSolid. For other applications, the Altair License Utility is used.
Access Altair Units from the License Setup Dialog
-
Open the License Setup dialog using one of the following options:
- If you have configured your license, navigate to .
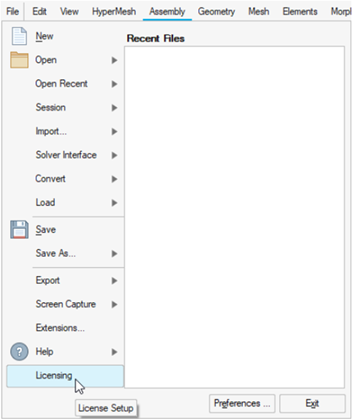
Figure 1. - If you have not configured your license, the License Setup dialog shown in the next step displays automatically when you start the application.
- If you have configured your license, navigate to .
-
In the License Setup dialog, enter your Altair One
credentials (Username and
Password) under the Hosted on Altair One section.
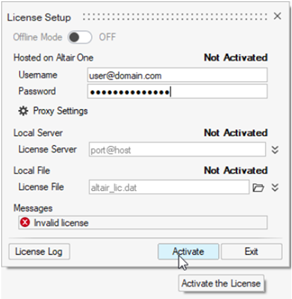
Figure 2. License Setup Dialog
Access Altair Units from the Altair License Utility
-
Navigate to the tab.
Figure 3. -
In the top-right corner, click Generate Auth Code.

Figure 4. -
Click the Copy icon.
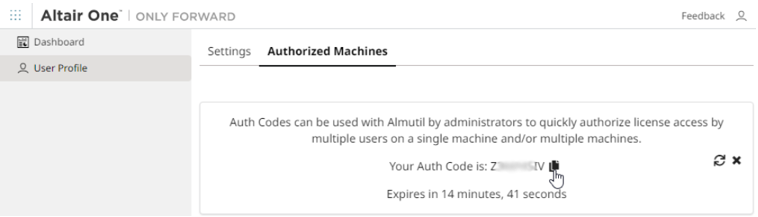
Figure 5. -
Click Authorize.
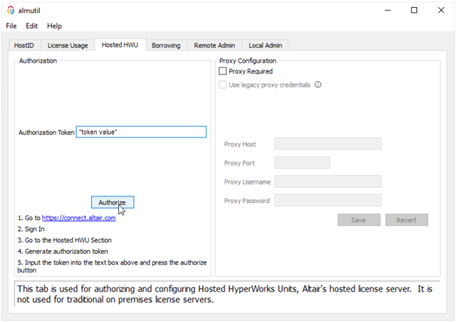
Figure 6.A message displays that the authorization was successful.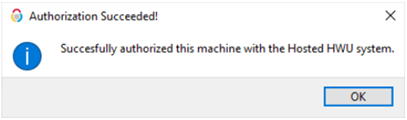
Figure 7.
Altair Units System Advanced Settings
There are many advanced settings that may be useful for Altair Units. Many consist of setting environment variables to change behavior or running almutil to change settings.
If you have a shared home directory on multiple machines, you may have multiple config files. Each one will be in a separate directory under .altair_licensing in your home directory.
Location of the Altair Units config file on supported platforms is as follows:
- Platform
- Default Location
- Windows
- C:\Users\<USERNAME>\AppData\.altiar_licensing\<HOSTNAME>\altair_hostedhwu.cfg
- Linux
- ~/.altair_licensing/<HOSTNAME>/altair_hostedhwu.cfg