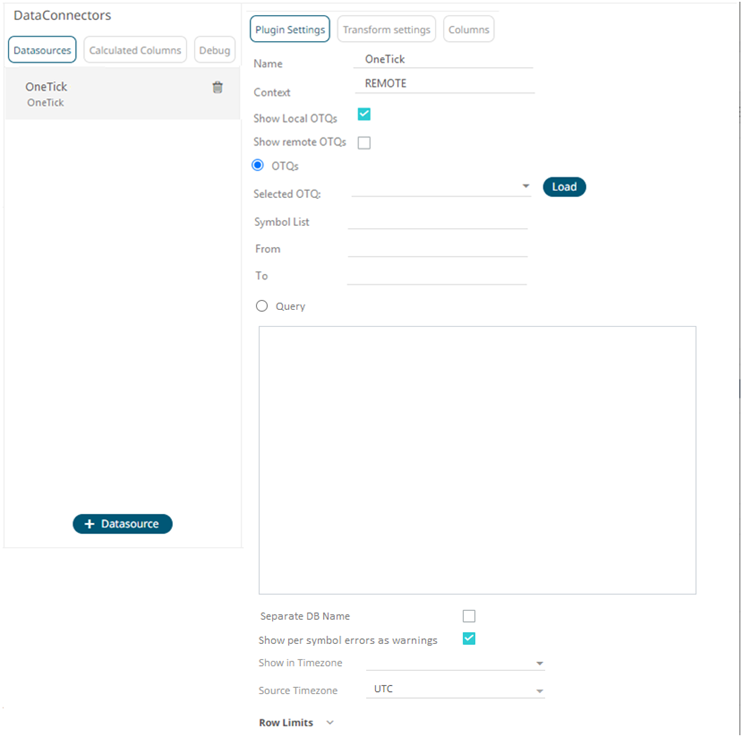
OneTick
The OneTick connector allows connection to OneMarketData OneTick tick history databases on a polled basis. In general, it is used to retrieve conflated time series data sets. The connector supports either:
q Execution of a specified OTQ
q Execution of a specified parameterized OTQ
q Execution of a custom SQL Query
Steps:
1. Select OneTick from the Data Sources pane. The OneTick Settings pane and the retrieved OneTick source are displayed.

2. Enter the Name of the OneTick
data source, then click  .
.
3. Enter the Context (for example, REMOTE).
4. You can either check:
· Show Local OTQs box to display the local OTQs in the Selected OTQ drop-down list.
· Show Remote OTQs box to display the remote OTQs in the Selected OTQ drop-down list.
An OTQ can be specified for execution, or a custom SQL query can be executed, through selection of the appropriate radio button:
· OTQs
· Query
5. Click Load  to
populate the Selected OTQ
drop-down list. Select an OTQ.
The list of input parameters that the OTQ expects is displayed. In addition, the basic SQL query is generated allowing the OTQ to be executed and the input parameters specific to the selected OTQ. The following are generic to all OTQs:
· Symbol List
|
NOTE |
This property will accept comma-separated values either hardwired or parameterized. |
· From
· To
These add additional filter criteria such as symbol, and time window onto the basic OTQ.
6 Check the Separate DB Name box to generate a separate field for the database name.
7. Check the Show per symbol errors as warnings box to proceed with warnings in the log if symbol errors are returned.
The result is a fully generated OneTick SQL query. This can be edited as required.
8 Date/Time values of output data and Date/Time inputs, where supported, is by default unchanged.
You can opt to define the Show in Timezone and Source Timezone settings.
9. Set the row limit of the data set.
10 Tap the Preview Selected Data Source slider to turn it on.
11 Click  to display the data preview.


