


|
Creating RabbitMQ Input Data Source
The RabbitMQ connector allows connection to RabbitMQ’s message bus on a real-time streaming basis. Specifically, the connector allows Panopticon Streams to subscribe to XML, JSON, Text or FIX based messages that are published on particular topics.
Steps:
1. In the New Data Source page, select Input > RabbitMQ in the Connector drop-down list.
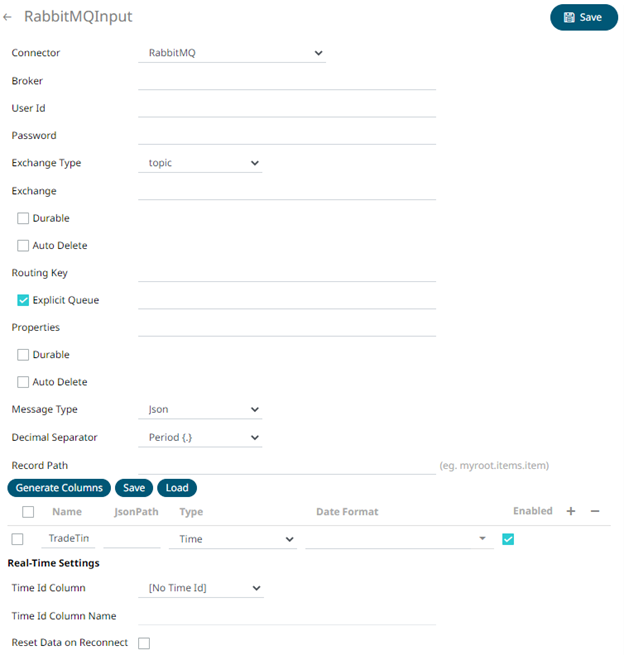
2. Enter the connection details including:
|
Property |
Description |
|
Broker |
The location of the message broker. |
|
User Id |
The user Id that will be used to connect to RabbitMQ. |
|
Password |
The password that will be used to connect to RabbitMQ. |
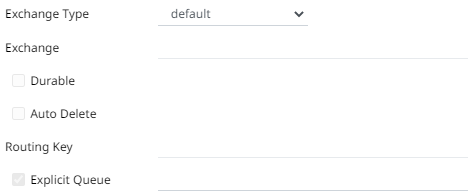
3. Select any of the following Exchange Types:
|
Exchange Type |
Description |
|
Default |
A direct exchange with no name that is pre-declared by the broker. Selecting this exchange type disables the Exchange section (Exchange and Routing Key properties).
|
|
Fanout |
Broadcasts all of the messages it receives to all of the queues it knows and the routing key is ignored (the Routing Key field is disabled). |
|
Direct |
Delivers messages to queues based on a message routing key. It is ideal for the unicast routing of messages, although it can be used for multicast routing as well. |
|
Topic |
A message sent with a particular routing key will be delivered to all of the queues that are bound with a matching binding key. |
|
Headers |
Exchanges routed based on arguments containing headers and optional values. |
4. Depending on the selected Exchange Type, select or define the following:
|
Exchange Type Property |
Description |
|
Exchange |
Name of the exchange. |
|
Durable |
Enable so the exchange can survive a broker restart. |
|
Auto Delete |
Enable so the exchange is deleted when the last queue is unbound from it. |
|
Routing Key |
The routing key used to deliver messages to queues. |
|
Headers |
This field is only available when the message type is Header. Binding a queue to a Headers exchange is possible using more than one header for matching. Setting x-match to any, means just one matching value is sufficient. Setting it to all means that all values must match. Default is x-match=all. |
5. Check the Explicit Queue box and enter the custom queue name. Then enter or enable the following properties:
|
Queue Property |
Description |
|
Properties |
The custom queue property. |
|
Durable |
Enable so the queue can survive a broker restart. |
|
Auto Delete |
Enable so the queue that had the least consumer will be deleted when that connection closes. |
6. Select the Message Type.
7. Select either the period (.) or comma (,) as the Decimal Separator.
|
NOTE |
Prepend 'default:' for the elements falling under default namespace.
|
8. Click  to
the fetch the schema based on the connection details. Consequently,
the list of columns with the data type found from inspecting the first
‘n’ rows of the input data source is populated and the Save button
is enabled.
to
the fetch the schema based on the connection details. Consequently,
the list of columns with the data type found from inspecting the first
‘n’ rows of the input data source is populated and the Save button
is enabled.
9. You can also opt to load or save a copy of the column definition.
10. You can opt to click
 to add columns to the RabbitMQ
connection that represent sections of the message. Then enter or select:
to add columns to the RabbitMQ
connection that represent sections of the message. Then enter or select:
|
Property |
Description |
|
Name |
The column name of the source schema. |
|
Fix Tag/Json Path/Text Column Index/Xpath |
The Fix Tag/Json Path/Text Column Index/Xpath of the source schema. |
|
Type |
The data type of the column. Can be a Text, Numeric, or Time |
|
Date Format |
The format when the data type is Time. NOTE: To parse and format times with higher than millisecond precision, the format string needs to end with a period followed by sequence of upper case S. There can be no additional characters following them. For example: yyyy-MM-dd HH:mm:ss.SSSSSS |
|
Filter |
Defined parameters that can be used as filter. Only available for JSON, Text, and XML message types. |
|
Enabled |
Determines whether the message field should be processed. |
To
delete a column, check its  or
all the column entries, check the topmost ,
then click
or
all the column entries, check the topmost ,
then click  .
.
11. Define the Real-time Settings.
13. Click  . The
new data source is added in the Data Sources list.
. The
new data source is added in the Data Sources list.