Submit a Job by Selecting an Input File
Submit a job by simply selecting a job input file and choosing a solver or profile.
-
Perform one of the following options:
- Using the file system tree on the left, navigate to where your job input files are stored.
- Use the search box to narrow your search for the required file.
- If you know the job input file folder path, then type the folder path in
the location breadcrumbs available at the top of the file list view.

Tip: If you are using this folder or file frequently, then click to bookmark this folder or file
navigation path.
to bookmark this folder or file
navigation path. -
From the context menu, select Process With.
Solvers or profiles suffixed with "GUI" indicate that additional information is required to submit the job. In this case, a Job Submission Form is displayed so that the information can be supplied.Tip: Select All Profiles to set a default solver or profile for the input file type (based on the file extension) or to force the solver's job submission form to be displayed so that it can be customized.A list of solvers and profiles specific to the file type of the job input file are displayed.
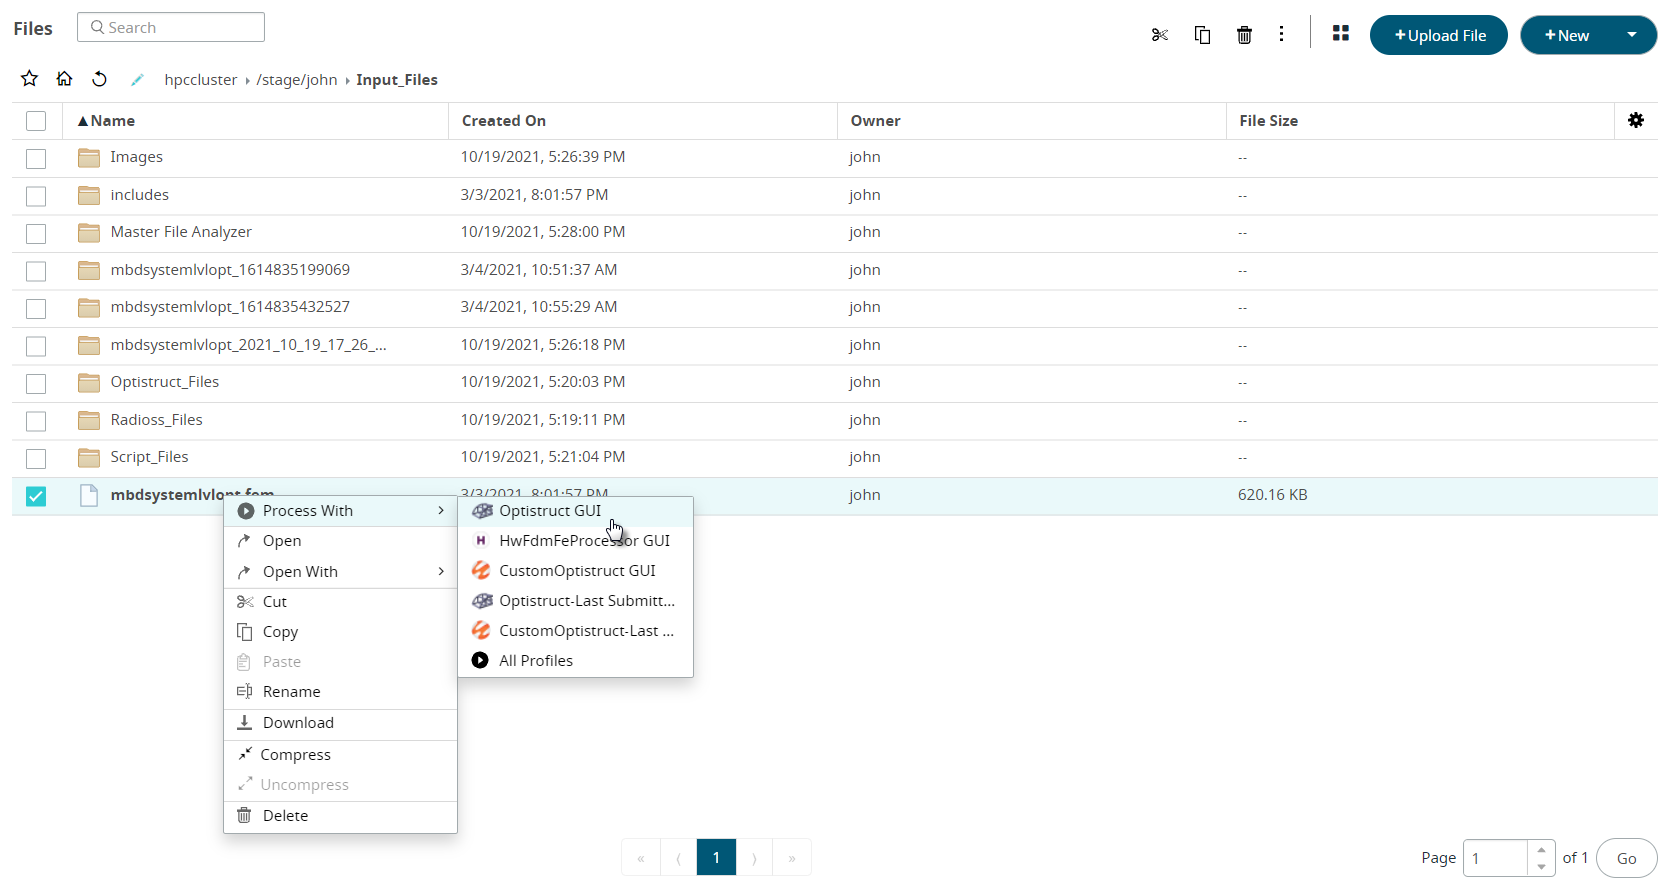
Figure 1. Solvers and Job Profiles Specific to the Job Input File Type - Select a solver or job profile.
If additional information is necessary to submit the job, then a job submission form is displayed. Otherwise, the job is instantly submitted.A job submission form is displayed based on the selected solver or profile containing the required application arguments for the application. Values for these arguments must be entered for the job to be successfully submitted. Each application will have its own unique arguments.

Figure 2. Job Submission Form
Your job will initially be placed into a queue awaiting execution. Jobs can be monitored for queuing, execution, and completion, and the job results viewed via the Jobs tab.