Submit a job by providing the required solver job arguments.
Populate a job submission form that contains the unique arguments necessary to submit
a job for a solver.
Click the Jobs tab located in the upper left-hand of the
page.
A list of applications are displayed at the top of the Job Monitoring
page. Figure 1. List of Applications/Solvers
Tip: Click to view the other applications/solvers.
The application name displayed is based on the
ApplicationName defined in the application definition
input file.
Click an application.
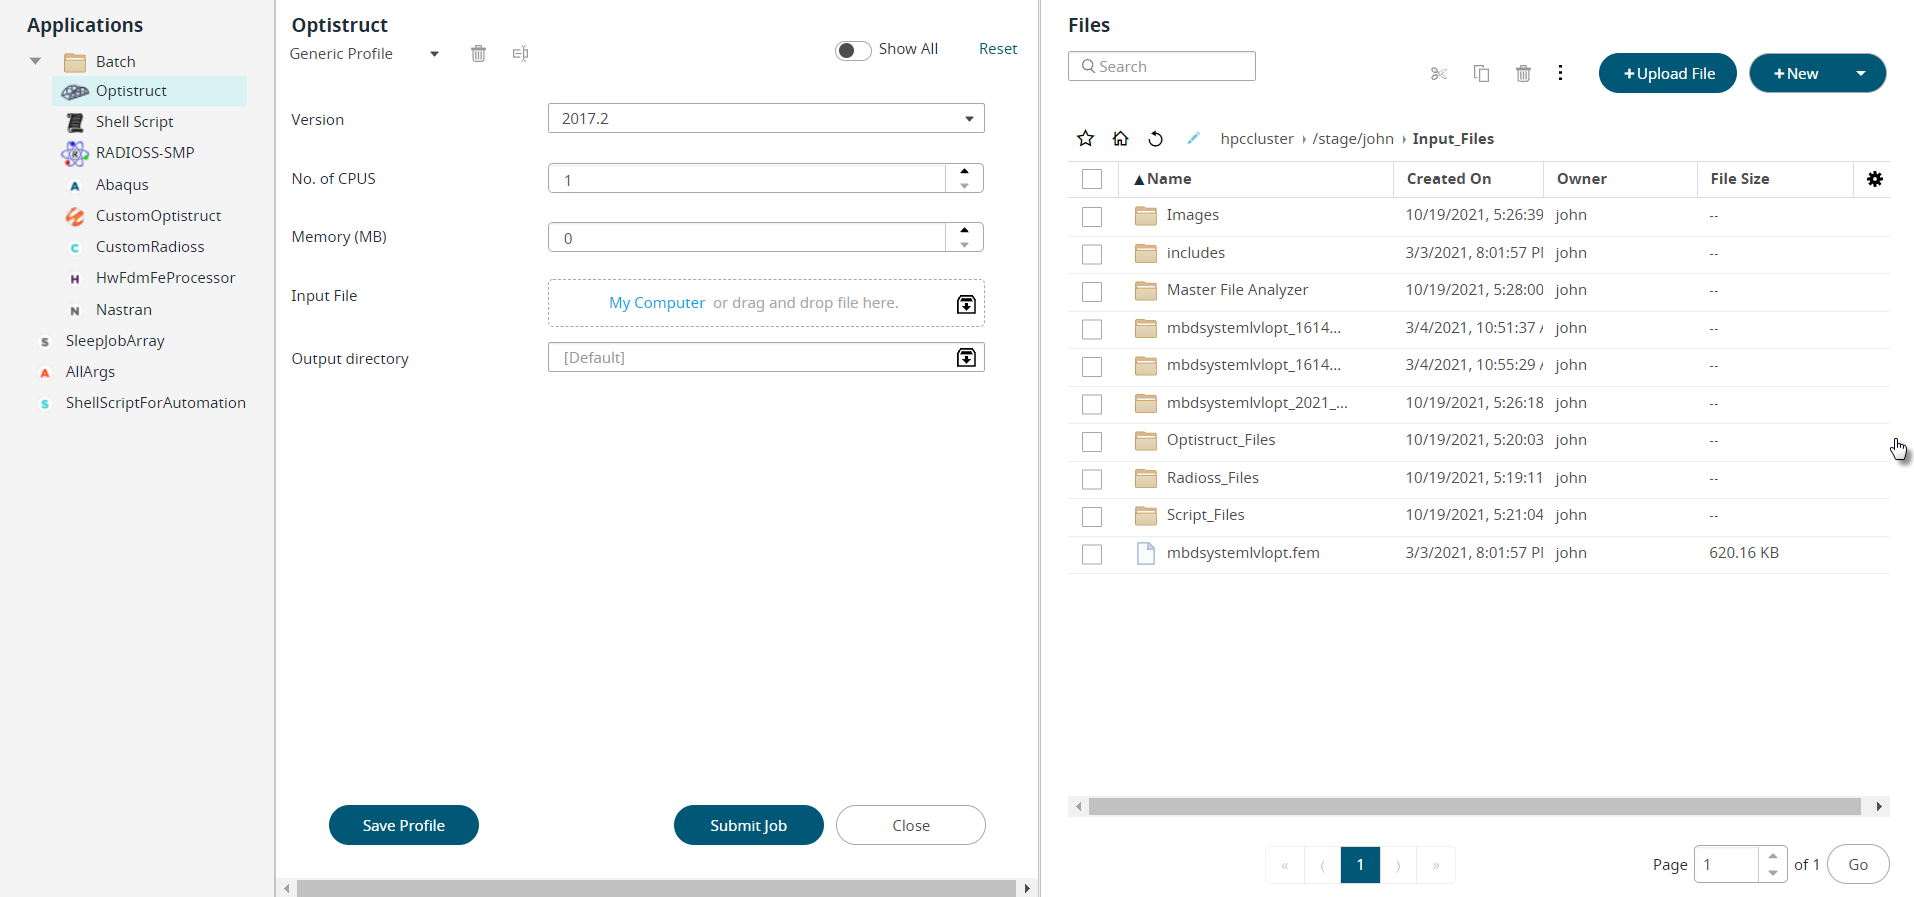
A job submission form is displayed. Figure 2. Job Submission Form
Fill in the required application arguments:
Select the Server from the drop-down list.
Note: The Server field will be displayed only if
more than one Server Cluster is registered.
The applications and profiles displayed on the left are those that are
installed on the selected HPC complex.
Select the version of the solver from the drop-down list.
Enter the number of CPUs and Memory in MB required to run the
job.
Select an input file.
If a Master File is selected as an input file, then the include files
will be listed by default.
Enter the Output Directory.
By default, the output directory is created in the same location where
the input files are located.
Tip: Click Save Profile to create a
customized profile with the pre-populated arguments.
Click Submit Job.
The job is submitted and a notification is displayed providing the
status of the job.
Tip: Click on the Job ID link provided in the
notification to view the job status.
A folder is created in the job output directory. It is named
based on the job name and job submission time. Job result files are written to this
folder. While the job is running results files are maintained on the remote PAS server.
These files can be displayed by viewing the contents of the Running Folder tab. Once the
job completes, the job results files are written to the Output tab.
Your job will initially be placed into a queue awaiting execution. Jobs can be monitored for queuing,
execution, and completion, and the job results viewed via the Jobs tab.

 to view the other applications/solvers. The application name displayed is based on the ApplicationName defined in the application definition input file.