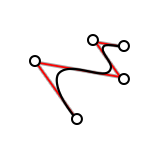
NURBS Curve
Create a NURBS curve, which is a free-form curve.
-
On the Geometry ribbon, select the
NURBS tool.

Note: The tool may be hidden in a dropdown menu. To access the dropdown menu, you can do one of the following:- Click and hold the currently displayed tool (Blend, Helix Curve, Extend Curve, Face Curve, or Divide).
- Select
 at the lower right corner of the
currently displayed tool (Blend, Helix Curve, Extend Curve, Face
Curve, or Divide).
- Optional:
In the guide bar, select a Degree.
Tip: Enter a higher degree for a smoother curvature.Note: The degree of the curve depends on the number of control points. For example, a Degree 3 curve would need at least 4 (3+1) control points.
-
To place the control points, click existing vertices, sketch points, or
reference points.
Note: To edit after creation, right-click the NURBS curve in the History Browser (F6), and then select Edit.
-
To edit the NURBS curve, adjust the control points, degree, and other
options.
Note: To extend the NURBS curve, click the plus sign near an endpoint. To insert a control point within the NURBS curve, click a plus sign on the control polygon (dotted gray line).
In the microdialog, you have the following options:
Option Description Smooth Close the curve smoothly. Cusp Close the curve with a sharp corner. Open Open the curve at a selected control point. Maintain/Break Snap Reference - Link the control point to a snap point. The shape of the NURBS curve will change based on the position of the snap point.
- Or break the link between the control point and the snap point.
X Enter the x-coordinate of the control point. Y Enter the y-coordinate of the control point. Z Enter the z-coordinate of the control point. Weight Add weight to a control point to give it greater influence over the shape of the curve. Reset Clear all selected features and restore the default values. - Right-click and mouse through the check mark to exit, or double-right-click.