Create and Edit Lines
Use the Create Lines tool to draw free lines for geometry construction and to generate meaningful snap locations to be used by other tools.
-
From the Geometry ribbon, click the arrow next to the
Create tool set, then select
Create Lines.
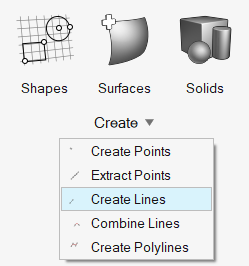
Figure 1.
Tip:
- Draw lines that are perpendicular or tangent to other lines by snapping to
predefined points such as end, middle, center, and intersection points. You
can also snap to points along the x, y, and z axis.
Dashed lines hint to the location of snap points on surfaces and lines. Hovering over snap points along the x, y, and z axes matches the line's color with the color of the corresponding axes in the lower left corner of the modeling window.
- Hold Ctrl to create multiple chained
lines.Note: Even though the lines are connected by their position, each segment will still be an independent line entity.
- Copying and pasting surface edges generates free lines and organizes them in the same component.