Tutorial: Simulating a Guitar Amplifier Signal
Learn how to define a circuit block and run a transient and frequency-domain analysis for a guitar amplifier.
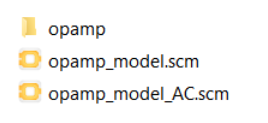
Files for This Tutorial
Amplifier directory.
Overview of a Guitar Amplification Problem
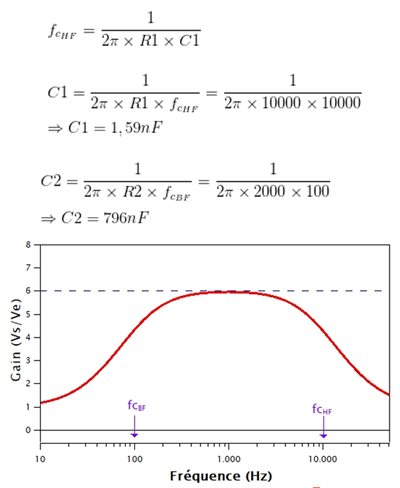
The following is a guitar amplification problem, which is presented here courtesy of
https://fais-tes-effets-guitare.com/conception-dune-pedale-boost-a-ampli-op/:

This tutorial shows you how to address the amplification problem by performing both a
transient and AC simulation inside of Activate given the following:
- Circuit model: opamp_model.scm
- Circuit model: opamp_model_AC.scm
- Spice Library: opamp
The opamp Spice library contains the following block definition and schematic used in the circuit models.
Opamp.cir:* .SUBCKT OPAMP1 1 2 6 * @ACTPO: 3 * INPUT IMPEDANCE RIN 1 2 10MEG * GAIN BW PRODUCT = 10MHZ * DC GAIN (100K) AND POLE 1 (100HZ) EGAIN 3 0 1 2 100K RP1 3 4 1K CP1 4 0 1.5915UF * OUTPUT BUFFER AND RESISTANCE EBUFFER 5 0 4 0 1 ROUT 5 6 10 .ENDSOPAMP1.svg:
Import the Opamp Block
-
Copy
<installation_directory>/tutorial_models/amplifier
into a working directory.
-
In the OML Command Window, enter the following:
vssImportSpiceLibrary command; path to the opamp folder;
and path to a designated folder that the import command will use to generate
files for the library:
vssImportSpiceLibrary('<working_directory>/opamp/', 'c:/temp’)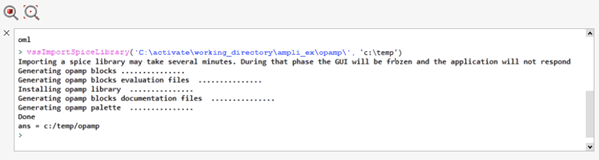
A new palette with the OPAMP1 block is created: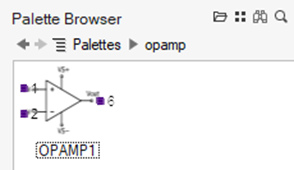
Open the Amplifier Model
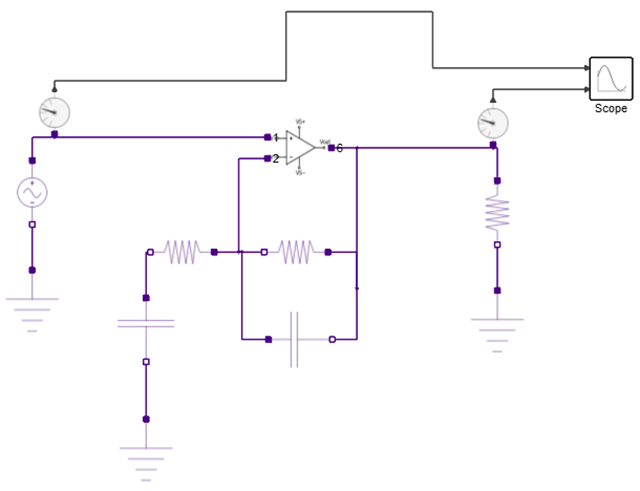
Select .
The model opens with the imported OPAMP1 block.
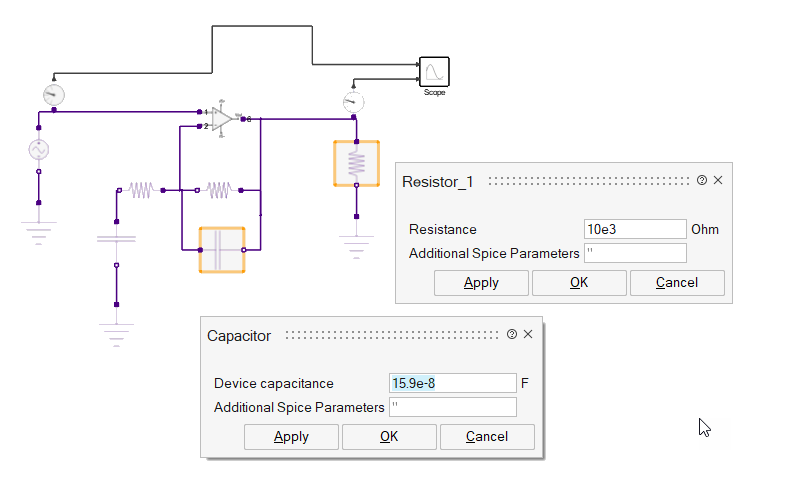
Run a Transient Analysis
-
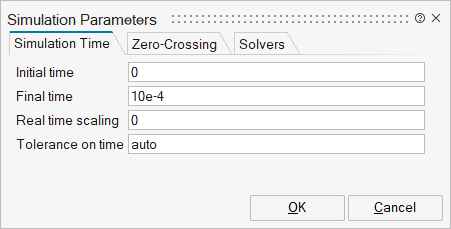
For the simulation setup, keep the default values.
-
On the ribbon, select Run.

-
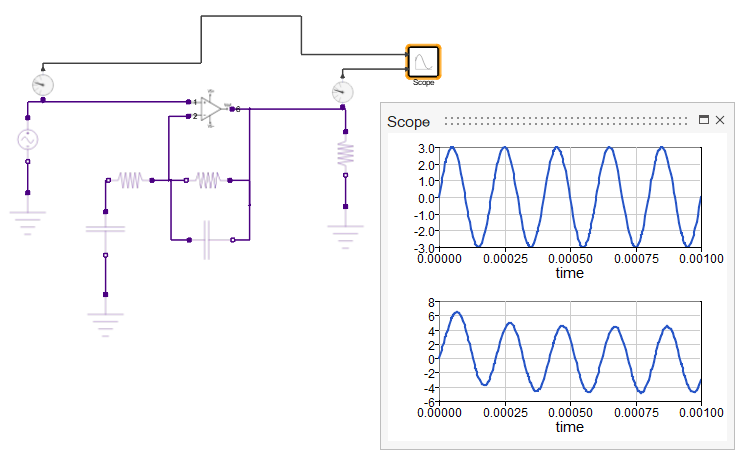
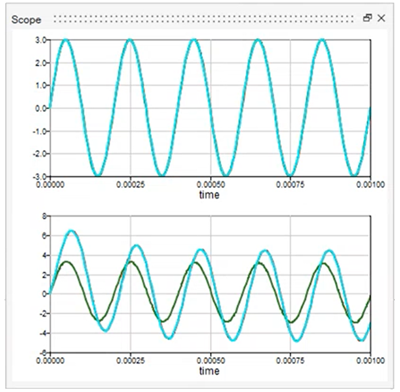
Select the Scope block, then view the results.
The Scope shows the input and output of the amplifier.
-
Experiment and change the parameter values in the components such as the
Resistor and Capacitor.
-
Run the simulation again and observe the changes in the input and output.
Set Up a Frequency Analysis
-
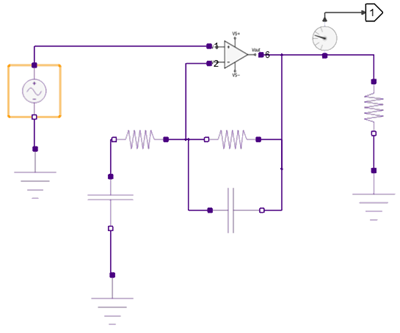
Double-click the SuperBlock.
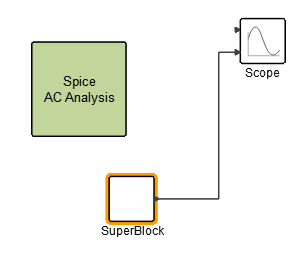 The SuperBlock has the same schematic as the transient model, opamp_model.scm, but with a potential sensor and additional output.
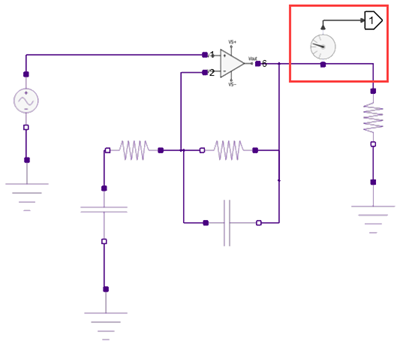
-
Select the VoltageSin block.
This is the block that provides the small signal source for the circuit when the AC analysis is launched.
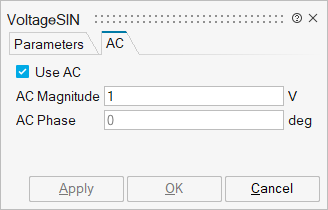
-
Select the AC tab and the Use AC
option.
Review the parameters and keep the default values.
-
Double-click the Spice AC Analysis block.
 Note: The AC Analysis block is found in the palette.
 -
Review the setup for the AC analysis.
AC Analysis Parameter Description Block name Enter SuperBlock. This block specifies where the Spice circuit is defined for the AC analysis. Frequencies Method Select DEC, which defines the range of frequencies by the power of 10. Frequencies Range Enter: - Minimum frequencies = 10Hz
- Maximum frequencies = 10000 kHz
- Number of points to be computed per decade = 1000.
Results and Plots Enter: - Frequency Scale = Logarithmic
- Amplitude Scale = Linear
- Phase Results = Degrees
AC Analysis Enter: - Analysis at time = 0
Your setup should look like this: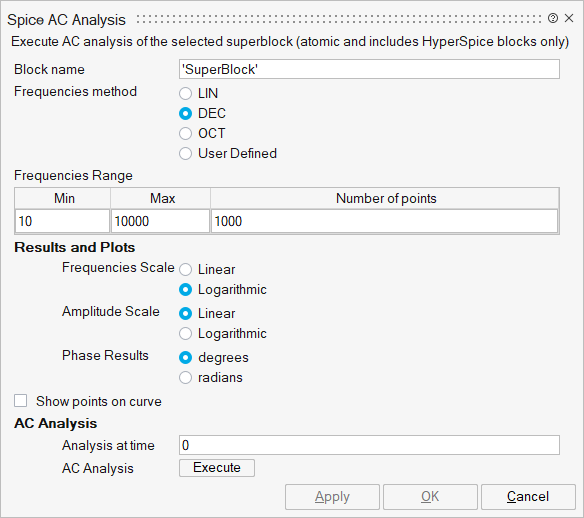
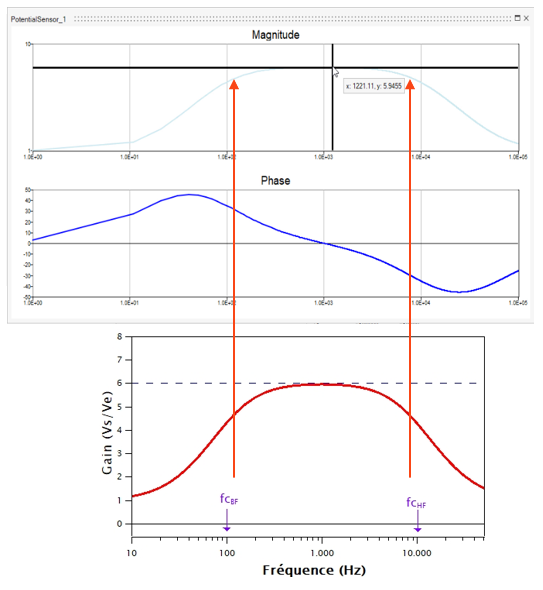
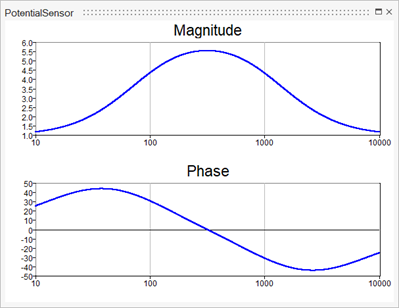
Review the Frequency Analysis Results
-
Review the frequency response of the amplifier signal.
The Scope block in the model shows the magnitue and phase of the potential sensor of the amplifier signal:
-
Experiment by modifying the component values and rerun the simulation.
Compare the results from the opamp_model_AC.scm in reference to the textbook example shown at the start of this tutorial: