Guide Bars
Guide bars guide you through a series of commands, required inputs, and options necessary to complete a workflow that is specific to a tool.
Guide bars consist of different parts such as a command or a drop-down menu with additional options. In addition, all guide bars have an action button on the far-right of the bar which executes the tool's primary function. You work through a guide bar from left to right, generally filling out options first on the left side of the guide bar, working your way through the workflow, until finally executing the tool function on the right side of the guide bar.
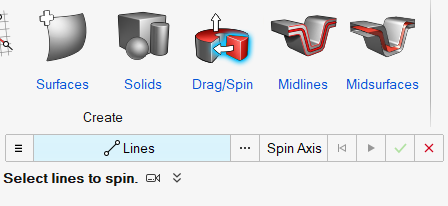
Figure 1.
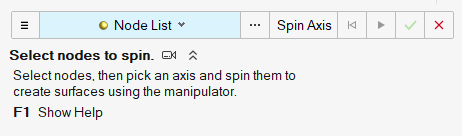
Figure 2.
Guide bars help to focus and streamline the work you are trying to accomplish with each tool.
Layout of a Guide Bar
Guide bars share a typical layout although the specific workflow of the guide bar will vary depending on the tool it is associated with.
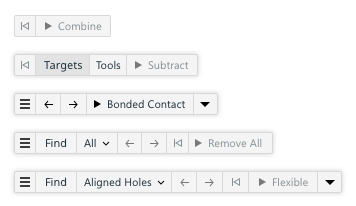
Figure 3.
Notice that the individual buttons vary somewhat, but the left-to-right workflow remains the same for all guide bar layouts.
Guide Bar Buttons
Guide bar buttons can vary depending on the tool they are associated with. This section outlines some of the most commonly found buttons on the guide bars.

Figure 4.
- Options - A menu which provides tool-specific controls or
defaults. This can include a number of things including but not limited to:
- Search criteria: Find Larger, Find Smaller, Find Similar (± 5%), and Find Options. Selecting Find Options opens a dialog, where you define the minimum and maximum size of the feature to be found.
- Default selection filter types.
- Enabling automatic meshing, morphing, and other similar actions.
- Controlling various numerical defaults like mesh size, contact or connector search tolerances, and so on.
- Find - Finds and selects all instances of the feature on the selected object, based on the search criteria defined using the Options button.
- Filter - This drop-down menu allows you to select a feature to filter the search or change selection type filter.
- Go to Previous - Zooms in on each previous feature located by the search.
- Go to Next - Zooms in on each next feature located by the search.
- Clear Selection - Deselects (resets) all features.
- Apply
- OK
- Cancel