Input variables can be added to your study manually or imported.
Import Input Variables from HyperMesh or MotionView
Quickly add input variables to your model by importing them from a HyperMesh or MotionView
session.
In the Define Models step, click Import Variables.
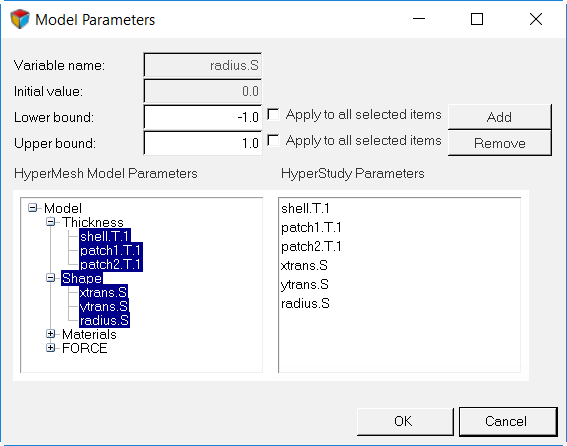
The Model Parameters dialog opens.
Select the parameter(s) to add as input variables from the panel on the
left.
Note: For HyperMesh models, you can edit the upper
and lower bounds of the input variables during this step.
Click Add.
The parameters you selected for definition as input variables are
appended to the panel on the right.
Click OK (HyperMesh) or Done (MotionView).
The model parameters that were appended to the
panel on the right are added to the list of input variables in the Define Input
Variables step. Each model parameter is associated with an input variable. Figure 1. HyperMeshModel Parameter Dialog
Import Input Variables and Output Responses from Excel Spreadsheets
Quickly add input variables to your model by importing them from an Excel
spreadsheet.
Before you begin importing
input variables from an Excel spreadsheet, it is import that the data in your
spreadsheet is formatted correctly. For more information, refer to the Usability
Characteristics section in Spreadsheet Model.
In the Define Models step, click Import Variables.
The Excel spreadsheet opens.
Select input variables.
In the Excel dialog, click
Yes to begin selecting input variables.
The Excel - HyperStudy Input Selector
dialog opens.
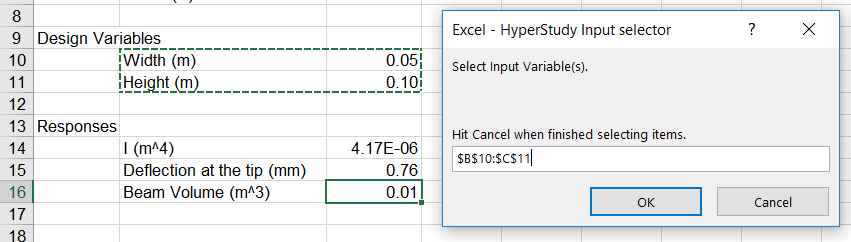
In the spreadsheet, select the input variable's value and label
cells.
Note: You can select an input variable's value and label in two
consecutive rows or two consecutive columns.
The selected cells display in the Excel - HyperStudy
Input Selector dialog.
Click OK to import the selected input
variables.
To continue selecting input variables in other areas of the
spreadsheet, repeat steps 2.b and 2.c.
Click Cancel in the Excel - HyperStudy
Input Selector dialog to stop selecting input
variables.
Figure 2.
Select output responses.
In the Excel dialog, click
Yes to begin selecting output
responses.
The Excel - HyperStudy Input Selector
dialog opens.
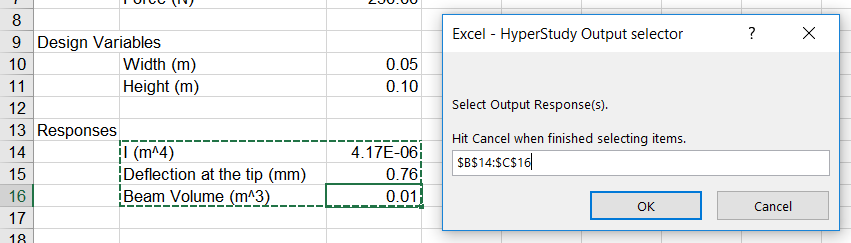
In the spreadsheet, select the output responses' value and label
cells.
Note: You can select an output responses' value and label in two
consecutive rows or two consecutive columns.
The selected cells display in the Excel - HyperStudy
Input Selector dialog.
Click OK to import the selected output
responses.
To continue selecting output responses in other areas of the
spreadsheet, repeat steps 3.b and 3.c.
Click Cancel in the Excel - HyperStudy
Input Selector dialog to stop selecting output
responses.
Figure 3.
The imported input variables
are added to the list of input variables in the Define Input Variables step, and the
imported output responses are added to the list of output responses in the Define Output
Responses step.
Create Input Variables
Manually create input variables in HyperStudy.
In the Define Input Variables step, click Add Input
Variable.
A new input variable is created and added to the list of input
variables.
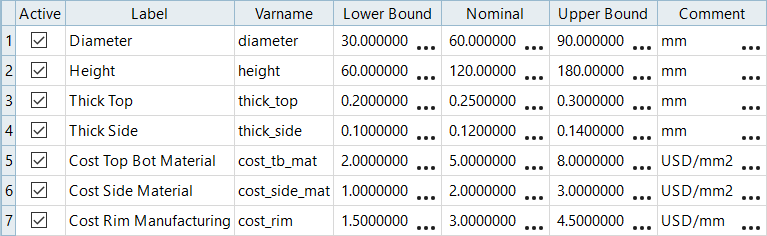
Define the input variable by modifying its corresponding cells in the work
area.
Enter a label.
Specify a lower, nominal, and upper bound.
Optional: Change the data type, mode, distribution role, and so on from the Modes
and Distributions tabs.
Figure 4.
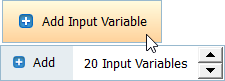
Tip: Create multiple input variables simultaneously by left-clicking and
holding the mouse button on Add Input Variable. In the
pop-up, enter the number of input variables to add and press
Enter. Figure 5.
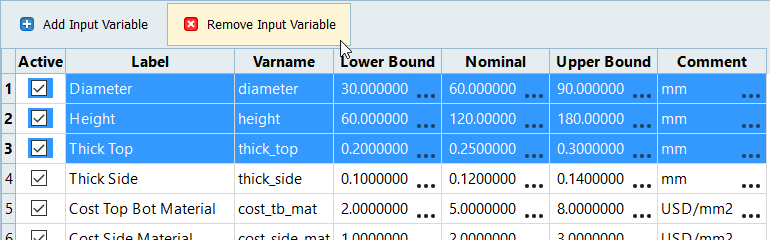
Remove Input Variables
Remove input variables from your study.
In the Define Input Variables step, select the input variable to remove.
Click Remove Input Variable.
Figure 6.
Tip: Select multiple input variables to remove by holding Ctrl while left-clicking.