Advised workflow with Skin effect mesh macro
Introduction
The advised workflow to mesh the skin depth with the macro Skin effect mesh is presented here.Few user operations are required to obtain the mesh and it works with all conductors shapes.
Step by step
The macro is called MeshSkinEffectFaceRegions.PFM and is in the directory Macros_Flux2D_Mesh.
- Load the macro
- Run the macro
- Enter the following inputs and validated the box:
- Name:
This name will be used to name the entities created by the macro and used in the meshing (RELAXLINE_NAME, RELAXFACE_NAME, MESHPOINT_NAME, etc.)
- Number of layers:
Defines the number of layers in the thickness of the skin depth (over or equal to 2).
A paramater NBRELAYERS_NAME is created
- Skin depth thickness:
Defines the value of the skin depth thickness (in meter)
A paramater SKIN_DEPTH_NAME is created
- Face regions:
Regions where it is desired to carry out the skin effect mesh
- Excluded lines:
Lines excluded from the face region contour where the skin effect mesh will not be applied.
- Name:
- Mesh the device through 注: In 2D, the second order elements are generated automatically.
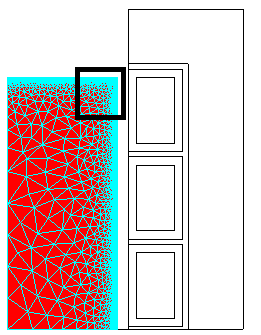
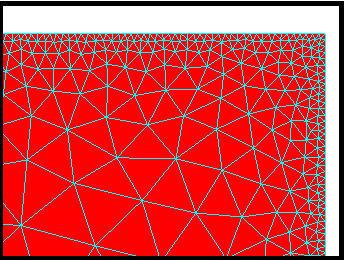
Here is an example of the mesh obtained with skin effect mesh macro: