Presto/IR Settings
The settings for the Presto/Interactive Rendering engine.
- Relight
- Select this option if you plan to create multiple renderings of an animation or lighting study. Options to change the emitter power and color will be available during post-processing.
- Denoiser
- Reduce the amount of noise/grains in the final rendered
image.
- None (default)
- Optix: To use Optix, you need a NVIDIA GPU with a
computing capability of 3.0 or higher and a driver version of 450.00 or
higher.Note: For RTX graphics cards, the NVIDIA drivers need to be higher than 418.81.
- Intel: This open denoiser uses CPU and works with all graphic cards.
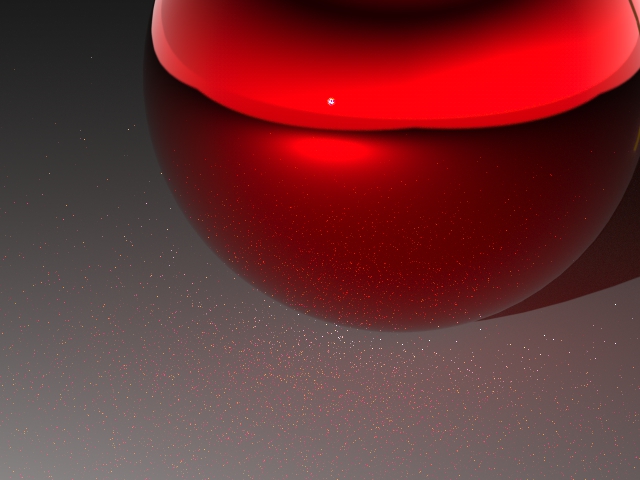
Note: To turn off the denoiser for interactive rendering, deselect Denoise Interactive Render.There are noise/grains around the bottom of the car, as indicated by the red arrows.
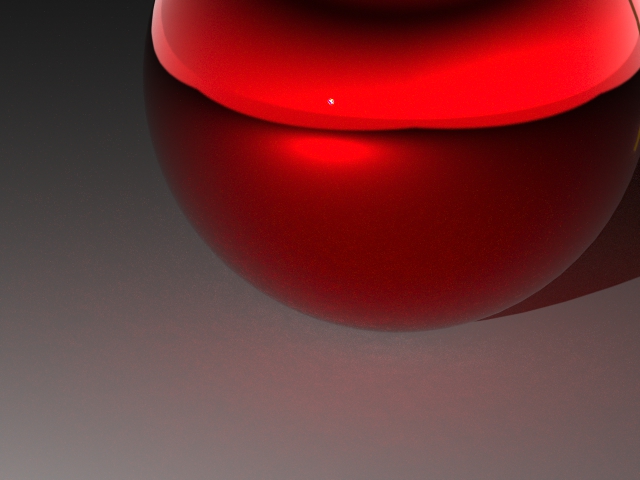
After applying a denoiser, noise/grains have been removed.
General
- Tracing Depth
- Define the maximum number of bounces a ray will have (diffuse, reflection, etc.).
- Transparency Depth
- Calculate how many rays can pass through a transparent object. The Transparency Depth value is added to the Tracing Depth value.
- Internal Reflections
- Control the amount of reflection inside transparent objects. The Internal Reflections value is added to the Tracing Depth value.
- SSS Depth
- Calculate the subsurface scattering effect. When light enters the surface of a translucent object, it interacts with the material and becomes scattered, exiting the surface at a different point. Subsurface scattering is important when you render materials like wax, skin, leaves, and milk. The SSS Depth value is added to the Tracing Depth value.
- Ambient Light
- Observe the uniform non-directional illumination created in the environment by ambient light.
- Full Caustics (CPU Only)
- Select this option to achieve a more accurate visualization of refraction and reflection. For example, you can use this option to render the shimmering waves of light at the bottom of a swimming pool.
- Adaptive Tracing
- Select this option to solve difficult lighting situations to reduce noise, such as fireflies, indirect lighting, and caustic lighting. Typical use cases include an interior scene that is lit from the sun coming through small windows or scenes with lots of glass that generates caustics or pool caustics.
- Diffuse Interreflection
- Select this option to increase the accuracy of global illumination when using Progressive AO.
- Super Sampling
- This feature determines how each pixel of the image is subdivided in order to
calculate its real color. Selecting a higher setting will increase the quality of the
rendering details, but it will also increase the rendering time and the amount of
memory used during the rendering.
- Auto (default): Automatically set Supersampling to None for interactive rendering and to Normal for final rendering.
- None: No super sampling.
- Normal: Render the image at a higher resolution (2x2).
- High: Render the image at a higher resolution (3x3).
- Bucket Rendering
- The image will be rendered in small square parts rather than all together. This
option is useful when rendering very large images that would require a huge quantity
of memory using the normal rendering. Note: Only use bucket rendering for final rendering.
- Time Limit (min)
- Enter 0 for no limit.
- Max Samples
- Control how many times each pixel will be calculated and refined. This is useful for producing an animation because you can make sure each frame that is rendered has the same quality.
- Devices
- Select which of the available graphics cards and CPUs you'd like to use for rendering.
- CPU
- If selected, CPU will be used in the Interactive rendering calculation.
- Restore Default
- Click this button to restore the default settings for the Presto/Interactive Rendering engine.
Channels
- Alpha
- Create an opaqueness grayscale image with respect to the background. A black color corresponds to no opaqueness (background is fully visible) while a gray color corresponds to partial opaqueness.
- Ambient Occlusion
- This feature calculates how much light hits a point of the object. For example, enabling this option will cause objects to appear closer and corners in the wall to appear darker.
- Depth
- Depth Channel gives the depth (distance along camera Z-axis) of the first hit objects in the scene. The depth values will be mapped afterwards to a gray-scale image according to Min/Max Z.
- Direct
- Display direct lighting.
- Global Illumination (GI)
- Display global illumination.
- Invert Mask
- Display indexed objects in black and other objects in white.
- Irradiance
- This channel, shows the Irradiance, computed by photon mapping and final gathering and interpolated using the Irradiance Cache (if used). This channel is used in conjunction with illuminance photometric analysis (see next table).
- Mask
- Mask selected objects/groups and create masks for post-processing processes.
- Material ID
- Display each material in a distinct color.
- Normal
- Stores the normals of the first hit objects in the scene. Black is assigned to vector (-1,-1,-1), while white is assigned to vector (1,1,1). Due to the normalization of surface normals, these values are never reached; instead we get intermediate colors.
- Object ID
- Display each object in a distinct color.
- Position
- Display the position of each point of the scene regarding the global frame; useful for post-processing purposes.
- Raw Diffuse Color
- Display raw diffuse color (all materials diffuse color).
- Raw Diffuse GI
- Display raw diffuse global illumination (not multiplied by the diffuse color).
- Raw Diffuse Lighting
- Display raw diffuse lighting (not multiplied with the diffuse color of the scene).
- Reflection
- Display reflections.
- Refraction
- Display refractions.
- Self-Illumination
- Display self-illumination.
- Shadow
- Render shadows separately. When used in conjunction with other channels like Mask or Object ID, Shadow can produce effects like objects with shadow in .png format at the post-processing stage.
- Subsurface Scattering (SSS)
- Display subsurface scattering.
- Transparent
- Display transparency (thin film like glass, alpha mapping transparency).
- UV
- Display the UV coordinates of objects in the scene.

