Map a Network Drive
Map a network drive to create a shortcut to the shared file system path.
To map a network drive you will need to know the shared file system path.
Mapping a network drive will help you to access the shared files just the way you access your local files. When you map a network drive, it will display as a new drive in the File Explorer.
-
Perform one of the following options based on Windows version:
- In Windows 7, right click Computer and select Map network drive... from the context menu.
- In Windows 8 or 10, right click This PC and select Map network drive... from the context menu.
A Map Network Drive menu is displayed.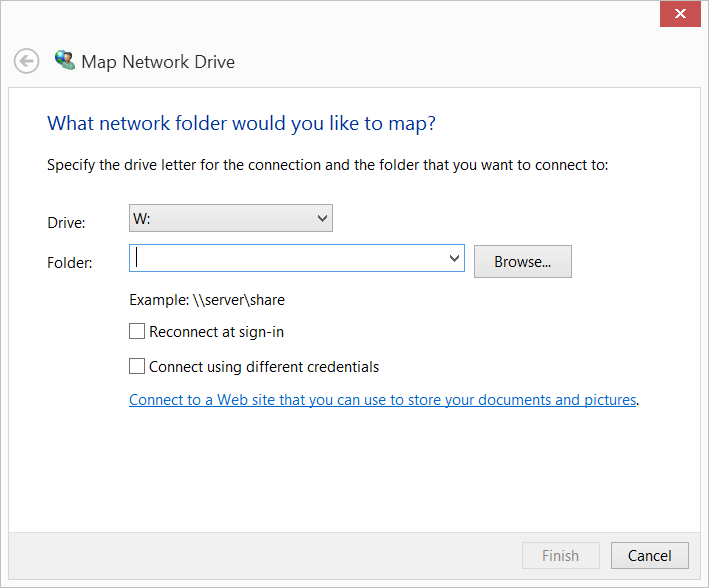
Figure: Map Network Drive