Create Solver Application Definitions
Create your own solver application definitions using the Basic-SMP or Basic-MPI starter template.
-
Click
 .
.
-
Select App Composer.
The App Composer is displayed.
The App Composer UI is made up of three main areas. On the left panel, all your custom applications are listed. In the centre panel build your own application definition and save it. The right panel provides a preview of our application definition in the Job Submission form.

Figure 1. App Composer -
Click
 to browse and select an icon for the
application definition.
to browse and select an icon for the
application definition.
-
Click Edit Pre to provide a python script to run before
the job is executed.
Tip: The editor supports syntax highlighting and code completion.
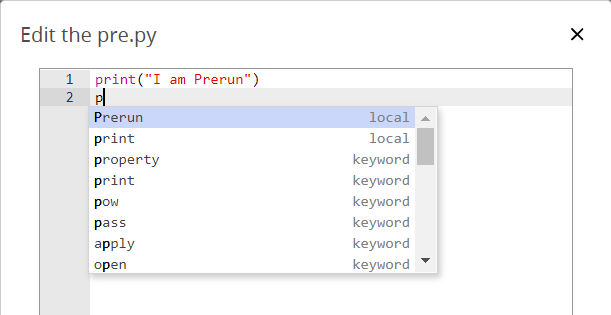
Figure 2. Script Editor -
Enter the executable command to run the job.
The executable command can be a basic shell scripts and multi-line shell scripts.Tip: The command box provides the list of parameters when you click
 or when you enter the syntax $ which helps to
write the executable command.
or when you enter the syntax $ which helps to
write the executable command.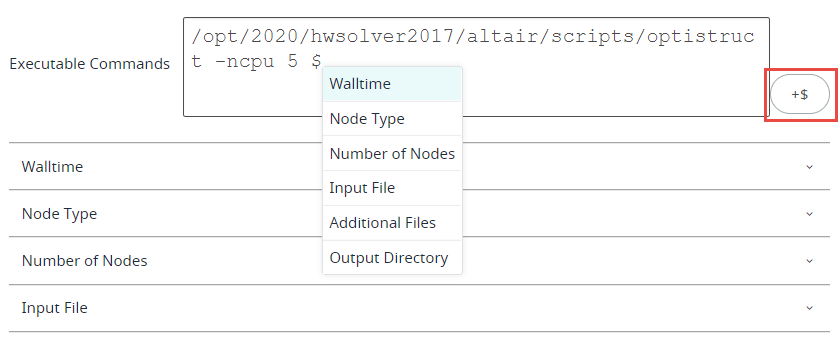
Figure 3. Parameters List -
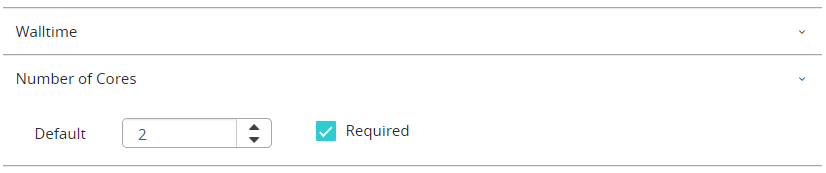
Choose the parameters that are provided by the selected starter template
required for the application definition.
You can specify if the parameters are optional or required field in the job submission form. You can also set the default values for the parameters.
-
Click Manage Parameters to add or remove
parameters.
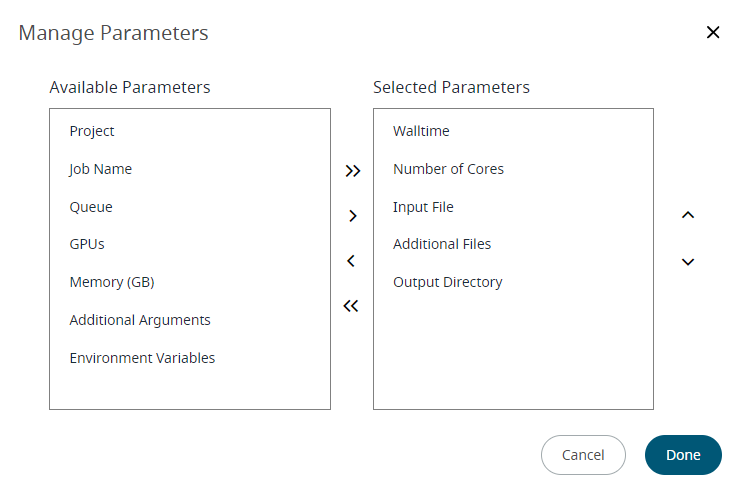
Figure 4. Manage ParametersYou can move the parameters from Available Parameters to Selected Parameters using and
and  buttons. Rearrange the order of the parameters in the Selected Parameters column
using
buttons. Rearrange the order of the parameters in the Selected Parameters column
using  and
and  buttons. The Job Submission form will display the parameters in the same
order.
buttons. The Job Submission form will display the parameters in the same
order. -
Verify if you have provided all the details required for the application
definition.
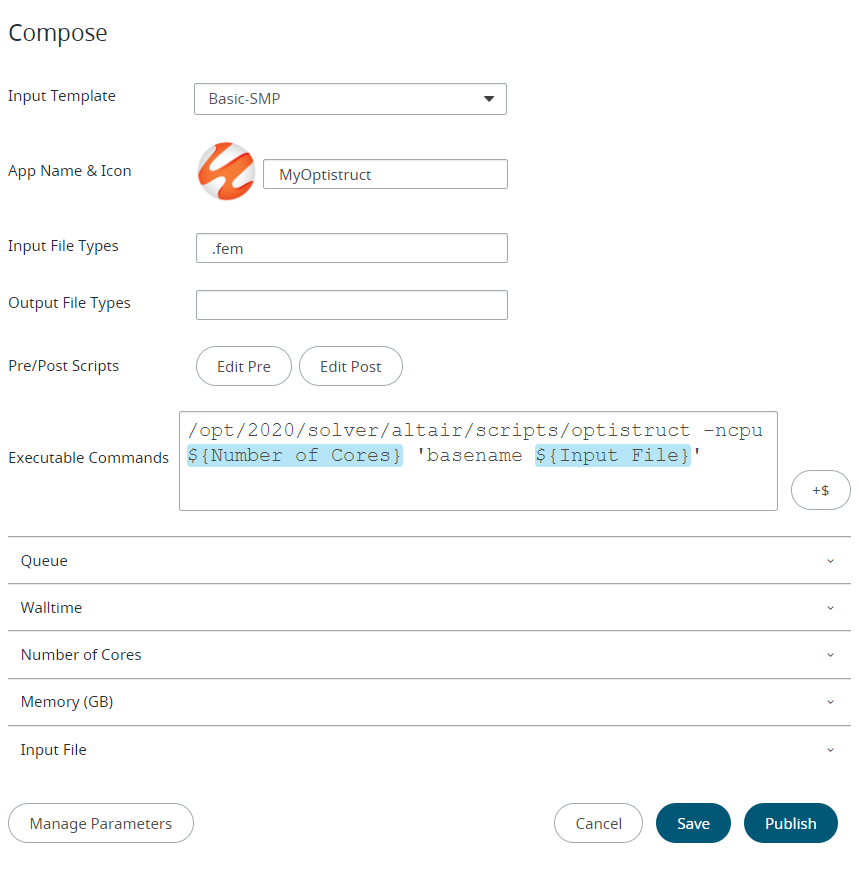
Figure 5. Application Definition Form -
Click Save.
The Preview & Test panel on the right displays the job submission form, Job Submission command and Solver Launch Command information for the application definition we have composed.
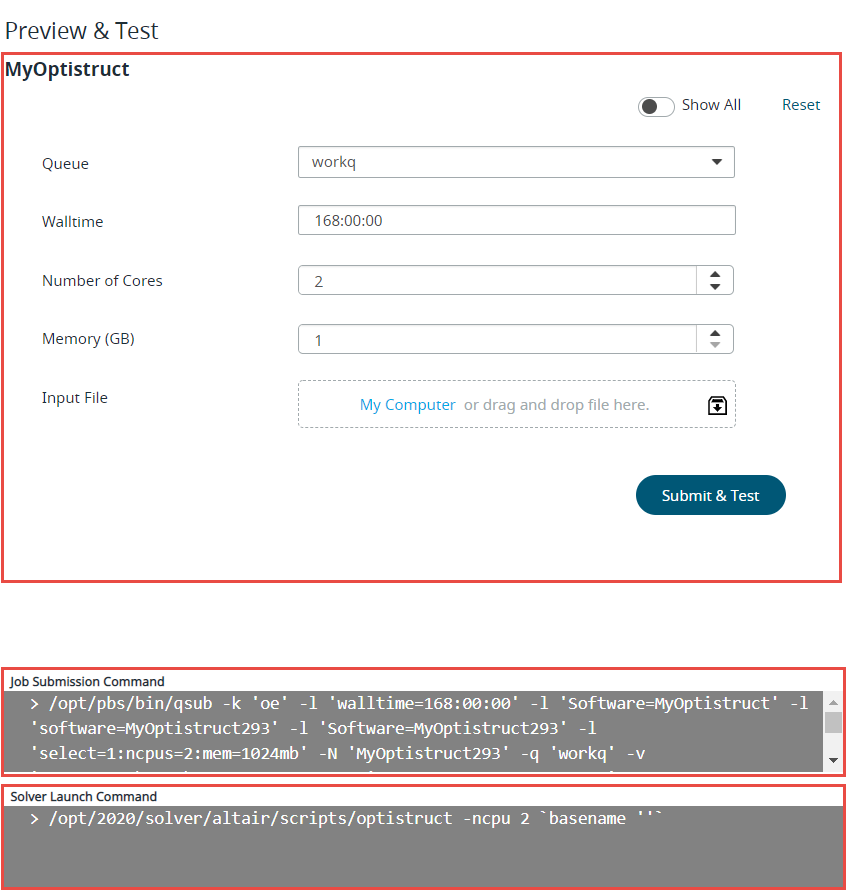
Figure 6. Peview and Test Panel -
Click Submit & Test.
Tip: Click on the Job ID link provided in the notification to view the job status.The job is submitted and a Test Job Monitor window is displayed.
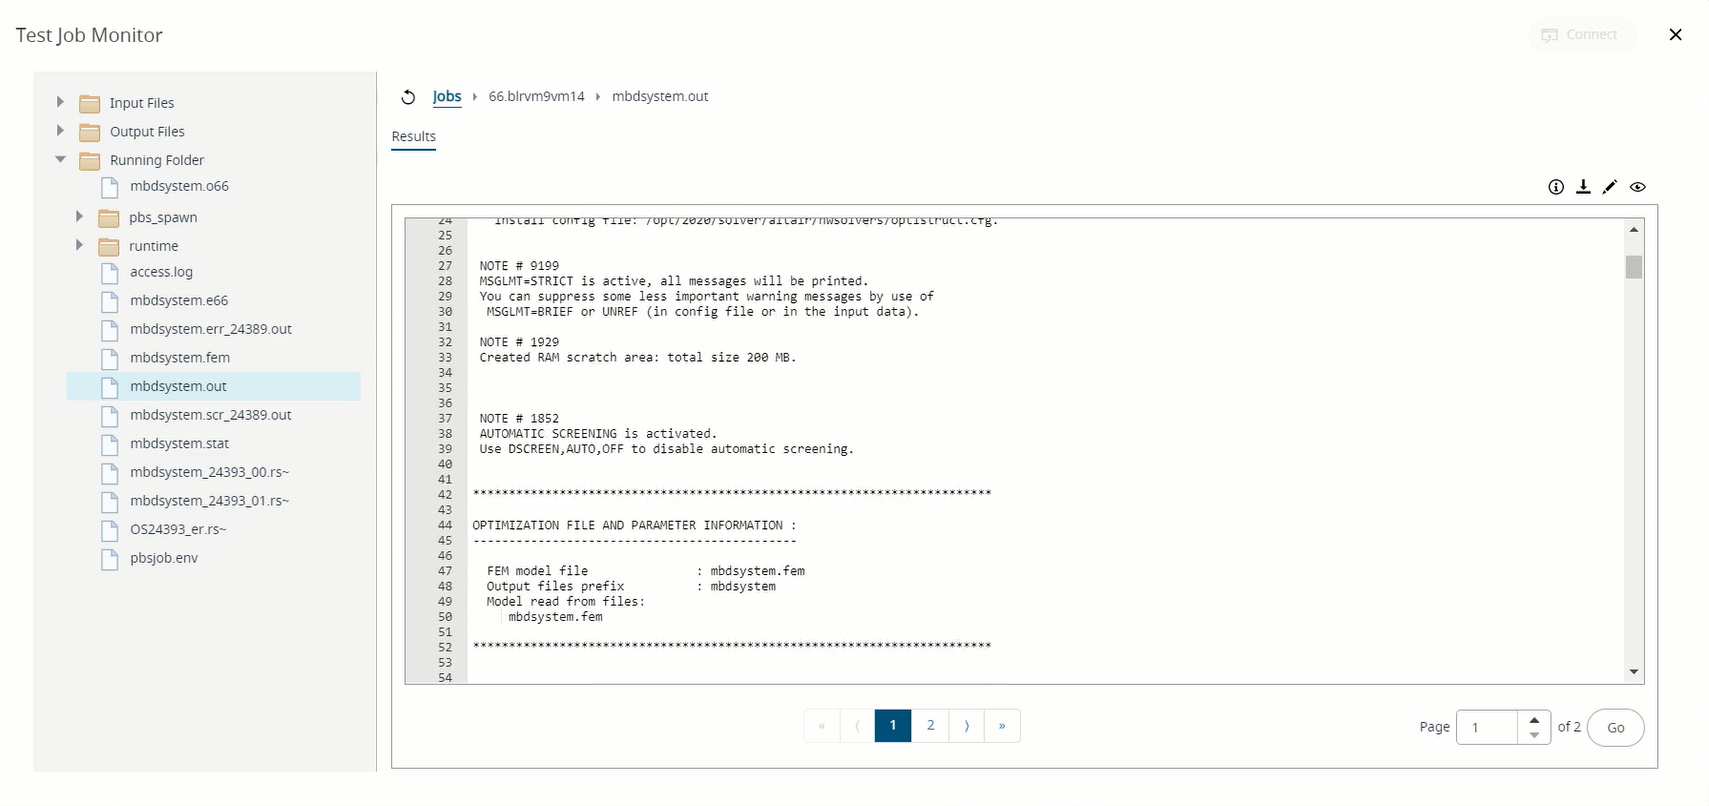
Figure 7. Test Job MonitorTip: From the files list on the left panel, you can select other files to view the job details.The application definition is added to the existing application definitions list.
Figure 8. Application Defintion ListNote: The application definitions that you have created are in JSON format and is stored at /home/$USER/userapps. The System Administrator can configure the path so that you can edit it in the Text Viewer.