HV-3080: Create Linear Superposition Loadsteps

Learn how to create a linear superposition loadstep from existing loadsteps and contour a linear superposition loadstep.

This exercise uses the results files bezel.h3d and bezel_iter2.h3d located in the animation folder.
To access the linear superposition loadstep utility, you can use one of the following methods:
  • Right-click in the Results Browser and select Create > Derived Load Case > Linear-Superposition.

    OR

  • Click the Derived Load Cases button on the Result toolbar and set the Type to Linear-Superposition.

    OR

  • Select Results > Create > Derived Load Steps from the menu bar and set the Type to Linear-Superposition.


Figure 1.

This utility allows you to create linear superposition loadsteps using existing loadsteps and their simulation steps. Linear superposition loadsteps are saved to the session file. Using this utility, you can also create derived loadsteps and envelope loadsteps. See the Derived Load Cases topic for additional information.

Create a Derived Loadstep

  1. Load the bezel.h3d file, located in the animation folder, as both the model and results files.
  2. From the Results Browser, right-click and select Create > Derived Load Case > Linear-Superposition.
    All existing loadsteps and corresponding simulations are listed.
    Figure 2.
  3. Select Subcase 1 (Step_X), Subcase 2 (Step_Y), and Subcase 3 (Step_Z) from the list of loadsteps on the left.
  4. Click the right arrow button , to append these selected loadsteps to the new linear superposition loadstep.
  5. From the derived loadstep table (located on the right side of the dialog), highlight the row containing Subcase 1 (Step_X): Static Analysis.
  6. Enter -0.22 into the Constant scale: field and press ENTER on the keyboard.
  7. Repeat steps 5 and 6 for the rows containing Subcase 2 (Step_Y): Static Analysis and Subcase 3 (Step_Z): Static Analysis, using a scale value of 1.37 and 0.55, respectively.
    A different scale is applied to each simulation in the linear superposition loadstep.
    Figure 3.
  8. Verify that the Type field is set to Linear-Superposition.
  9. Click Apply to create the linear superposition loadstep.
  10. Click on the Rename button.
  11. Type HyperView_LSP in the Rename dialog and click OK.
  12. Click on the button, to view the linear superposition loadstep that was created.
    Highlighting HyperView_LSP will display the three loadsteps which were used to create the linear superposition loadstep in the derived loadstep table area.
  13. Click on the button, to view the initial loadsteps in the results file.
  14. Click OK.

Contouring the Linear Superposition Loadstep

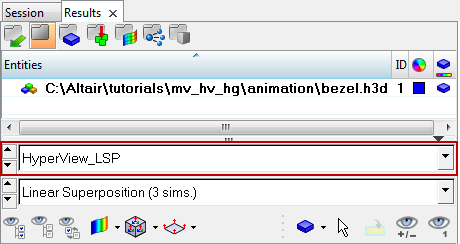
  1. From the Results Browser, use the Change load case drop-down menu to set the load case to HyperView_LSP.
    Figure 4.
    Note: The Results Browser can be turned on or off using the BrowsersHyperViewResults option located within the View pull-down menu.

    The Change load case toolbar visibility can also be toggled on/off using the Configure Browser option (located in the Results Browser context menu).

  2. Expand the Plot Styles folder and click on the icon next to Default Contour. By default the displacement magnitude is contoured.
    Observe the contour displayed in the graphics area.
    Figure 5.
  3. Repeat steps 1 - 3 by selecting Subcase 4 - solver_LSP instead of HyperView_LSP.
    Subcase 4 - solver_LSP contains results from the analysis. This subcase was set up as a combination of the loads applied in Subcase 1, Subcase 2, and Subcase 3 according to the following linear superposition equation:
    Subcase 4 = -0.22 *(Subcase 1) + 1.37 *(Subcase 2) + 0.55 *(Subcase 3)
    Note: Neither the contour nor the min and max values in the legend changed when switching between Subcase 4 - solver LSP and HyperView_LSP. This shows that HyperView calculated the same results in the linear superposition HyperView_LSP loadstep as given by the solver.
    Note: Averaging can be applied to the results that are calculated in a linear superposition loadstep. The vector and tensor panels can be used to review vectors and tensors from a linear superposition loadstep.

Adding Simulation Steps from Another File

  1. From the Results Browser, expand the Load Cases and then the Derived Load Cases folders.
  2. Right-click on HyperView_LSP and select Edit from the context menu.
  3. Click on the Result Files button to add loadsteps and simulations from another result file.
  4. In the Update Result Files window, browse and select the result file bezel_iter2.h3d.
    Figure 6.
  5. Click Close.
    Figure 7.

    The loadsteps and simulations from the second results file will be added to the list of available loadsteps and simulations and can be used in creating derived loadsteps, linear superposition loadsteps, and envelope loadsteps.