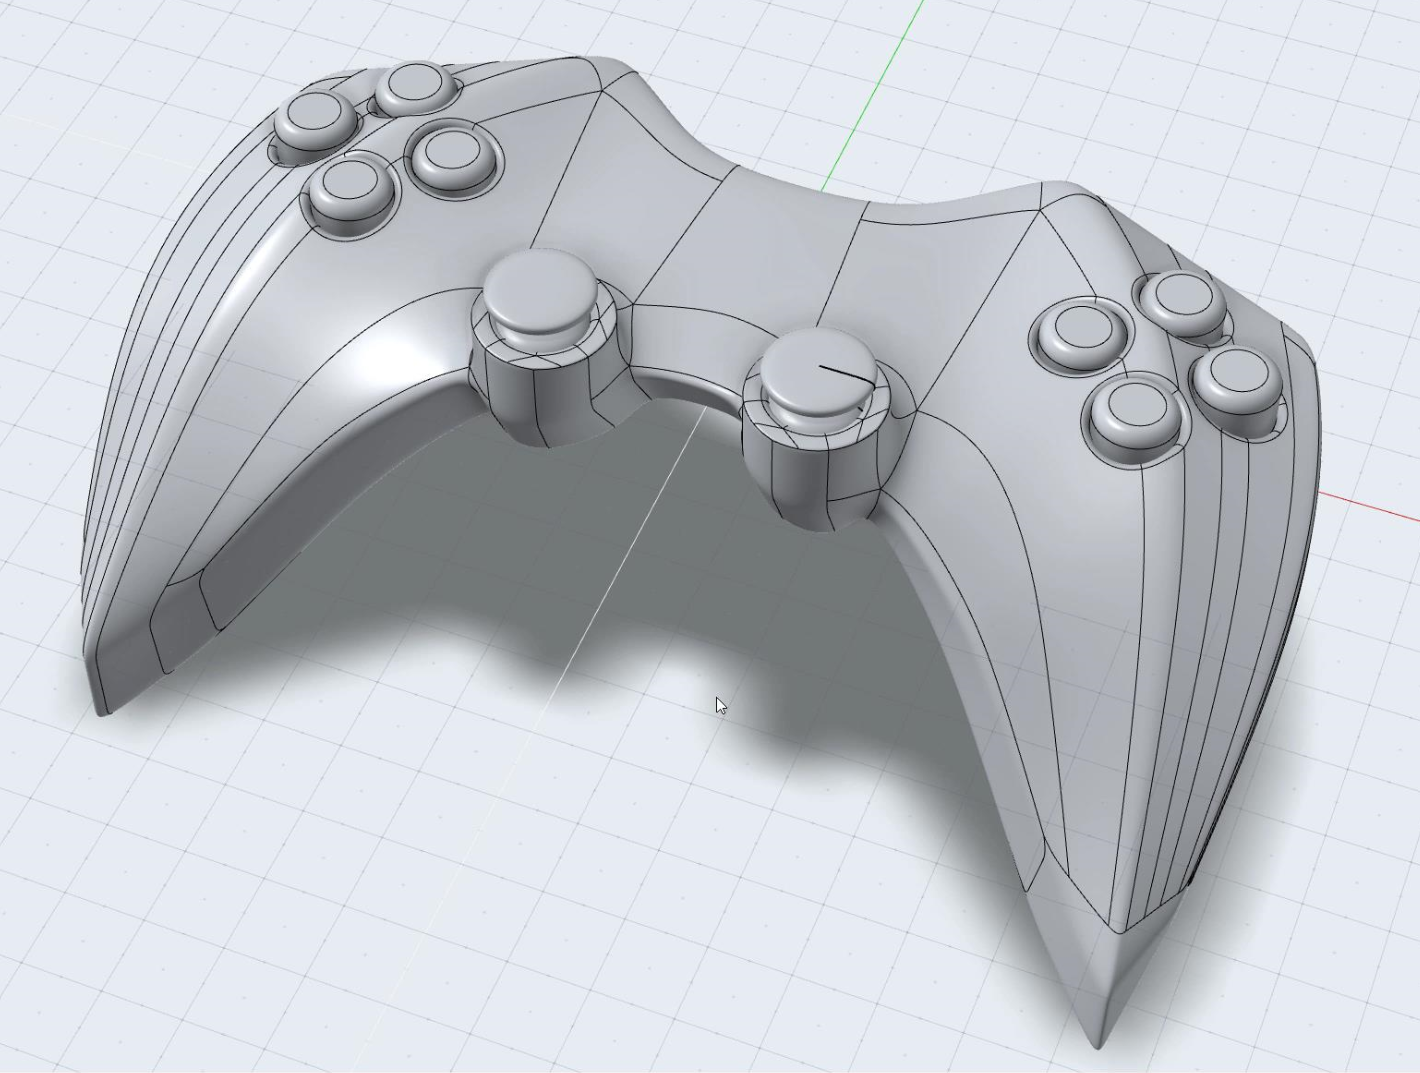
Tutorial: Advanced PolyNURBS

Learn more advanced techniques for creating and editing PolyNURBS.

In this lesson you will learn about:

  • Aligning vertices to a curve
  • Sliding vertices
  • Circle Maker
  • Close Hole
  • Duplicating faces
  • Hybrid modeling

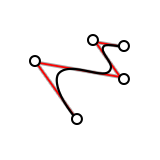
Create Helper Curves

  1. On the Curves tab, select the NURBS Curve tool.

  2. Create four curves as shown in the video.

Edit the Shape of the Curves

In this step, we will move the curves and their points to get the desired shape.

  1. Select all the curves and move them by 1 cm along Z.
  2. Double-click Curve #2, select the last CV, and move it by -3.5 cm along Z.
  3. Double-click Curve #3. Select the two inner CVs and move them by 1 cm along Z. Then select the last CV and move it by -4 cm along Z.
  4. Double-click Curve #4 and move the last CV by -3 cm along Z.

Create Basic PolyNURBS Surfaces

  1. On the PolyNURBS tab, select the PolyPlane tool.

  1. Draw a polyplane and define the number of Subdivisions along L as 4.
  2. Double-click the polyplane to edit it.
    1. In the Control Panel, for Edit, select Vertices.
    2. For Symmetry, select X.
    3. Select the top right two vertices. Turn on Align to Curve. Click the Align to Curve button and select the top curve. The vertices are aligned to the curve.
    4. Align the bottom vertices to the bottom curve.

  1. Create a second polyplane with 2 Subdivisions along L and 4 Subdivisions along W.
  2. Align the points to the other curves as shown in the video.
  3. Align the three columns of vertices along the three curves as shown in the video.
    Tip: Using the On snap, the vertices can be moved along a curve or edge.

Complete the Basic Surfaces

  1. Using Planar Symmetry, select the right half of the gamepad surface to create a symmetrical copy. Drag the left half of the gamepad as shown in the video.
  2. Press Alt+C to open the Delete dialog. Select No to keep the source objects in the construction history.
  3. Use the Merge PolyNURBS tool to merge the two PolyNURBS into a single entity.
  4. In Edit Edges mode, with symmetry along X still active, select the open edges using Ctrl, and create a bridge using the right-click context menu.
  5. Box select all surfaces and extrude them down by about 2 cm using the extrude handle as shown in the video.

Align the Newly Created Edges

In this step, we will align the vertices created in Step 4 to some new curves. First we need to offset some primary curves.

  1. On the Curves tab, select the Offset tool.

  2. Click Curve #4 and offset it along the X Axis by 0.5 cm.
  3. Offset Curve #2 by 1 cm along the Y Axis with an Elevation of 0.5 cm.
  4. In Edit Vertices mode, select the vertices and align them to the curves as shown in the video.

Clean Up the Vertices

When modeling with PolyNURBS, it's good practice (but optional) to maintain clean vertex distribution.

  1. In Edit Edges mode, with Symmetry set to X, select the vertices you want to slide.
  2. Using the arrows, slide the vertices to position them equidistant from each other.

Create the Joystick Housing Using Circle Maker

  1. First, add an Edge Loop to the top of the gamepad surface.
  2. In Edit Faces mode, select the two faces as shown in the video and extrude them by 1 cm along Y. Keep the Symmetry along X.
  3. Delete the four faces as shown in the video. Using the Circle Maker tool, click the open edge and specify a Radius of 2 cm.

  1. Using the Close Hole tool, close the two circular openings created in the previous step.
  2. Using the Split Faces tool, add some edges to the closed hole.
  3. Extrude the new faces by 1 cm along Z.
  4. Press N to nurbify the geometry.
  5. Select some edges and strengthen the creasing.

Create the Controller Rear Button Housing

  1. Add edge loops to the side wall of the gamepad.
  2. Select the two faces as shown in the video and extrude them inward by 0.5 cm.
  3. Select the outer edges and apply a creasing strength of 0.5.

Complete the Joystick Housing and Rear Buttons

  1. First, select the central vertex on the joystick surface and chamfer it.
  2. Extrude the face down by 0.5 cm to create the joystick housing.
  3. Select the two faces of the rear button housing, right-click, and then select Duplicate selected faces.
  4. Extrude the duplicated faces by 0.7 cm.
  5. Select all edge of these two buttons and apply a creasing strength of 0.7.

Create the Gamepad Button Housing

  1. In the Top view, create a circle of 1 cm.
  2. Move it along X by 5.3 cm and then along Y by 1.4 cm.
  3. Create a Radial Symmetry of this circle with 4 copies. Make sure to select Combine with input.
  4. Move this radial symmetry along Z by 0.5 cm.
  5. Extrude the geometry by 1.5 cm.
  6. Create a Planar Symmetry of this extrusion along X and enable Combine with inputs.
  7. Create a Boolean Subtraction of these buttons with the gamepad.
    Note: After using a NURBS tool such as Boolean, the final object is no longer PolyNURBS. It is now a NURBS model and the PolyNURBS editing will no longer work on this object. All subsequent operations done on this object are NURBS related. However, the underlying PolyNURBS can still be edited, thanks to construction history using the PolyNURBS editing tools.
  8. Finally, add a round to the edges with a value of 0.1.
    cm

Create the Gamepad Buttons

  1. Using Surface Extract in Duplicate mode, select the eight surfaces in the holes of the button.
  2. Select the Surface Extract object, and press I to isolate it.
  3. Extrude these surfaces by 0.8 cm along Z.
  4. Add a round of 0.2 cm using box selection to select all the top edges.
  5. Press I to toggle isolate mode and bring back all the surfaces.
  6. Select all edges of these two buttons and apply a creasing strength of 0.7.

Create the Joystick

  1. In the Front view, create a NURBS Curve in the shape of a joystick.
  2. Using the Revolve tool, revolve this curve along Z.
  3. Move this revolve object into place using the Move tool.
    Tip: While moving, it might be easier to disable all snaps using the snaps menu on the bottom right of the screen.
  4. Create a planar symmetry of this joystick.
  5. You can edit the shape of the joystick by moving the points on the curve.