Add a new workplane to the model for geometry creation.
-
On the Construct tab, in the Define group, click the
 Add Workplane icon.
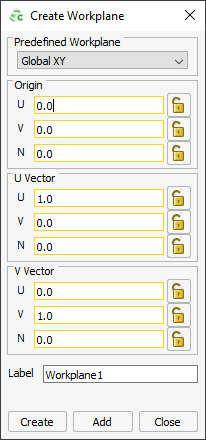
Figure 1. The Create Workplane dialog.
-
Under Predefined Workplane in the drop-down list, select a reference workplane.
-
Under Origin, enter the position of the workplane using
one of the following methods:
- Enter the coordinates for the origin manually.
- Use point entry to enter the coordinates for the origin from the 3D view.
-
Specify the rotation of the workplane by entering values for the U-Vector and V-Vector.
-
In the Label field, add a unique label for the
workplane.
-
Select one of the following workflows to close the dialog.
- To create the workplane and close the dialog, click OK.
- To create the workplane, but keep the dialog open to add a second
workplane, click Apply.