Manual E-Line Method Tutorial

This section of the document will walk you through the Manual E-Line Creation steps

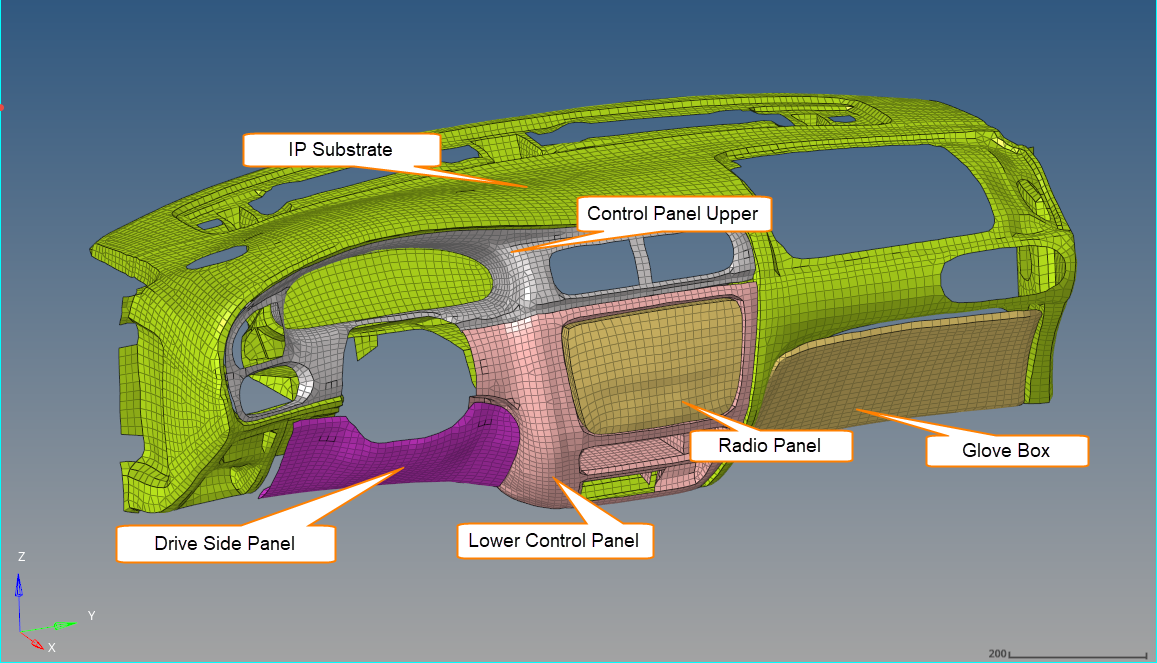
For the exercise purpose, you will create E-Line connector at the below locations:
  • Glovebox and IP Substrate
  • Control Panel Lower and IP Substrate
  • Radio Panel and Control Panel
  • Driver Side Panel and Control Panel Lower
  • Driver Side Panel and IP Substrate
  • Control Panel Upper and Speedometer


Figure 1.

Manual creation of connectors for Tutorial

  1. Select Manual method radio button from Method panel.
  2. Click Master Component button.
    Component selection panel will activate. Select Glove Box and click proceed.
  3. Click Slave Component
    Component selection panel will activate. Select IP Substrate and click proceed.
  4. Click Geometric Line
    Line selection panel will activate. Select the line between components and click proceed.
  5. Enter 30 for Spacing and Search Distance.
  6. Select GloveBox_To_IPsubtrate from Interface Name drop down list.
  7. Select Rattle from E-Line Type drop down list.
  8. Select In plane to master from Gap Direction drop down list.
  9. Keeping the other values default, click Create
    This should create connectors between the selected components are shown below.


    Figure 2.
  10. Repeat steps from 1 through 9 to create connectors between the listed components, with the parameters specified below:
    Master Slave Line Type Interface Name Gap Direction
    Control Panel Lower IP Substrate Rattle IPSubstrate_to_Controlpanellower In Plane to Master
    Radio Panel Control Panel Rattle Radiopanel_to_ControlPanel Normal to Master
    Driver Side Panel Control Panel Lower Rattle DriverSidepanel_to_Controlpanellower In Plane to Master
    Driver Side Panel IP Substrate Rattle DriverSidepanel_to_IPsubstrate In Plane to Master
    Control Panel Upper Speedometer Squeak Other_Locations In Plane to Master
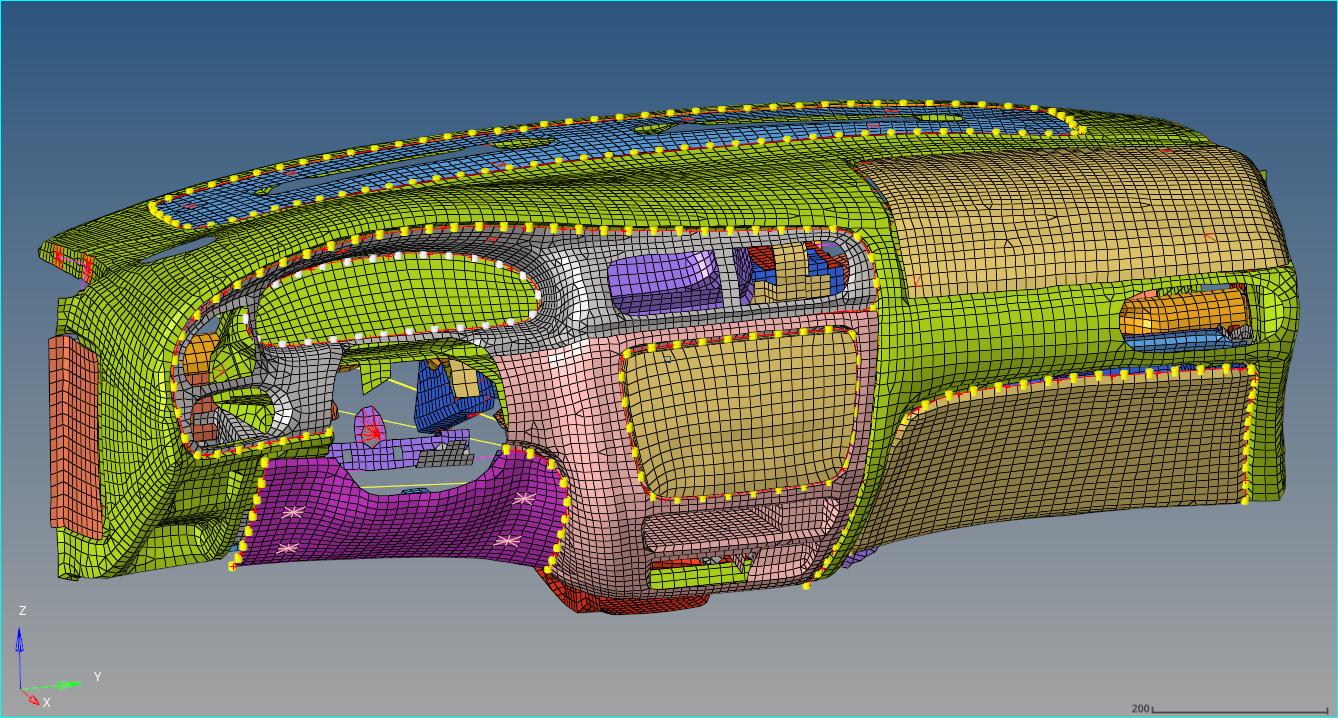
    After completing the above steps, you can see the connector locations updated throughout the model as shown below.


    Figure 3.
  11. Click Next to continue to Review ELines task, which is the next step in process.