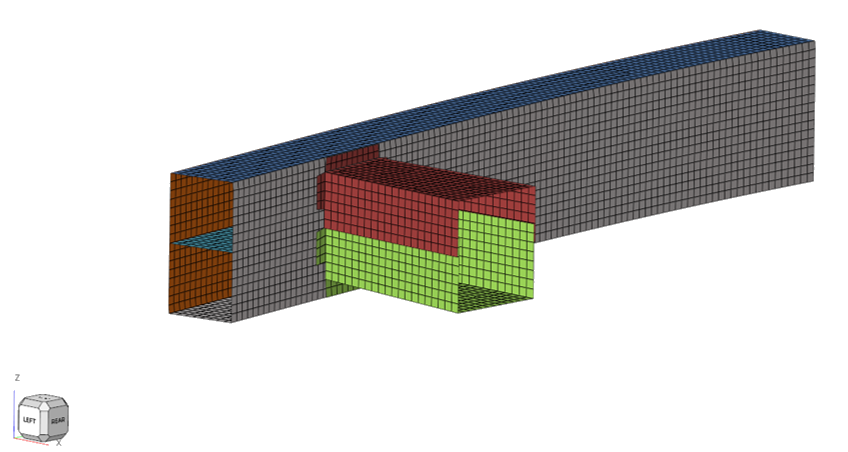
RD-HWX-T: 1020 Front Impact Bumper Model
This tutorial demonstrates how to find deformation, stress, and energy absorbing capacity of various structural components of a vehicle hitting a stationary or moving object.
The component is crashworthy (safe), if it meets the plastic strain and energy targets.
A bumper beam is one of the components that is used to protect passengers from front and rear collision.

Figure 1.
- Step 1: Load the Radioss (Block) interface and load initial solver deck
- Step 2: Global de-penetration
- Step 3: Define material and failure
- Step 4: Define property
- Step 5: Define spotwelds
- Step 6: Mirroring model
- Step 7: Set contact
- Step 8: Define rigid body
- Step 9: Define boundary condition
- Step 10: Define loading (gravity / initial velocity)
- Step 11: Create rigid wall
- Step 12: Create accelerometer
- Step 13: Define section
- Step 14: Model check
- Step 15: Define output (time history / anim)
- Step 16: Create Engine setup and export the model
- Step 17: Run the model and check the results
Model Description
- UNITS: Length (mm), Time (ms), Mass (kg), Force (kN) and Stress (GPa)
- Simulation time: [0 – 100.0]
- Boundary Conditions: Gravity load, initial velocity of -5.0 m/s of the bumper beam on the rigid wall
- /MAT/LAW2 (PLAS_JOHNS): for bumper parts and crash box parts
- /PROP/TYPE1 (SHELL): for bumper beam parts and crash box parts
- /INTER/TYPE2: for tied interface that connects a set of secondary nodes to a main surface (connect coarse and fine meshes, model spotwelds, rivets, and so on)
- /INTER/TYPE7: Penalty contact between all versus all
- /FAIL/BIQUAD: model failure
Prerequisites
To run this simulation, you will need access to a licensed version of Radioss. You will need an internet connection to watch the video tutorials and download the files.