Troubleshooting: Can't Offset the Part
Condition
I can't create a matching offset for the part. In the Model Browser, the part is displayed in red and when I hover over it, an error message is displayed saying that the "Part failed to offset."
Cause
The imported part cannot be offset and needs to be modified.
- In the guide bar of the Matching Die tool, change the Offset multiplier.
- Go back to the Part tool and adjust the Thickness.
Cause 2
When you selected Apply Smoothing, some ribs were automatically moved to smoothen the addendum wall where it intersects the binder. When the ribs were moved, they became overlapped or too close.
Remedy 2A: Fix Overlapping Ribs
Overlapping ribs is the most common issue, so we suggest starting off by fixing them manually.
-
Rotate the ribs so that they don't overlap by doing one of the
following:
- Hover over the rail to display handles. Drag the lower arrow to change the angle of the rib plane.
- Select a handle and enter an Angle in the microdialog.
Note: If a rib can't be rotated, select the rib, and in the microdialog turn off the constraint Tangency G1 to the part so that you can rotate it.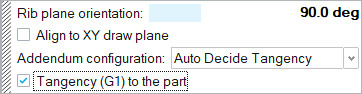
Remedy 2B: Delete Excess Ribs
Check for ribs that are too close together or lie on the same plane, and then manually delete excess ribs.
- Adjust the view as necessary to locate ribs that are too close together or lie on the same plane.
-
Delete ribs as necessary to smoothen the flow.
-
In the guide bar, select Edit Ribs.

-
In the guide bar, select Edit Ribs.