Select Entities Using Legacy Selectors
For older contexts, selection is performed via yellow entity selectors.
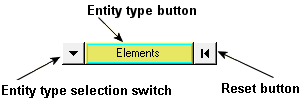
Figure 1.
An entity type in the plural form, such as "elements", indicates that you are able to select more than one entity from your model. An entity type in the singular form, such as "node", indicates that you can select only one entity from your model at a time.
When you need to define a plane by specifying a plane's normal vector, the selector allows you to select nodes one at a time by entering the node ID. Similar to other selectors, the active node is surrounded by a blue square.
Examples of this type of input collector include:

Figure 2. Plane normal vector definition using the global axis

Figure 3. Plane normal vector definition
Use the Extended Entity Selection Menu
-
Click the entity type button on the selector
 to access the extended entity
selection menu.
A pop-up menu containing the available selection techniques is displayed. This menu allows alternative methods for selecting elements of the specified entity type.Note: The options displayed on the extended entity selection menu are dependent upon the active input collector.
to access the extended entity
selection menu.
A pop-up menu containing the available selection techniques is displayed. This menu allows alternative methods for selecting elements of the specified entity type.Note: The options displayed on the extended entity selection menu are dependent upon the active input collector.
- By right-clicking in the modeling window.
- In the Advanced Selection dialog by clicking
 on an entity selector.
Change the Entity Type
-
Click the entity type selection switch
 to access a pop-up menu of
possible entity types.
to access a pop-up menu of
possible entity types.
- Select the type that you want to use.
Reset the Selector
Card Filter
Use the Card Filter to restrict the list of entities displayed when you click the entity selector.
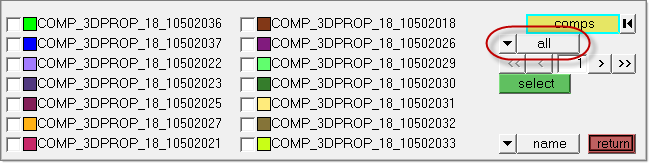
Figure 4. Card Filter. Card Filter is outlined in red.
Some panels present a list of entities when you click their Entity Selector button instead of the Extended Entity Selection options.
| Assembly | Beamsection collector | Blocks |
| Component | Contact surfaces | Control volume |
| Curves | Ddvals | Groups |
| Laminates | Load collector | Load steps |
| Material | Multibodies | Plies |
| Plots | Property | Sensors |
| Sets | Shapes | System collector |
| Tags | Titles | Vector collector |

Figure 5.
This displays a read-only text field adjacent to the Card Filter control. Click card to open a pop-up window that lists all of the cards defined in your model for the selected type of entity, and pick the card that you wish to filter by.
Once selected, only entities with the chosen card type will display in the entity list on the panel.
To remove the filter, simply use the switch to select all, displaying all entities regardless of card association, or no card, displaying only those entities that do not have a card at all.