HS-1560: Set Up Study using LS-DYNA Model Parameters in HyperMesh
Learn how to set up a study for a LS-DYNA model in HyperMesh.
Before you begin, copy the model files used in
this tutorial from <hst.zip>/HS-1560/ to your working
directory.
Import a HyperMesh Parameter into HyperStudy
-
Open model.
- From the menu bar, click .
- In the Open Model dialog, open the boxbeam_morphed_noDV.hm file.
A model appears in the graphics area.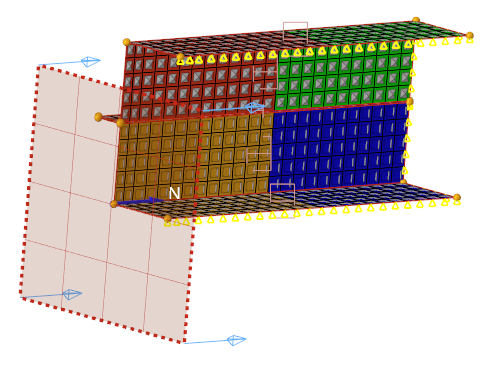
Figure 1. -
Create and assign parameter to Material.
-
In the Model browser, Material folder, click
Material.
The Entity Editor opens and displays the material's corresponding data.
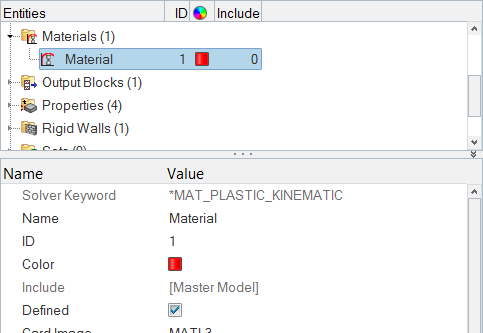
Figure 2. -
In the Entity Editor, right-click on E and
select Create and Assign Parameter from the
context menu.
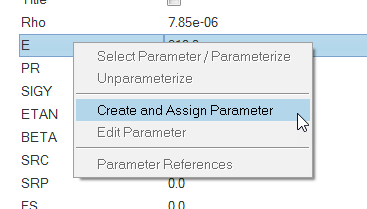
Figure 3.The Create Parameters dialog opens. -
Click Close.
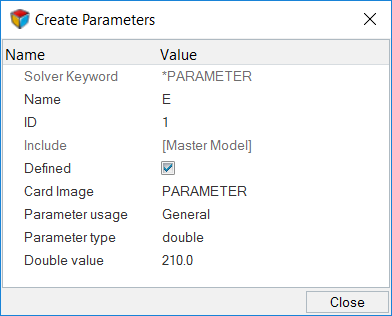
Figure 4.
-
In the Model browser, Material folder, click
Material.
Register LS-DYNA as a Solver
-
Add solver script.
Figure 5. -
In the Path column of the script Dyna, click
 .
.
Perform the Study Setup
During this step, you will import the input variables that you created in HyperMesh.
-
Start a new study in the following ways:
- From the menu bar, click .
- On the ribbon, click
 .
.
-
Add HyperMesh model.
-
From the Directory, drag-and-drop the
boxbeam_morphed_noDV.hm file into the work
area.
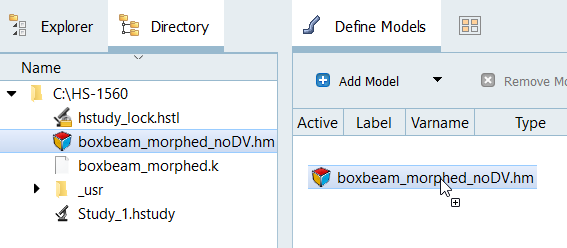
Figure 6.

Figure 7. -
From the Directory, drag-and-drop the
boxbeam_morphed_noDV.hm file into the work
area.
-
Import variables.
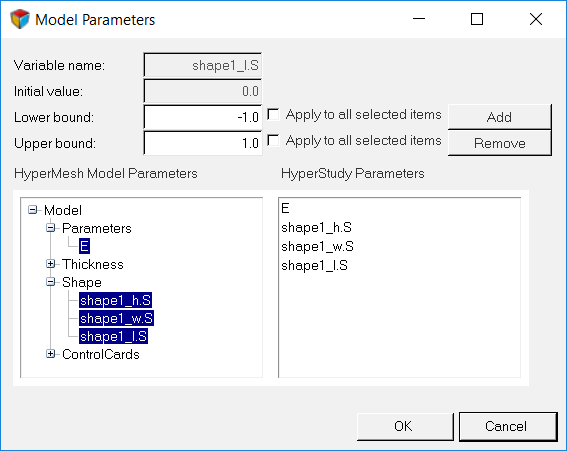
Figure 8. -
Review the input variable's lower and upper bound ranges.
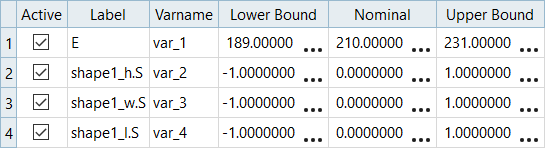
Figure 9.
Perform Nominal Run
Create and Evaluate Output Responses
-
Click Add Output Response three times to add three
output responses labeled Energy,
Force, and Mass.
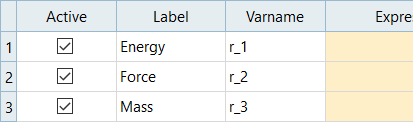
Figure 10. -
Define the output response, Energy.
-
Click Insert Varname.
The function max() appears in the Evaluate Expression field.
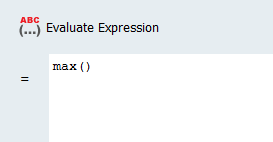
Figure 11. -
Next to Insert Varname, click
 and select First Element.

Figure 12.
-
Click Insert Varname.
-
Define the output response, Mass.
-
Highlight the value for total mass of body.
Tip: Quickly search for keywords within the file by selecting the Keyword checkbox and entering total mass of body in the text field. Click
 until the total mass of body keyword is located.
-
Highlight the value for total mass of body.