Subcase Creation

The Subcase Definition panel can be used to add multiple subcases to the model. The panel is shown below:
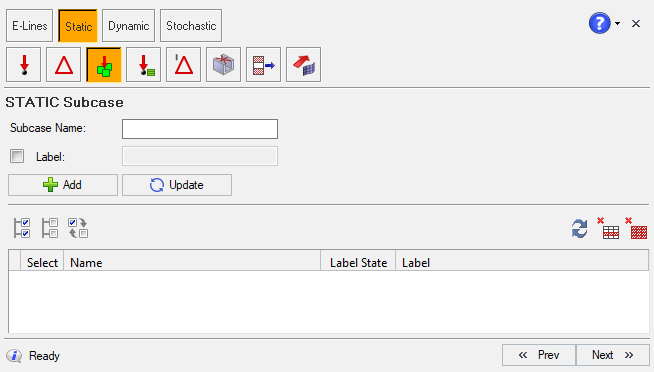
Figure 1.
You can perform the following operation in this panel -
  • Add a new subcase
    • Provide Subcase Name
    • Proivde Label, if required
  • Update existing subcase title
  • Delete selected subcase
  • Delete all subcases in the table

Adding a New Subcase Definition

  1. Enter a name for the new subcase, in the Subcase name field.
    The subcase name should not contain blank spaces. If the name that you have entered contain blank spaces, SnRD will automatically add an _ symbol in its place.
  2. To add a label to the subcase, select the Label check box.
    The text field will become active.
  3. Enter a label for the subcase in this field.
  4. Click Add.
    The subcase will get added and the same is displayed in the subcase list on the panel.
  5. Select the check box for the created subcase to use that for further processing.

Managing Subcases

  1. Click to select all subcases in list.
  2. Click to unselect all subcases in list.
  3. Click to reverse the selection of the subcases in list.
  4. Click on the subcase name from the list.
  5. Enter a new name and label in the Subcase name and Label fields.
  6. Click Update.
    The subcase name and label will be updated.
  7. Click on the subcase name from the list.
  8. Click Delete.
    The subcase will be deleted from the panel and model.
  9. Click Apply or Next to proceed to the next step in the process.
    Note:

    You must select at least one subcase on this panel to proceed to the next step. If none of the subcases are selected, then an error message is shown in a pop up window.