Multiple Inputs
From the Create Curves by File dialog, click Multiple Inputs to select multiple files with intersecting data (for example, multiple runs of a test) and plot the data from all files simultaneously in the current HyperGraph session.
After making your selections, click Select to move to the Y Source tab, where you can select the type, request, and component options for the Y data.
Click Plot to plot the data for the selected files.
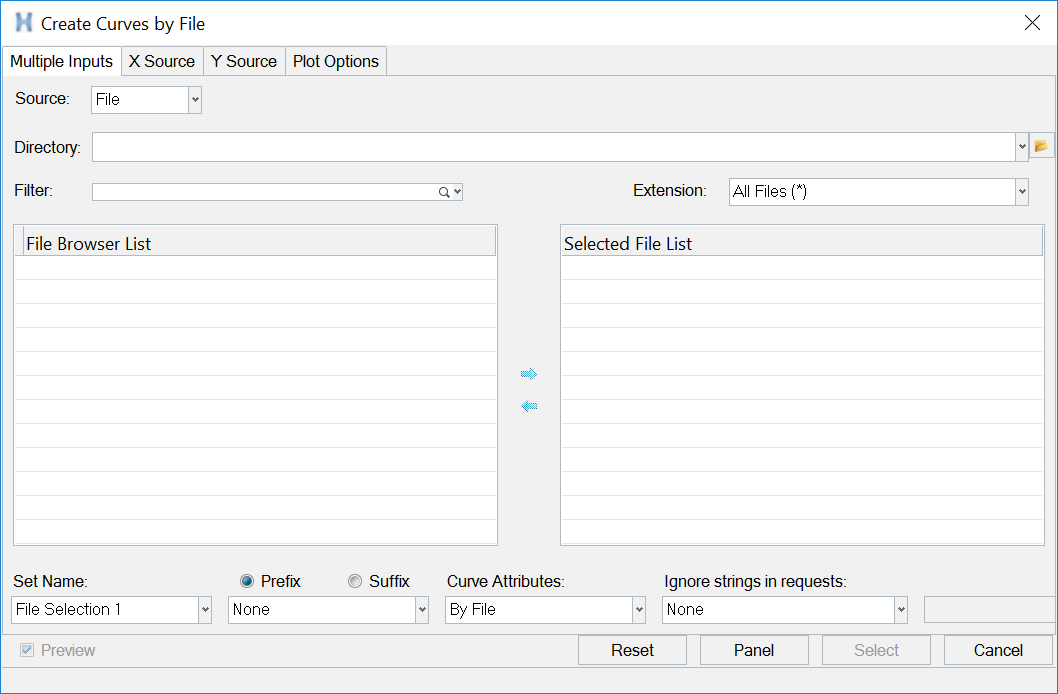
Figure 1.
Use the following options to define the curve name, curve color, and line style, as well as generate file sets for the current session.
- Source
- Select File or Subcase as the source.
- Directory
- Click the file browser button to locate the directory to select your files from.
- Filter
- Enter a file name keyword to use as a filter when searching for files to plot.
- Extension
- Select All Files or a specific file extension type.
- File Browser List
- Displays the files found (with or without a filter) from the Directory field. Select the files that you want to use and click the arrow button to add them to the Selected File List column.
- Selected File List
- Displays the selected files moved from the File Browser List. Select the files and click the arrow button to return the files back to the File Browser List.
Use the following options to define the curve name, curve color, and line style, as well as generate file sets for the current session.
- Set Name
- Enter a set name to save the set to the current session (or, to use at a later time). The default set name is File Selection 1.
- Curve Name
- Select curve name types from the drop-down menu. The options allow you
to add "extensions" to the curve name that include the filename, path,
and different directory levels. Select Prefix or
Suffix to add the type selected to the
beginning or end of the standard HyperGraph curve
naming convention.
- None
- Uses the standard HyperGraph naming convention that includes a combination of the request label and the component label.
- Filename
- Uses the filename plus the standard HyperGraph naming convention.
- Path + Filename
- Uses the complete file path plus the filename.
- Directory Level 1
- Uses the directory name one level up, plus the standard HyperGraph naming convention.
- Directory Level 2
- Uses the directory name two levels up, plus the standard HyperGraph naming convention.
- Directory Level 3
- Uses the directory name three levels up, plus the standard HyperGraph naming convention.
- Attach
- If Subcase is selected, an additional Attach menu item is displayed.
Options include:
- None
- Attach x Vectors Only
- Attach x and y Vectors
- Curve Attributes
- Select a color scheme and line style for the curves.
- Standard
- Uses the standard HyperGraph method of cycling through the eight colors and five line styles available. You can change this method in your preference file.
- By File
- Uses the standard HyperGraph method of cycling through the eight colors and five line styles available, combining and alternating all curves from the file.
- By Selection
- Uses the standard HyperGraph method of
cycling through the eight colors and five line styles
available, combining and alternating all curves depending on
the selection.
- For one request and “n” components, HyperGraph cycles through the combination of request and components.
- If “n” requests and one component, HyperGraph cycles through the combination of component and requests.
- If “n” requests and “n” components, HyperGraph cycles through the combination of requests and components.
- Ignore strings in requests
-
- None
- Select None to not ignore strings in requests.
- Until First Blank Space
- Select this option to ignore a string until the first blank space in the string.
- First n Characters
- Enter the number of characters to ignore in the string. Enter the number in the empty text box next to the drop-down menu.
- Until First Appearance of a String
- Enter the string in the empty text box next to the drop-down menu.
- Reset
- Clears the selected set list.
- Panel
- Return to the Build Plots panel.
- Select
- Displays the Y Source tab, and finds and displays the request and component intersections of the files selected.
- Cancel
- Cancels your selections and closes the dialog.