HS-1070: Define Discrete Size Variables with Conditional Linking for use in HyperStudy
Learn how to define discrete input variables that are conditionally linked.
Before you begin, copy the model files used in
this tutorial from <hst.zip>/HS-1070/ to your working
directory.
In this tutorial, beam thickness and material model values are used as variables. Material model values are linked to the selection of the material to be used. The variables you will use in this tutorial include: Shell Thickness, Young's Modulus, Poisson's, Ratio, and Density. The output responses you will use in this tutorial includes: Mass.
Create the Base Import Template
-
In the Find area, enter PSHELL and click
 until you find
the PSHELL card.
until you find
the PSHELL card.
-
In the same line as PSHELL, highlight the value 0.002 for the PSHELL thickness
as indicated in Figure 1.
Note: In an OptiStruct deck, each field within a card is 8 characters long. Properly select the value for the PSHELL thickness by selecting 0.002 and the three spaces that follow.
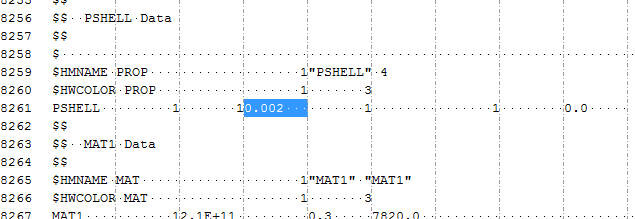
Figure 1. -
In the Parameter: varname_1 dialog, define the Thickness
parameter.
- In the Label field, enter Thickness.
- Change the Upper bound to 0.0022, the Nominal to 0.0020, and the Lower bound to 0.0018.
- Change Format to %8.5f.
- Click OK.
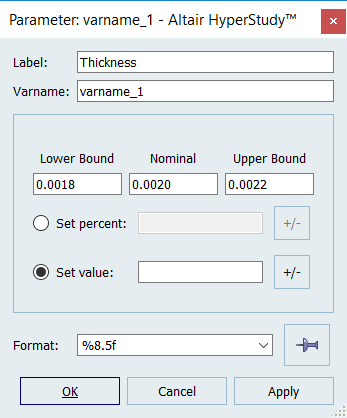
Figure 2.
Perform the Study Setup
-
Start a new study in the following ways:
- From the menu bar, click .
- On the ribbon, click
 .
.
-
Add a Parameterized File model.
-
From the Directory, drag-and-drop the beam.tpl
file into the work area.
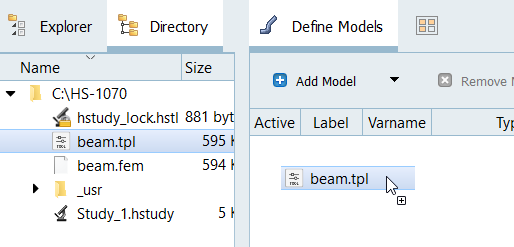
Figure 3.

Figure 4. -
From the Directory, drag-and-drop the beam.tpl
file into the work area.
-
Define the number of points for Thickness.
-
In the Values column for the input variable Thickness, click
 .
A pop-up window opens.
.
A pop-up window opens.
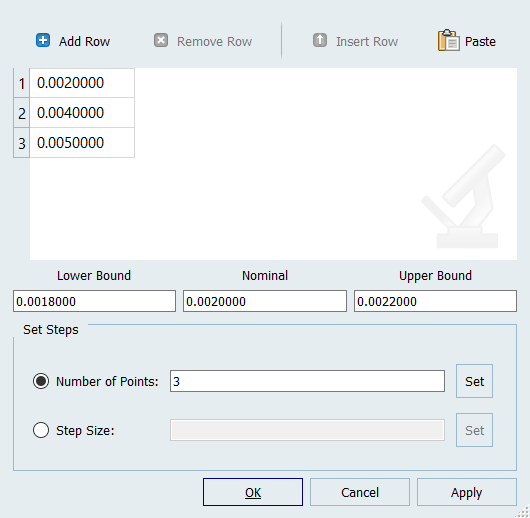
Figure 5. -
In the Values column for the input variable Thickness, click
-
Define the number of points for Young.
-
In the Values column for the input variable Thickness, click .
A pop-up window opens.
-
In the Values column for the input variable Thickness, click
Perform Nominal Run
Create and Evaluate Output Responses
In this step you will create one output response,
-
Define the following options, then click Next.
- Set Type to Mass.
- Set Request to Mass.
- Set Component to Value.
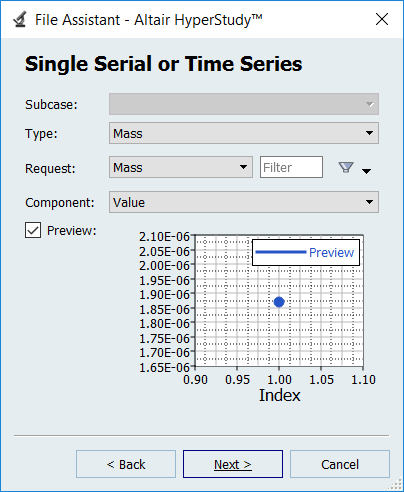
Figure 6. -
Click Finish.
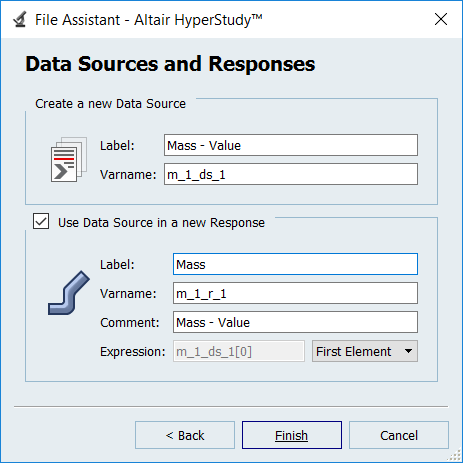
Figure 7.The Mass output response is displayed in the work area.