FE geometry is topology on top of mesh, meaning CAD and mesh exist as a single entity. The purpose of FE geometry
is to add vertices, edges, surfaces, and solids on FE models which have no CAD geometry.
1D mesh that allows accurate testing of connectors, such as bolts, and similar rod-like or bar-like objects that can
be modeled as a simple line for FEA purposes.
Use the CFD 2D Mesh tool to generate hybrid grids containing hexa/penta/tetra elements in the boundary layer and tetra elements in the
core or fare field.
Automatically generate a mesh at the midplane location, directly from the input geometry (components, elements, solids
or surfaces), without first creating a midsurface.
The Rebuild tool streamlines the process of remeshing existing meshes to generate a new mesh with good quality and flow. The rebuild
mesh functionality utilizes the same parameter and criteria files used by BatchMesher to define the quality criteria and relevant mesh parameters. This algorithm saves significant time over the traditional
automesh and quality correction approach.
Adaptive wrap meshing is a useful utility to get a clean, water tight shell mesh out of 2D mesh containing several
intersecting parts and small gaps which do not need to be modeled.
Shrink wrap meshing is a method to create a simplified mesh of a complex model when high-precision models are not
necessary, as is the case for powertrain components during crash analysis.
Bulkheads are design enablers that provide localized performance benefits for multiple design attributes such as NVH,
Safety, and so on. When their position and thickness are precisely designed, bulkheads can reduce mass and increase
performance as they eliminate up-gauging of entire part(s). Typically, bulkheads are welded on one side and bonded
with a structural adhesive on the other side and can be incorporated even during the late stages of the product
design cycle.
Doublers are design enablers that provide localized performance benefits for multiple design attributes such as NVH,
Safety, and so on. When their position and thickness are precisely designed, doublers can reduce mass and increase
performance as they eliminate up-gauging of entire part(s). Typically, doublers are typically welded on one side and
bonded with structural adhesive on the other side and can be incorporated even during the late stages of the product
design cycle.
Volume mesh or "solid meshing" uses three-dimensional elements to represent fully 3D objects, such as solid parts
or sheets of material that have enough thickness and surface variety that solid meshing makes more sense than 2D shell
meshing.
Doublers are design enablers that provide localized performance benefits for multiple design attributes such as NVH,
Safety, and so on. When their position and thickness are precisely designed, doublers can reduce mass and increase
performance as they eliminate up-gauging of entire part(s). Typically, doublers are typically welded on one side and
bonded with structural adhesive on the other side and can be incorporated even during the late stages of the product
design cycle.
Doublers are design enablers that provide localized performance benefits for multiple
design attributes such as NVH, Safety, and so on. When their position and thickness are
precisely designed, doublers can reduce mass and increase performance as they eliminate
up-gauging of entire part(s). Typically, doublers are typically welded on one side and
bonded with structural adhesive on the other side and can be incorporated even during the
late stages of the product design cycle.
Figure 1. Automotive body in white with a doubler
From the Mesh ribbon, click the arrow next to the
2D Mesh tool set name and select
Doubler from the list of options.
With the Element selector active on the guide bar,
select the elements where the doubler needs to be roughly located.
Figure 2.
Click Base on the guide bar then
select the base node.
Note: The base node must be on the longest face of the
selected elements. Figure 3
shows correct “Base” node selection. Figure 4
shows incorrect “Base” node selection that will not create a bulkhead. Figure 3. Correct "Base" node selection (from the longest face)
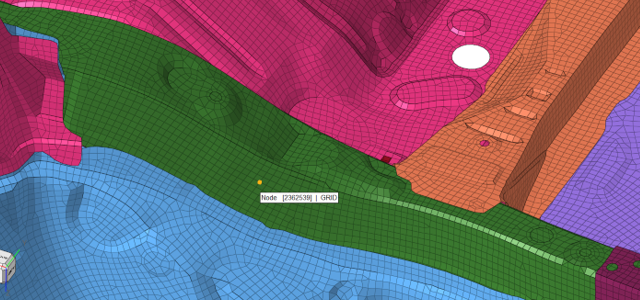
Figure 4. Incorrect "Base" node selection
Use the microdialog to edit the thickness of the
doubler, the flange width, the length, and the mesh size.
Optional: Use the other icons in the microdialog to further
define the doubler.
- modify the direction and orientation
- select a material
- select predefined connection control
- select edges to differentiate flanges from
doubler face (see Doubler Edge Selection) Figure 5. Edge selection
Click on the guide bar.
The doubler is created within a new component. The appropriate property
card image (for example, PSHELL for the OptiStruct
solver profile) is also created. Figure 6. Doubler preview
Figure 7. Doubler parameters with material and connection control
selection
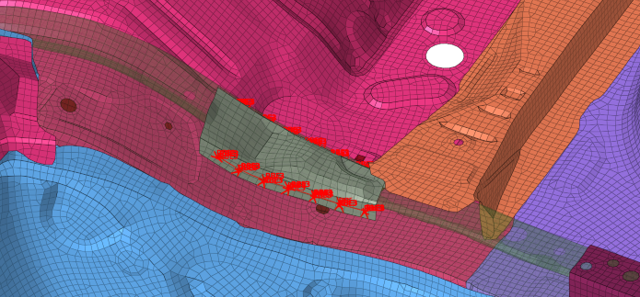
Figure 8. Doubler with connectors
Doubler Edge Selection
If the section selected to create the doubler does not have sharp edges, the doubler
tool may fail to generate an appropriate preview. In such cases, the following steps can
assist to create a doubler.
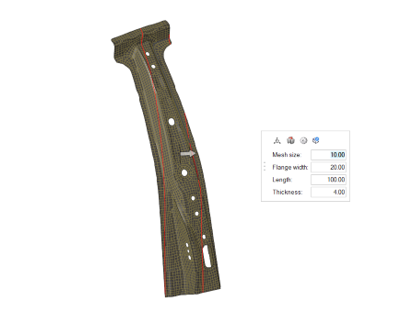
Figure 9. Incorrect orientation of doubler preview
Click to rectify the orientation of the doubler.
Set the correct orientation options, which can be seen in Figure 10.
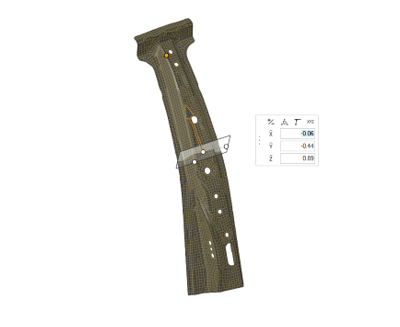
Figure 10. Use of vector to rectify the orientation of the doubler
Press Esc to return to the
doubler microdialog.
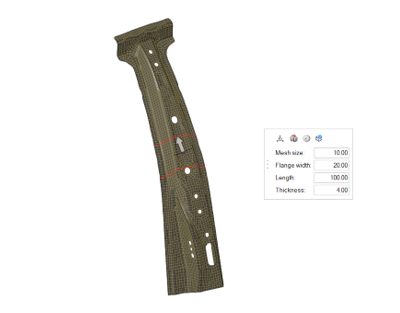
Figure 11. Correct doubler orientation
Click to enter the edge selection mode.
Deselect existing edges using Shift+ left mouse
selection window.
Set the edge selection angle to 10◦ using
Shift + mouse scroll.
Select two edges to differentiate between the doubler face and flanges (Figure 12).
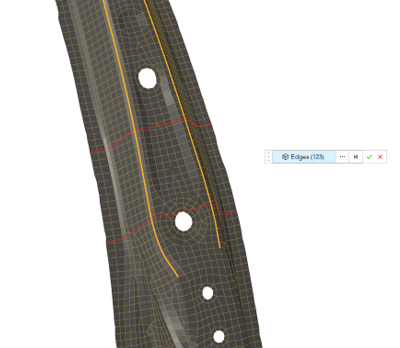
Figure 12. Selection of edges
Press Esc to return to the
doubler microdialog.
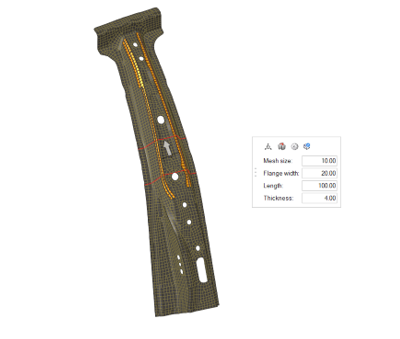
Figure 13. Doubler preview with correct orientation and edges