Import Models
Import a model using Model Verification.
-
In the Comparison/Verification Browser, right-click and
select Import from the context menu.
The Import - Model Verification dialog opens.
-
Select Import Type for Base Model.
- XML (PLMXML or UDMXML)
- Assembly (CAD assembly files: UG Assembly, CATProduct, JT Assembly…)
- CAD (Refer Config / CAD section)
- FE (Refer Config / FE section)
- Multiple Assembly (Multiple CAD assembly files)
- Spot Files (Refer Config / FE / Connector section)
- FE File (direct file selection)
- Mixed Import (folder contains CAD and FE files)
-
Select a datatype.
Respective data types will be listed.
-
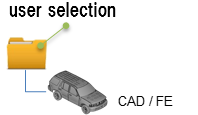
Click the folder icon and navigate to the model to import (Folder/File
selections).

Figure 1. -
Choose a method for running the model.
- Choose Interactive to run the model in the same HyperWorks session.
- Choose Background to launch a new HyperWorks session in batch mode.
-
The Processes drop-down list becomes active when you select
Background, and it also depends on the processor. The
Model Verification tool launches as many hmbatch processes selected.
- Choose Check to execute only the comparison without the report generation.
- Choose Report to generate only the Reports (Check executed previously).
- Choose Both to perform the comparison report generation sequentially.
- Click Run to execute the function.
-
Click Stop to stop the operation.
This closes front and background HyperWorks sessions. The Comparison/Intersection Browser is populated with the parts structure.Note: This function can be used to create XML or to review the model. This function is included in all Verification and Comparison functions.